Welcome to adobo-down-under!

Musings. Family. Food. Stories. Cooking. Recipes. Eating. A recipe journal. From simple Filipino dishes to challenging recipes and exciting gastronomical failures. This is for my girls to look back on for comfort, memories, laughs, love and lots of food!
Showing posts with label picnic. Show all posts

Friday, August 28, 2015

Lemon and sour cream cake with raspberries


I found a new hobby.  Colouring books!  If you haven’t already noticed, adult colouring books is the trend at the moment and publishing companies are selling them by the millions.  Marketed as therapeutic and anti-stress, colouring books for adults have become hip thanks to social media.  People who are into colouring books posts their creations on social media and it just creates the pull which is making the publishers very happy.


A standard page would take me from an hour to 3 hours, glued to the page instead of watching some TV series on Netflix or browsing on Facebook and Instagram.  While it may be my own form of digital detox, it does deliver its own spell of mindfulness and calmness claims.  Indulging in a new hobby, engrossed with colour pencils sliding across the page, sticking to the lines, mix matching colours onto patterns somehow gives me a sense of fulfillment as I create something visual and beautiful.  I started borrowing colour pencils from the girls, but now that I have my own set, I can colour to my heart’s content.


Although this does not replace my love for cooking, baking and writing, it does give me something to do while waiting for dinner to cook, or the cake to be warm and the cookies to cool.


How about you?  Have you started a new hobby lately?


Now to this cake that is a revisit from the archives.  A lemon yoghurt cake dressed with raspberries.  This is my go to cake recipe when I'm asked to bring a cake.  Why?  Because it's easy as A-B-C, 1-2-3.  No need for a mixer.  Just good ol' fork and little bit of elbow grease.


Ingredients

1 and 3/4 cups sugar

2 eggs

1/2 teaspoon salt

2-3 teaspoon lemon juice

grated rind of 2 lemons

3/4 cup light olive oil

1 cup sour cream

2 cups self-raising flour

1 cup (or more) fresh or frozen raspberries

Icing sugar for dusting (optional)


Method

Preheat oven to 180*C.  Line a round 20cm cake tin with baking paper.

In a mixing bowl, mix rind, oil, eggs and sugar with a fork.

Add remaining ingredients and combine well.

Add the raspberries and stir to distribute around the pan and some to sprinkle on top of the batter.
Pour into cake pans and bake at 180 degrees C for 30 minutes.

Leave to cool on a cooling rack, then turn out onto a plate.  

Dust with icing sugar (if using).


* You can use natural yoghurt or buttermilk as substitute for sour cream and the result will be the same.


Thursday, April 03, 2014

Salmon rissoles


As Lent is upon us, we like to eat more fish or seafood dishes this season.   As a Filipino parent, we try to instill in our kids traditions that we grew up with.  And as born Filipino Catholics, there's a lot of these traditions that come during Lent - from Ash Wednesday to Maundy Thursday to witness washing of the feet, to Good Friday to do the Stations of the Cross to Easter Sunday.   While we can't always do all these traditions because of timing and schedule, we do keep to our lenten sacrifice.


From Ash Wednesday, it's customary that we avoid eating meats on Fridays for the whole season of Lent.  In the past years, I have personally sacrificed eating meat for 40 days and it was a welcome change.   


Every year, each of the girls have their own fave food or habit which they sacrifice for the whole Lenten period.  Usually they give up chips, lollies, chocolates, soda, etc.  It's a good exercise of discipline as sometimes I forget and pack some in their lunch box, and then I get told off.  "Please don't add chips in my lunch box as I'm sacrificing that for lent, mum."  It's good for discipline and for the health too!


Now this is a fantastic option to our weekday or weekend menu.  Salmon rissoles.  They're easy and so inexpensive to make.  The recipe is adapted from Coles recipes.


Ingredients:


4 medium sized potatoes
 
30g unsalted butter
395g tin red salmon, drained and flaked

3-4 spring onions, chopped

1 cup breadcrumbs

zest and juice of 1 lemon

1 egg

1 cup corn flour


vegetable oil or light olive oil for frying


Method

Boil the potatoes until tender, 20-25 minutes.

Drain.  In a large bowl, mash the potatoes with 30g unsalted butter.

Add the flaked tinned salmon, bread crumbs, spring onions, egg, zest and juice of the lemon.

Mix and shape into patties.

Roll in corn flour and shake off excess.

Continue wth the rest of the patties.

Heat a pan on medium heat with enough oil for frying.

Pan fry the rissoles in batches, for 5-6 minutes or until golden.

Drain on paper towels.

Serve with garlic aoili (simply add crushed garlic into a cup of store bought mayonnaise) and a lemon wedge.


Tips and tricks:

*Variations on this rissoles, would be using tinned tuna or flaked smoked salmon;

* When shaping the patties/rissoles, make sure they are uniform in size to make cooking easy

* You can add other greens into the rissoles.  Chopped basil or chives will work great too.


Tuesday, April 01, 2014

Peanut butter cookies with coconut oil (made with homemade peanut butter)


Peanut butter cookies is one of the two things I remember we baked at home, while growing up.  We were not a baking family.  We were more grilling and stove top people.  The other thing we baked at home were pound cakes.  Yes!  And I remember we used Blue Bonnet butter.  US imports into the PI back then which were aplenty.  And pound cakes and peanut butter cookies were a staple in our kitchen.    The most fun out of making the peanut butter cookies were the criss cross patterns which me and my siblings would fight over who should do it.    


These days, with peanut butter overtaken by Nutella in recent years, the girls were not a bit interested with these.  So I had these to myself and my siblings when they came over.


I'd like to say these are healthy because butter is substituted with coconut oil, and we also made our own peanut butter.  So pretty much, we knew what went into these cookies. 


The cookies came out soft and chewy (as we wanted), but you can always make it crunchy.


If you want to make this with your own peanut butter, The Kitchn has the step by step-step easy procedure to make them.  Of you can simly use store-bought peanut butter.


First you will need peanuts.

For our version of this peanut butter, I used salted peanuts because I didn't want to add any more salt while making them.  I also roasted them in the oven first then cooled before making the nut butter.


Then they go into your food processor.  The first pulse gives you a grainy texture of milled or pounded nuts.


The next process gives you a smoother nut butter and almost ready to use.  I just added 2 tablespoons of vegetable oil and it was ready!  Poured into a jar and kept at room temperature.  It lasted for more than two weeks.   But of course, we ate them with warm Filipino pandesal bought from our local Asian grocer immediately.  Taste test for quality, as you do. 


To make the peanut butter, I adapted the recipe from Elise at Simply Recipes.

 
Ingredients:

100 grams caster sugar

125 grams light brown sugar, packed

 1/2 cup creamy peanut butter (store bought or home made)

1/2 cup coconut oil

1 egg

325 grams plain flour

1 teaspoon baking soda

1/2  teaspoon baking powder

1/4 teaspoon salt


Method

In a medium sized bowl, combine the dry ingredients and mix with a whisk.

In the bowl of your stand mixer, beat the coconut oil and sugar until creamy, 2 or more minutes.

Add the peanut butter and eggs and continue beating until light and fluffy.

Add the dry ingredients in 3 batches, continuing to mix with every addition, and until the dough comes off the sides of the bowl. 

Wrap the dough in cling film and refrigerate for 3 hours.

Preheat oven to 175*C.  Prepare a cookie sheet with baking paper or silicone mat.

Shape the dough into rounds, golf ball size.  Place on the prepared pan/cookie sheet 2-3 inches apart.

Flatten the cookies using a fork with a criss cross pattern.

Bake in the oven for 15 minutes for chewy cookies, or until golden.

For crispy cookies, bake in a preheated 180*C oven for 10-12 minutes.


These cookies are not sweet, as I lessened the sugar a little bit, and they were surprisingly good.  There were no coconut flavour or odour which some people dislike when using coconut oil.


Tips and tricks:

* To use coconut oil, it helps when the oil is a little bit solid.  Usually, coconut oil solidifies when the weather is cooler.  If you use liquid coconut oil, it will take longer to beat it until light and fluffy.  To solidify your coconut oil, measure what you need and place it in the fridge overnight, and just take it out an  hour or more before using.  

* The cookies lasts longer than when butter is used.  I tested a few of these, and they kept for two weeks in an air tight container room temperature.


Tuesday, February 11, 2014

Oreo brownies for the school lunch box


Aah. The school lunch box.  What's in it today?   The school lunch box is a tricky thing you see, especially when schools are "nut-free" and all my girls just really want for is anything with Nutella.  Either that, or they'd rather have rice with anything (even hotdogs) than a ham and cheese sandwich.  Yes, I have raised them well into the Filipino food culture.


The new school year has started and we are back again into routine.  Morning lunch box prep, homework, assessments, piano lessons, cello, sports, etc etc etc.  Although we have minimised the girls out-of-school activities, I find that the start of the new school year always brings unnecessary anxiety.  Are the lunch boxes packed, water bottles, snacks, fruits.... do you have your library bag?, did I sign that permission note?, did we check head for lice? (yes - the most important of them all!).  Did we?  Did I?  .....


Sometimes I get organised and prep the lunches in the evenings and then get that extra few minutes of sleep in the mornings.  Most of the time, I open the fridge door in the morning and prep what's on offer.  Sometimes its a jam sandwich, or a cup of rice with what's left over from dinner, at odd times the girls will have some onigiri because I felt like I had superpowers for the day.


I drool at lunch box bento boxes prepared by other mums who I follow on IG like Nami from Just One Cookbook.  I want to, but at the same time, I don't.  Hahaha!  With 4 girls going back to school, I don't think I have enough superpowers to do them all equally attractive and bento-box like.


While I don't prepare bento-box like lunchboxes, I do love going back to their favourites and adapting them to the school's nut-free policy. This is a favourite brownie recipe with the nuts replaced with Oreos.  Now who doesn't love Oreos?


Ingredients

200g dark chocolate, chopped

125g butter, chopped into cubes

1 1/4 cups or 280g caster sugar

3/4 cup or 115g plain flour

1/4 cup or 30g unsweetened cocoa powder

150g Oreos (1 foil pack from the double-pack box), roughly chopped

3 eggs, slightly beaten

 3-4 packs mini Oreos for topping


Method

Pre-heat over to 180 degrees C. Line a 28cm X 18cm brownie pan with non stick baking paper.

Put the chocolate and butter into a heatproof bowl and place over a saucepan of simmering water, stirring occasionally until smooth. 

Remove the bowl from the heat and set aside to cool slightly, 5-10 minutes. 
Combine the sugar, flour, cocoa powder and Oreos in a large bowl. 

Using a wooden spoon, stir in the eggs and chocolate mixture until just combined.

Pour into the prepared pan, and top with the mini Oreos (as many or as little as you want) slightly pushing them into the batter.

Bake for 30-45 minutes, or until moist crumbs cling to a skewer when inserted into the centre.


Tips and tricks:

* Brownies are very versatile.  You can add any kind of nuts or leave them plain. 

*  Instead of Oreos, you can also top them with salted pretzels, Ferrero Rochers, Reese's cups - which I've seen from IG feeds.

* Here's another tip I learned from TAFE when lining square pans.  Cut the edges diagonally, and then slid them side by side to fit the pan.  No need to cut a square and line the sides. 


And so 7 weeks more before the next school holiday, but I'm not counting.  While I surrender back to the chaos and regularity that is our life, I also love sitting back and enjoying the peace and quiet when I'm not working and have the day to myself - which days have been filled with physical activity: walking and badminton and yes, more time in the kitchen to cook and bake.

Now, what's for the lunch box tomorrow?


Tuesday, January 14, 2014

Empanadas (empanaditas)


Heirloom recipes.  Do you have those?  Handed and taught down from generation to generation through family members?  


I don’t have an image of me growing up with my grandmother on one side and mother on another, dabbling with ingredients in the kitchen or making  a mess with flour and sprinkles.


Inay, my grandmother (mother side), was not so much a kitchen person.  She’ll concoct some traditional Tagalog / Filipino dishes every now and then, effortlessly.  The few times she’s in the kitchen, she can work magic with simple ingredients – from scratch.  And I mean from a live chicken to a dish on the table.  That type of cooking.  Other than those few magic moments, she’s really a Martha-Stewart-recycling-DIY-kinda-gal.  She’ll make a “walis ting-ting” – broom made of sticks from dried coconut palm leaves.  She’ll idle away the time making floor rags from old fabrics and old t-shirts.  She’ll clean the hell out of old coffee, jam, peanut butter jars and reuse them as drinking glasses and tumblers at home, she’ll be happily tinkering away the afternoon in her sewing machine. At the best of times, she’d be making mean "pinais na tulingan" (slow braised tuna in tamarind or kamias), tinolang manok with malunggay (native chicken tinola with moringa leaves).  Her cooking was always simple with fresh ingredients and as organic as would be called now. 


Now my grandmother on my father's side is the all the time cook.  Although I have never spent time with her side by side in the kitchen (she's lived in the US since we were born with a few visits in the Philippines while growing up),  I have gotten to know her through her cooking.  The few times she's visited us was always a lesson in the kitchen.  And this is her recipe. One of the dishes she can throw all together in a bowl without batting an eyelash, without measurements, and it always comes out perfect.    And whenever they make this at my aunt's home in NJ, everyone pitches in and make these.


Now like all recipes, as long as you have the ingredients on hand it's really up to you to adjust the quantities as it suits your taste.  The flavour, feel and texture is entirely up to you.  I have tweaked my grandmother's recipe for the filling to suit our preferene at home.


There are two elements to this recipe - the filling and the dough/pastry.   


Ingredients and method for the filling:

 500 grams minced pork (or beef or chicken)

 1 large onion, diced

3 cloves garlic, finely diced

1 large potato, diced

2 medium sized carrots, diced

1 red capsicum, diced

1 stick celery, diced

1 cup frozen green peas

2-3 tablespoons soy sauce

salt and pepper, to taste

vegetable oil

2 teaspoon of chilli flakes (optional) 


In a large skillet or wok, pour about two tablespoons of vegetable oil and heat the pan.

Saute the onions and garlic until soft and fragrant.

Add the minced meat and cook stirring until almost brown, 5-10 minutes

Add the potatoes, carrots, capsicum, celery and cook stirring to coat all the ingredients.

Add soy sauce and season with salt and pepper.

Turn the heat to medium and simmer until meat and vegetables are cooked through, 10-15 minutes.

Add the frozen green peas and sprinkel the chilli flakes if using.

Simmer for another5 minutes then turn off heat.

Spoon onto a large bowl and let it cool.  
Make sure the filling is completely cool before making the empanada/empanaditas.


Ingredientes and method for the  dough:

170 grams butter, cold cut into cubes

3 and 1/2 cups plain flour

1/4 cup sugar

1 cup cold water

1 beaten egg + 1 tablespoon of water for the egg wash

2 tablespoon milk or water for sealing

Combine all the  dry ingredients in a bowl and rub the ingredients with your hands until it resembles fine crumbs.  Slowly add the water (a little at a time) and continue to mix with your hands until it forms into a ball.

* Alternatively, you can process the butter, flour and sugar in a processor, then slowly pour the cold water until the mixture forms into a ball.

Flatten the dough slightly and chill in the refrigerator for 10-15 minutes.

Place the dough on a flat surface, and using a rolling pin flatten the dough to abou 1-2 cm thick.  

Cut the dough with a cookie cutter (your desired size - can be bigger or smaller).


Filling the dough:   (see photo below).   

Press on the sides of the dough to slightly thin them out.  Seal one side with milk.

Fill the dough with a tablespoon of the filling.

Slowly pinch the sides to seal the empanada.

Place on the flat surface and using your thumb/finger, press the sides of the empanada.

Further seal the edges with a fork.  Place all finished empanadas on a lined baking tray.

Continue with the other dough/filling.  


Baking the empanadas/empanaditas
Before baking, preheat oven to 180*C.

Brush the empanadas/empanaditas with egg wash.

Bake in the oven until golden, 30-40 minutes. 


Tips and tricks

* The butter needs to be cold when making the dough, not softened or melting;

* When making the filling, you can add other ingredients to suit your preference.  You can make it entirely vegetarian too.

* Alternatively, you can also deep fry the empanadas until golden, then drain on paper towels.

* Create small air pockets on the empanadas prior to baking so they don't inflat too much leaving a space between the dough and the filling.  I usually use a small knife or a fork to do this.

* This dough which my grandmother uses does not have the flaky texture when baked.  If you prefer a flaky dough, you will need to roll until thin, fold, then roll, and fold and roll.  The layers from rolling and folding several times creates the layers which results in a flaky dough.

* Some empanada recipes calls for lard and butter combined, which also helps in creating a flaky texture when baked.  Trissalicious shares in her blog a secret for a flaky empanada. 

* Store-bought puff pastry can also be used to make these empanadas.

* They are called empanadas when they are bigger, like the palm of one's hands.  This recipe for empanaditas are bite-sized and a little fiddly to make (photos show scale).  You can always adjust the size to suit your preference.


From Inay Mercedes and lola/grandmother Antonia, this is my heirloom - memories of good old fashion, no-nonsence cooking.  No fancy antique jewelries here, or grand estates. 


And this family recipe, I'll recreate a tradition at home when making this - as these are bite-sized pieces, I'll gather the girls around the table, pinch away dough and seams and filling and sharing stories and creating new memories.
 

Tuesday, November 26, 2013

Mixed vegetable soba noodles salad with peanut sauce


Traditional Filipino cuisine does not have a lot of fresh vegetable salad dishes in its repertoire.  Most vegetables are cooked in soups or stews, some are steamed and served with a side of dip or some form of chutney or relish.  It's quite surprising because even with the warm tropical climate, cooked vegetables are almost always the only option in most homes across the island.  The reason is that while there are available salad vegetable varieties, they are pricey as they come from the upper north or the south where the climates are cooler.   

Growing up, I can't remember salads serve on the dinner table except for the usual tomato-onion-green mango that comes with a good barbeque, classic salads are only to be had when dining out in restaurants.  


Living in Australia has opened a lot of fresh green doors for me.  My kids are now accustomed to fresh salad and veggies on the table, lettuce in their sandwiches, cucumber slices in their lunch box... the works.  Especially as the season becomes warmer, fresh and cold salads are the best way to serve the day's healthy portions. 


Now the real hero here is the dressing, aka peanut sauce.  The soba noodles add the healthy protein touch.  This recipe is adapted from Pallavi Gupta through Honest Cooking.

To  make this salad just add vegetables which you are keen to eat fresh and raw - cucumbers, lettuce leaves, cherry tomators, grated carrots, slices of capsicum. You can just play around with the quantities.   But for this salad of 4 serves, I used:


Ingredients:

60 grams organic soba Hakubakku brand, cooked according to packet instructions then drained through cold running water.
(I used 2 bundles from the 90g pack)

half capsicum, julienned

6 pieces cherry tomatoes, sliced in two

1 cucumber, sliced

1 carrot, julienned

1 brocolli, stems removed

2 stalks of spring onions, sliced


For the sauce:

1/3 cup smooth peanut butter

1 red chilli, finely diced

1 clove garlic, finely diced

2 tablespoons sweet chilli sauce

2 tablespoons soy sauce

60 ml warm water (or less)

Combine the peanut butter, chilli, garlic, sweet chilli sauce and soy sauce in a bowl and whisk together.  Add the warm water a tablespoon at a time and continue whisking until you get the desired consistency of the sauce.

 Place the cold soba noodles in a large bowl, add the vegetables and toss together.  Drizzle the peanut sauce when serving.

Tips and tips

* You can add as many or as few raw/fresh vegetables in this salad.  Just make sure you slice them thinly (julienned).

* You can make the sauce as thick or as thin as you like, just add (or don't add) warm water as you prefer.  

* I made this a day ahead and it became think in the fridge.  I diluted it with a little bit of warm water and added a few more teaspoons of sweet chilli sauce to suit my taste.  


Perfect for the warm spring weather for a weekday lunch, entree or to accompany hot BBQ on a weekend.

Enjoy!


Monday, November 04, 2013

Barbecued pork belly cooked in capsicum paste


I love a good make ahead recipe.  Especially when it's something that can be used for grilled dishes (like my version of chermoula chicken)  and when it takes me outside of my (Filipino) comfort zone - where the usual marinades consists of soy sauce, vinegar and garlic.  This one caught my eye from the get-go - the small photo in the October 2013 issue of The Sydney Magazine of Mark Jensen's barbecued pork spare ribs was enough to leave me drooling and craving for this dish!  And when that happens, off to kitchen I go.

Red capsicums are a plenty at my local green grocer and they're cheap as! Although they came in different sizes.  But size and shape does not matter that this was on our table for a weenight dinner. It helps that I only work 3 days a week and Mondays and Tuesdays are quiet days to ponder and domesticate myself while the kids are at school and hubby at work. So I prepared the paste a day ahead.


Vibrant red!  They're so pretty!


Oh. The. Smell!  It was divine!!

Now the hero of this dish is the capsicum paste.   You make it a day ahead and it keeps in the fridge for up to 2 weeks (according to the recipe). 


Ingredients:

125g of red capsicum, washed

2 heads garlic

2-3 pieces red chillis

salt and pepper

2 tablespoons extra virgin olive oil


Method

 Preheat oven to 220*C.  

Place capsicums and garlic on a baking tray and roast for 20-30 minutes or until the capsicum skins have blackened.  

Place a rack and leave to cool.

Peel the garlic skins off and place the flesh in the food processor.

Peel and seed the capsicums and add to the food processor with the chillies, salt and pepper.

Process to a smooth paste.

Spoon into sterilised jars and top with olive oil.

Keep in the fridge until ready to use. 


Poured into a sterilised jar and topped with olive oil!


On the ready - to brush onto the pork pieces!


To make the barbecued pork ribs or belly:

1.5 kg of pork belly, sliced 1/2 inch thick strips

Generously rub on pork pieces and leave to marinade in a glass bowl, covered with cling wrap in the fridge - minimum 1 hour (or up to 4 hours)

Heat the BBQ grill or pan-grill and cook away.

Chop into small bite size pieces.

Enjoy with some coriander for garnish.  Serve with a slice of lemon or lime.  Best eaten with lots of rice.


Tips:

* In the recipe, Mark suggested to place the roasted capsicums in a plastic bag for 15-20 minutes.  I guess this makes the skins peel off easily.

* The recipe called for julienned ginger and chilli slices for garnish.


Wednesday, May 08, 2013

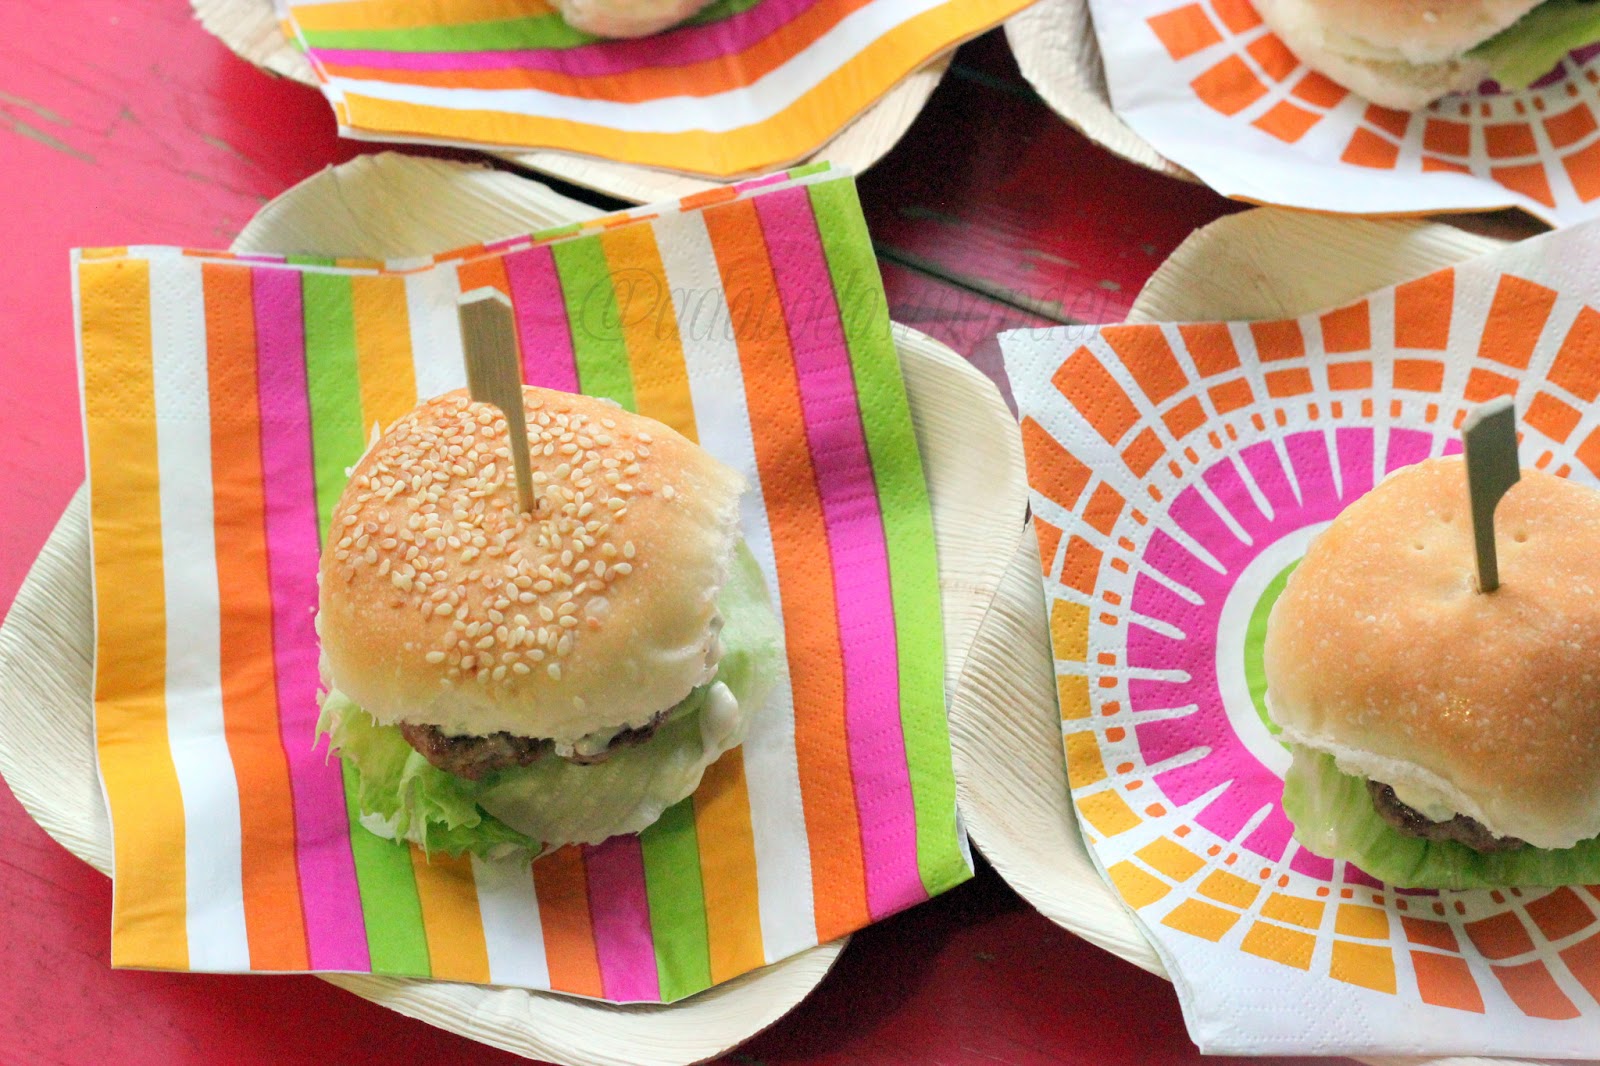
Pork and chorizo sliders with jalapeno mayo


"Life is full of surprises and serendipity. Being open to unexpected turns in the road is an important part of success. If you try to plan every step, you may miss those wonderful twists and turns. Just find your next adventure - do it well, enjoy it and then, not now, think about what comes next." - Condoleezza Rice


Do you believe in fate?  Serendipity?  I do in most instances.  I mean there are small miracles that happen every day, I believe that.  I've experienced that. But serendipity are those little sometimes big, pleasant surprises that just happen.  Because of fate?  Maybe.  Luck?  Who knows.  But I do believe this.  That if you think something or visualise something so bad and pray for it, the forces of the universe will make it happen.  

Now maybe I'm a little naive about these things and believe too much in this crap, but truly I am amazed at how things turned out for someone I've connected with in IG.  We don't know each other personally, but she's contacted me a few weeks ago.  We had two things in common.  We're both Filipinos and into Instagram.  That's about it.  In the course of our email exchange, she mentions about looking for a job which I thought maybe, somehow I could help however way I can.  Working a few days at at government office and with limited connections myself I casually forwarded a job posting email which circulates around the office when positions fall vacant.  And from there,  a few weeks after that email exchange, it all turned quite magical.  Serendipty. A happy pleasant surprise!  She got the job which involves a project working closely with our branch!  I am amazed at how this all turned out.  Social networking does work!  And soon, I will get to meet her!


Not to mention through social networking, my eating and cooking adventures (and my family included) have evolved.    


Just looking at my Instagram feed, Pinterest, FB and reading other food bloggers' posts is always inspiring.  Recently though, I had some nostalgic kick craving and remembering a particular burger we loved to eat while hubby and me were still dating.  This was served at a small kiosk at the Greenbelt Plaza just outside the cinema.  This was during the early 90s but they disappeared later on during that decade. From what I've learned, they are now back with the same famous recipe for choriburger but with an entirely new look and logo.  


So here's a recipe inspired by an old favourite from back in Manila (Burger on the Run's Choriburger).  I was looking for Bun on the Run online and found a Pork and Chorizo burger by Emeril Lagasse's from the Food Network's Backyard Eats - which I found too complicated with so many spices so I made my own version.  We served this "for adults only" at that weekend birthday party.   The smell of the patties while cooking was so inviting, some of the kids kept coming into the kitchen and asking what's cooking.  "Sorry kids, this is for adults only."


Ingredients:

500g pork mince

3 fresh chorizo sausages, removed from casings

2 cloves garlic, finely chopped

1 onion, finely chopped

1/4 teaspoon paprika

1/4 teaspoon cajun pepper/seasoning

1 tablespoon corn flour (for binding)

salt and pepper for seasoning


Mix all the above ingredients by hand in a large bowl.  Shape into patties.  Set aside.

Using a pan griddle, or a simple pan, fry the patties in a little oil and cook until done.

To serve: thinly spread some jalapeno mayonnaise* on the rolls/buns, top with a pork-chorizo burger, some lettuce (add tomato slices and cucumbers if you prefer), and top with a good dollop of the jalapeno mayo*.  


*I wanted to make Emeril's green chilli mayonnaise but can't get poblano peppers at the time, so I made a simple Jalapeno mayonnaise.  Which was a mixture of 2 jalapeno peppers finely diced, mixed with a cup of mayonnaise. 


Tips:
  •  Buy your chorizo fresh from the butcher or deli.  The supermarket variety will work but will not be the same because they are slightly cooked.  You will need to remove the chorizo from the casings which will be difficult to do with the commercial variety;
  • You can make this as big as burgers or small as in for sliders (like this version);


Sometimes I think the fear of being vulnerable and taking a risk stops us from connecting with people.  Opening doors, in more ways than none, actually helps.  We create friendships and build little communities!   I love how blogging and social networks has helped me do this.  And taken my thirst for cooking and eating into new heights.


LinkWithin

Related Posts Plugin for WordPress, Blogger...