Welcome to adobo-down-under!

Musings. Family. Food. Stories. Cooking. Recipes. Eating. A recipe journal. From simple Filipino dishes to challenging recipes and exciting gastronomical failures. This is for my girls to look back on for comfort, memories, laughs, love and lots of food!

Friday, August 29, 2008

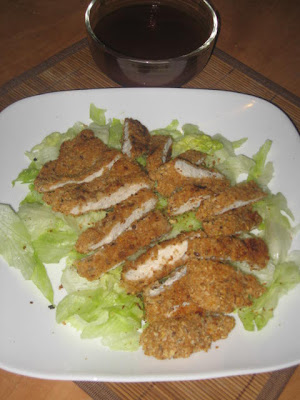
Baked Crispy Chicken Tonkatsu


We love Japanese food! There's never a day in a week that you guys don't threaten me to buy you take-away sushi from the local sushi bar. Usually, we'd sit down at the Sushi Bar in Lane Cove and eat there, but sitting takes time and it usually means you guys will be hungry for more. Not too good for mum's pockets. When I started paid work (Yep - 2 days a week and nobody even noticed I was away! You were in school!), you'd ask mum for a sushi treat at Mitsu in Macquarie Centre. Its now our favourite dine-in sushi bar.

And while we are in the subject of Japanese food, we had this for dinner. I was trying out recipes as a cookbook testing volunteer for Jaden's Steamy Kitchen Cookbook and this was the second one I've done for the week. I can't quote the recipe here but I guess soon, you can access this from her cookbook. But here is Jaden's site, full of lovely recipes and funny anecdotes.

One of you went into the kitchen as I was dredging the chicken into flour and asked, "What's for dinner mum?".. and I said, ... "giant chicken nuggets".

Although you still opted to dip your giant-chicken-nuggets aka Baked Chicken Tonkatsu, in tomato sauce and not the prepared tonkatsu sauce, you loved this one so much, you even asked to have it for your school lunch the next day! That made me really happy.

This was served for dinner, on a bed of shredded lettuce, home made tonkatsu sauce and rice.


Bon appetit!

Thursday, August 28, 2008

Andok meets Rosemary

Andok's is a roast chicken kiosk, popular in Manila. Along the likes of Baliwag and Savoury, take away roast chicken (or lechon manok as it is aptly called in Tagalog) is the most convenient dinner/lunch/snack every time there's no prepared meal on the table.

And it doesn't change, even in Sydney.

You guys love roast chicken. You do. You must remember that you were'nt fussy when it comes to having roast chicken for dinner or lunch. It doesn't matter if it's Cole's or Woolies, or Galo's or Nando's or Oporto. You just love roast chicken. Period. I guess most kids do. Whether its fried, breaded, roast, baked, barbequed - chicken is the all-time favourite food to feed little people.

This week, I tried doing home-made roast chicken using Jamie Oliver's recipe (taken from the TV show Naked Chef). The recipe was just passed on to me like a whisper, or like an sms. No actual measurements, no specifications on the instrument/equipment to be used, no specific temperature. Big brother passed on the recipe to me, casually in one of our family dinners months back. And since I had this 1.5kg whole chicken in the freezer, I thought why not just do the whole thing-a-ma-jig, instead of cutting it up (which I'm not good at, especially with a whole chicken) into bite-size pieces and marinating and coating with crumbs and frying or baking.... Whew! Roasting a whole chicken sounds daunting and labourious.

I've realised it isn't. It takes just as long as marinating some steaks and setting them on the grill. Or seasoning some pork chops or chicken drumsticks and frying them on the pan. I must admit the cooking time does take a little bit of patience, but its worth it.

So this is a razmatazz of a recipe - made with hunch, instinct, gut-feel, common sense and heaps of love.

When you get your chance to try this, use what I used: the basic ingredients plus all of the above.

The basics:

1 whole chicken (Cooking time varies of course, depending on the weight/size. Normal cooking time should be 25-30 minutes for every 500g or 1hr for 1k and so on. This also depends on the type of oven used of course, so you will need a lot of your gut-feel and common sense here.)

salt and pepper (add lots of instinct here, as what I did was simply put together some of each together in bowl)

garlic (a whole piece, about 6-7 cloves), pounded and diced

rose mary (fresh is better, but I reckon dried would do just as well), several stalks

olive oil (about 1/4 cup)

1 whole lemon

Sides : potatoes and carrots, cubed
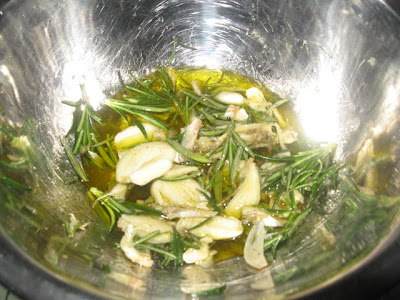

I don't want to think of this as hodgepodge, but this was what I did. Mixed together the salt and pepper, garlic, rose mary and olive oil in bowl.

Placed the chicken in a large shallow bowl and rubbed the olive oil mixture into the chicken.
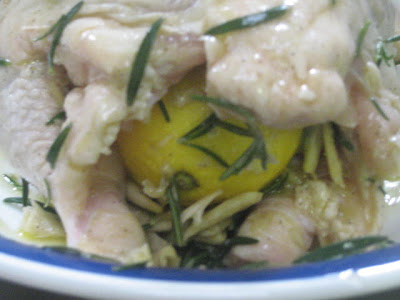

Stuffed the chicken with the lemon and several stalks of rose mary. I let this sit for about 30 minutes.
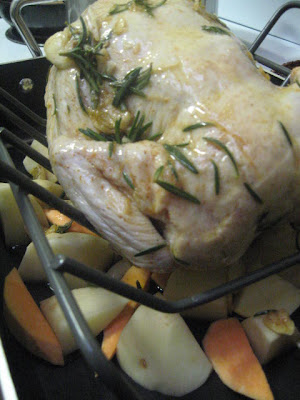

Place the chicken on a roasting pan, with the side veggies (potatoes and carrots) underneath. (The veggies got half-toasted, so I think the veggies should be put in midway through the chicken being cooked.

Voila! Roast chicken ala rose mary.

Remember, this is best served witih roasted veggies too! You guys loved this, but you said it wasn't as finger-lickin good as commercial ones, so I need to perfect this in future dinners. Although the smell was absolutely enchanting! Seriously!

And so, while we still reminisce of Andok's, here is an easy roast chicken family recipe, which hopefully you will also try and learn and pass on with a whisper. Don't forget the magic ingredients!

Don't you just love chicken!?!

Wednesday, August 27, 2008

First person, second person.....

I realised just moments ago I'm trying to document recipes here to pass on to my kids. Along with the memories that goes with each and every recipe.

And so, starting today. All entries on this blog will be on a second-person basis. Like a conversation, from me to you (I mean all of you, okay?!).

I hope when you're old enough, you will also learn to love food and cooking and by that time, appreciate all the time, effort and love I put onto those meals I nagged you to eat and almost pushed down your throats. Ha ha ha ha!

Seriously, home-made is always a healthier option than take-away, so live, love and EAT! (Hey! This is from one my favourite chefs - Wolfgang Puck)

Enjoy and happy eating!

Pan Fried Steak with Balsamic Teriyaki Sauce


This sounds really professional, doesn't it?

This is the first among the many recipes I will be trying in the coming weeks until end September, being one of the (probably thousands) of testers for Jaden's Steamy Kitchen Cookbook.

I used the Sizzle Steak pack from the local supermarket, seasoned with salt and pepper then pan fried, topped with Jaden's recipe here. I reckon this works best as marinate but decided to use it as sauce because I didn't have the right kind of steak (thicker cuts), and so I've saved some of the sauce for use later in the week with some beef scotch fillet on the grill (Yum!)

To serve, I cut the steak into strips topped with the sauce and served with rice and steamed bok choy (also topped with the sauce) and my fussiest critics (my kids) gave it a score of 9.

I can't wait to try the marinade and grilled version.

Tuesday, August 26, 2008

Llaneras galore


My sister arrived from back home and brought me these! 15 pcs of assorted sizes of llaneras! I did asked for lucban longganisa too, but this was a better option to carry considering the quanrantine rules in Australia. Nonetheless, I love them! Several weeks ago, I went into a leche flan frenzy - buying 3 dozen eggs every week and making leche flan! Not for a party mind you, just for home consumption... and boy did we get tired of it. And that was using disposable aluminum tins!


So now that I'm the proud owner of these "llaneras", I guess its time to go the leche flan route again.... I definitely must find more use for these tins soon. One can only take so much sweets I presume.

Tuesday, August 19, 2008

To Chocolate Chip Cookies and all its glory

I found this article link from the NY Times about the perfect chocolate cookie recipe via marketmanila's blog here. The article by David Leite praises the originator of this world famous cookie recipe - Ruth Graves Wakefield. Inspired and raring to go the extra mile, I took on butter, sugar and eggs to bowl with mixer in tow and tried my hand finding the right chewy kind of CCC (Chocolate Chip Cookie) version.

From the article, came the version by Jacques Torres (I used to watch this guy from the Lifestyle Channel in the PI concoct fancy chocolate creations, most of them daunting and overwhelming to watch. One of things that leaves me dreaming - like my previous post on the Devil's Food White-out Cake.), which I didn't try because it called for resting the dough for 24hours. This won't work for me as I'm as giddy as a 3yo when it comes to waiting for the result of my baking creations. Usually, I'd be endlessly peeking into the oven, which must cause a lot of my baking end in disaster. Patience in these instances, can really be an effort on my part.

And so while we are in the subject of CCC, I took the easiest route. I tried, and tested the recipe at the back of the Nestle Chocolate Bits package. It was easy in a hodgepodge kind of way, and unique too as it called for the addition of condensed milk. The result was really sweet smelling cookies, but hard as a rock. Either its the constant peeking in the oven or my oven temperature is really adding to my frustration. I made two batches of these, hoping the second batch will turn out better - meaning chewy. It didn't.


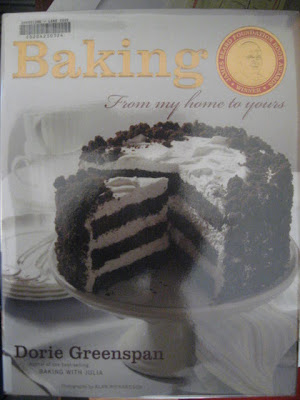
Two weeks on, I found two other versions. I found this recipe of Alton's Browns Chewy version online here. I like AB with his quirky and interesting take on food and cooking. AB's version called for the same ingredients as Dorie Greenspan's with a slight variation on the use of egg yolk and milk. But this time around, I tried DG's My Best Chocolate Chip Cookies from her recipe book "Baking from my home to yours".

I take my imaginary chef's hat off to this one. When she said its the "BEST" she's absolutely right. (Duh! She's an expert baker!) The most chewy kind of homemade chocolate chip cookie there is. And it even gets 5-stickers from each of my very fussy critics (my kids!)


So far, with all my adventures and misadventures into baking, I have a renewed sense of belief in all bakers. To me they are artists in their own right. Perfecting the simple chiffon cake or as simple as baking a batch of homemade chocolate chip cookies can be really taxing if instructions are not followed to the dot. Someone else' years of baking experience is now giving me the comfort of easy to follow baking recipes! Results can almost always be perfect.... but as the old saying goes. Perfection takes patience. I need to stop peeking into the oven NOW!

Maybe next time, I'll do AB's version. Ah! Here's to Mrs Wakefield and too all chocolate chip cookie lovers!

Monday, August 18, 2008

Char Kway Teow

This unique noodle dish that is originally from Singapore and Malaysia became one of our favourite dishes in our quest for fast-food. Ultimately, when we get lazy and want to have take-away dinner instead of home-cooked meals, the first option would be Chinese. Its fast, furious and most chinese food tastes really close to home cooked meals, despite the assortment of soy sauce and salt and spices. It may not be the best option for some, but for us, it is a better option than doing the Dominoes or KFC or Pizza Hut. Not that we are health food junkies - absolutely not! We have our usual portions of "chicharon" (or pork rind) in most days, but that's beside the point.

Char Kway Teow has a lot varieties, in terms of the addition or subtraction of ingredients, but the most basic is the flat white noodles resembling coconut meat, bean sprouts, and onion chives. There are several good ones we've tried at (but not limited to) Chatz Noodles in Chatswood Westfield, Bar Asia in Lane Cove - this one comes with a hefty serving for such a good price. And Now, as in all good food tasted somewhere, I yearn to prepare it home-made given the time and the right ingredients. I've discovered tons of different varieties, some adding a bit of something, while others omitting a few ingredients, like here, here and here.

Recently, I unknowingly discovered the kway teow noodles from a new Asian store in Lemongrove in Chatswood. This was purchased immediately of course, and followed with the quest to find the rest of the unique Char Kway Teo ingredients - Lap Cheong (Chinese Sweet Pork Sausage) and the Chinese Pork Barbeque (mostly sold by Asian butchers).

Using an ordinary teflon lined huge pan, I went on to do the Char Kway Teow challenge following the recipes taken online. Despite the lack of the sambal spice and the Chinese pork barbeque, my version turned out alright and enough to warrant some oohhs and aahhhs from my own homegrown fans.


But perfection is the key as I was told the secret to the best Char Kway Teow is the smoky flavour which comes from a very hot wok and the blend of the soy sauce with the rest of ingredients. Maybe the next version will be even better. Definitely!

Friday, August 15, 2008

Carambola / Star Fuit / Balimbing


Unbelievable price for something that you can just take from your neighbour's tree in most provincial towns in the Philippines.

Balimbing or Star Fruit is more popularly used to treat asthma and colic according to Gamot Pinoy (or Filipino Medicine) and the site on Philippine Medicial Plants states that the fruit is also has a laxative effect. Whatever its benefits, I'm not sure if people actually buy this fruit here despite its exotic characteristic and sour taste. It must have its own fans. Definitely not me. But I'm not closing my doors entirely on the Starfruit Carambola... if not today, maybe next time.

Thursday, August 14, 2008

Guinomis

Surprisingly, I only discovered this recently or perhaps only knew of its name recently. Maybe its just me, but when we were young, we didn't actually asked what the name of the food we're given and served as long as it tastes good and we like it, we couldn't care less. Maybe I was served this before, or must have tasted it from a party or a restaurant, or some other event. Nonetheless, it is as familiar to me as halu-halo or mais con yelo, but the name did not ring a bell. Whatever! The important thing is, as I am into the challenge of re-discovering food and cooking, I've become more observant of food most of the time.

Recently, at a friend's place, we were served a quick-but-satisfying dessert made up of 3 basic ingredients: coconut cream, unflavoured gelatine and toasted pinipig (rice flakes). To make it a real dessert, she simply mixed a few teaspoons of sugar into the coconut cream and added some ice cubes. It was such a hit especially for my picky daughter, that I've replicated it at home.

I can only guess as to how this dessert got its name. In Japan, guinomis is a drinking vessel or what's called as traditional Japanese cups such as these here. I'm guessing that the traditional guinomis dessert uses tapioca pearls (sago) such as this recipe here, similar to the Chinese dessert soup Sai Mai Lo plus the coconut milk, famously known as Tapioca Pudding.

There is quite a number of ways to make this dessert even better like this version here (such as adding melon shavings for topping, or ube or leche flan, etc), but for me the basics are all there is, to fill up the tummy as an after-lunch or after-dinner dessert. In this case, even when ingredients were substituted with what is more commonly available and conveniently accessible (like unfalvoured gelatin vs sago pearls or tapioca pearls) this simple and quick dessert is just as satisfying as something you would order in any one of the more popular restaurants in Manila.

Best served in shallow ice cream glass bowls or cups.


My ingredients (I say MY because you may probably find the proper ones when you prepare your version)

10 g unflavoured gelatine (I used 1 sachet of Davis Clear and Unflavoured Gelatin, dissolved in 500ml of hot water and prepared into 2 shallow oval tins. Once chilled, cut into cubes)

1 can 400ml coconut cream (I used a generic supermarket brand that is "light)

3-4 tbsp white sugar (depends really on how sweet you want it)

1/2 c roasted sweet rice flakes (in the absence of pinipig or the Filipino rice flakes, I bought this
substitute Thai Sweet Rice Flakes from an Asian shop. Roast the rice flakes in a shallow pan until brown)

To prepare, simply mix and dissolve the sugar with the coconut cream in a medium to large serving bowl. Add the cubed gelatine and some shaved ice or cubes, then top with the rice flakes.
Can't be anymore simpler.

I'm thinking since we had this in winter, we will definitely see more of the guinomis in summer, next time with more shaved ice and probably an assortment of toppings too. How about a cherry on top? Or even, using coloured gelatine for a change..... Hhhmmmmm.......

Saturday, July 05, 2008

Devil's Food White-Out Cake

This is definitely my dream cake. A cake I will keep on dreaming on making. It does look a little bit overwhelming when you look at it. Though the idea of having such a dreamy looking cake coming out from your kitchen does bring some kind of pride. It must. And it definitely should. After all, I am a novice baker.... and so all I can actually do is dream, dream, dream.... and probably blabber, blabber, blabber about actually doing it. Maybe when I own that dream kitchen mixer, or that dream kitchen with marble counter tops and top of the line appliances, or even that simple yet elegant and fancy cake tray, etc, etc, etc.......


I came across this very delectable (That is the very apt word, believe me! Look at it here) site and wondered if I can actually take myself up to the challenge. A special event in the near future should be enough reason to take up the opportunity. Until then, I must content myself with looking at the mouth-watering photos in this book and plan. A lovely dessert for Christmas dinner. Why not? Until then, dream, dream, dream.......

Tuesday, July 01, 2008

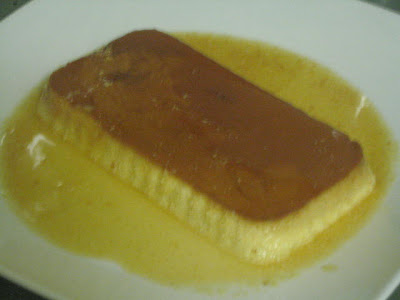
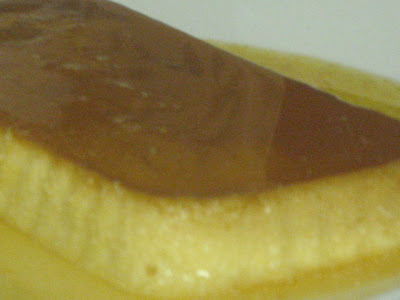
Leche Flan in Oz

One of my favourite Filipino desserts, Leche Flan has a thousand and one varieties. Commonly known as custard in Australia, this version is part of the Spanish influence in the Filipino kitchen. Similar to the French creme brulee, with a different twist in the preparation, the Leche Flan is prepared with the sugar caramel in the bottom before the flan mixture is poured into the ramekins or tins. While the preparation of the creme brulee uses the aid of a kitchen blow torch to caramelise the sugar, I find this version easier and more convenient.


This is one of the desserts that are in my favourite lists, but never tried it until now.

Most of the recipes online and in books call for the same ingredients, with slight differences in the measurements and in the kind of milk used. Nonetheless, it still comes out as a dessert should. Sweet and decadent. My little girls don't like the smooth texture of this dessert (as I find they only love those resembling chocolate or is chocolate-coloured), I'm sure they eventually find themselves searching for this recipe.

Ingredients

14 egg yolks
2 cans condensed milk
1 c fresh or full cream milk (Some recipes call for canned evaporated milk. I haven't tried this but I'm sure the difference wouldn't be that noticeable)
1 tsp lemon juice

1 c sugar (I used white)
1/2 c water (I don't use as much as I wanted the caramel to be thick. The first batch I made, I didn't use water and the caramel came out toffee-hard)

Caramelise the sugar using a shallow pan. Do not stir but let the sugar melt on its own, adding water bit by bit until the sugar has all melted.

Pour onto ramekins or baking tins (I used a generic rectangular baking tin) and let cool


Whisk egg yolks in a big bowl. Add the condensed milk and mix well. Add the whole milk and stir until the mixture is smooth.

Pour onto the ramekins or baking tins. Place in a roasting pan and pour some water, half-level of the tins.

Bake in a 180 degree oven for 40-45 minutes. The flan is done when a knife inserted onto the mixture comes out clean.


Enjoy!

Sunday, June 22, 2008

Beef Strips in Mushroom Soup

A favourite of hubby and my oldest daughter, this is one of those 30-minute meals that will work wonderfully well with rice or pasta.

This is a recipe I learned from my mother-in-law, usually prepared by the cook and uses beef kenchi cubes instead of strips. This is my quick and easy version, as it doesn't take any more extra hours to braise the beef.

Ingredients:

500g beef stroganoff strips (the thinner the strips the better, as it will cook faster)
1 can Campbell's Cream of Mushroom soup (or any other brand will suit just as well)
1 onion, chopped
1 c water
1 c mushrooms, sliced (optional)
2 tbsp vegetable oil


Saute onions in about 2 tbsp vegetable oil.

Add the beef and stir fry until the beef if brown.

Add the canned mushroom soup and the water.

Simmer in medium heat for 10-15 minutes, until the meat is tender. Add the (optional) mushrooms) last.

At home, we serve this with rice. But I'm guessing it will also work well with pasta. Just a sprinkle of chopped sweet basil.

Monday, June 02, 2008

Chocolate Crinkles


This is a favourite in our household. Fudgey cookies with loads of chocolate! There are lots of names and varieties of this recipe, like here where unsalted butter is used as alternative to vegetable oil and used coursely chopped semi sweet chocolates instead of baking cocoa powder, or this one from Betty Crocker, and lots more on the web.

This version is from the recipe book my parents gave me a few years back - Secret Recipes Revealed Book 1 of the Alabang New Life Christian Centre , which is actually a compilation of recipes from members of the community. Secrets that were passed on by families, to "bless" others. This particular recipe is from the "kitchen of Mina Shultz" called Trisk Chocolate Crinkles. This is very similar to the Betty Crocker version

Ingredients:

2 cups granulated sugar (I used raw sugar)
1/2 cup vegetable oil
1 cup powdered cocoa
2 tsp vanilla
4 eggs
2 cups all purpose flour (or plain flour)
1/2 tsp salt
2 tsp baking powder
1/2 cup powdered sugar (icing sugar) for rolling

Mix granulated sugar, oil, coca and vanilla in a bowl.

Add in eggs, one at a time.

Stir in flour, baking powder and salt.

Cover and refrigerate dough until slightly firm. (Betty Crocker suggested 3 hours. This is apparently the key, as mine turned out a bit flat because I only let it sit for an hour)

Preheat oven to 180 degrees C ( 350 degrees F).

Scoop a teaspoonful of dough and shape into balls.

Roll in icing sugar.

Place 1-inch apart on greased cookie sheet.

Bake for 8-10 minutes or until dough hardens and almost no indention remains when pressed.

Do not overbake, as this one tends to get really stone-hard when over baked.

Enjoy!


Monday, May 26, 2008

Martini Friday

A friend of mine in Canada suggested this. She and hubby have this nightly bonding they call martini nights (I actually asked her, how can you possibly do this every night?). She suggested I do the same, just for kicks. And try I did!

Although there have been a lot of variation on the classic martini, her Lychee Martini is a simple concoction of vodka, lychee syrup and lychee for the garnish. I bought canned lychees and used a little bit of the syrup into the mix and garnished with the lychees. Brilliant results!


Cheers and thanks to my mate RC, from down under! Hic!

Monday, May 19, 2008

Chicken Sotanghon with Shitake Mushrooms

Chicken Sotanghon is a Filipino dish, which probably was taken from the Chinese influence in our kitchen. It is prepared using chicken, garlic, ginger and some rice vermicelli noodles. Although there is the more common variety of the Chicken Sotanghon recipe which is in dry form - more like a stir-fry noodle dish, such as here from Burnt Lumpia, and here and here, this version of mine is in soup form, and this dish is definitely one of those classified as "chicken soup for the soul" kind of food, as it does wonders to the body especially in cold weather, when our bodies turn numb from the chills.

Although this recipe is one of those familiar ones in our family, this one has a new twist as I came across a similar recipe from Immunity Foods for Healthy Kids where the addition of Shitake Mushrooms made it one of those immune booster broths. Aside from the ginger, which is known to be have a hundred and one medicinal benefits, the added medicinal properties in the shitake mushrooms have been researched to provide immunological benefits. So clearly, this is one great dish with heaps of good stuff for the insides.


Ingredients
rice vermicelli noodles (I only used half of the 200g pack)
2 garlic clove, crushed
1 onion, chopped
Shitake mushrooms (I used half of the 40g pack. Instructions to soak the mushrooms at the back of the pack)
1 pair chicken breast fillet
1 sm fresh ginger, sliced
bunch of flat leaf parsley, chopped


To prepare, simply saute 2 gloves of garlic, ginger and the onion in a little oil. Add in the breast fillet strips and stir fry for about 5 minutes. Add the chicken broth (Store-bought in tetra packs works well too, or you may choose to boil the chicken breast first to save the broth will work fine too. You may lessen the cooking time if the chicken is already cooked from boiling.) and simmer for about 15minutes or until the chicken is cooked through.

Add the rice vermicelli noodles (which you have earlier in boiling water for about 30minutes).

Add the soaked shitake mushrooms, and simmer for another 10 minutes.

Turn off heat and top with the chopped flat-leaf parsley.

Serve warm in bowls.


Friday, May 16, 2008

Juan's Pork Ribs Adobo

Juan Tamad is a Filipino fable. A tall tale that exemplifies a lazy person, in mind and body. Adobo on the other hand, is an original Spanish word for seasoning or marinade. The roots of the adobo in the Philippines must be traced from from the time when the country was conquered by the Spaniards, from which they left a lot of influence in the way food is prepared in the Filipino kitchen. Although we do also have Chinese and American influences.... like the pancit (or stir fried noodles), fried rice, hotdogs, etc..... Anyways, back to the adobo....

In any (must be every) Filipino household, the Pinoy adobo is prepared and each family has its own special way of preparing them. But however and whenever the preparation will be, the basic ingredients of the adobo dish is this: soy sauce, vinegar and garlic. Some may add a few ingredients here and there, such as dried bay leaves, or hard-boiled egg for topping, or add a few potatoes for extenders. It can also prepared with pork, chicken, squid or maybe even beef (although I have never tried this yet). However it is prepared and served, the Pinoy adobo is a staple dish for most Filipino households (henceforth, my blog name - adobo). Here is another recipe on the classic adobo with a different twist.

I say my particular version is Juan's (no pun intended to any Juan's out there) because this is my lazy version of the pork ribs adobo.

For starters, the pork rashers are marinated in soy sauce, vinegar and garlic for about 30 minutes. And then fried in a little oil. Just to add some starch to the dish as a side, I chopped some potatoes and pan fried it together. (Lazy I say, because this should actually be done separately. But I am pressed for time most days).


After the pork and potatoes are done. These are transferred to a serving dish. The hard-boiled eggs are not a usual adobo topping, but I sometimes prefer to do this for the additional fanfare.

Adobo is best served with rice, and still good eaten the next day. Shredded as a rice topping, or sandwiched in pandesal (Filipino bread rolls).


Wednesday, May 14, 2008

Illicium verum / Star Anise

The star anise has been alien to me until we moved here from overseas. Not that they weren't available where I came from. But from the plain fact that we weren't personally introduced. One of the things I learned from moving overseas was to be independent, in the sense where even when it came to challenges, I had to create them myself. Routine can actually kill a person's spontaneity (as if having 4 kids isn't spontaneous enough eh!?), not to mention it can really drag you to boredom. And so, after doing the same familiar dishes over and over again, I gave myself the challenge of embarking on a culinary adventure. And to start, I borrowed tons of cookbooks from the local library. From baking to preparing sushi at home. Now I am a voracious reader. I thirst for new information, but for cookbooks I prefer the ones with the colourful photos as it gives me an idea of what to look forward to.

One of the dishes that my hubby and I both love is the Chinese spicy beef noodle soup. Similar to the Vietnamese pho noodles minus the bean sprouts and the mint, this one is a simple dish but full of aromatic flavours and spices. There is a favourite noodle place we miss in Manila which is called the Northpark (there are several of these but we frequent the one in Banawe in Quezon City). Now because Chinese dishes maybe simple, the ingredients and preparation of Chinese soups are not. A typical stir fry wil only take you less than hour to make - tossing in a few veggies, garlic, onion or ginger and a few strips of chicken or beef or pork, plus soy sauce and voila! You can claim glory for a common Chinese stir fry dish. But their soups and noodle soups are another story. It takes more effort, ingredients and preparation. There is the hours of boiling and tenderizing the meat with an assortment of spices, and then the straining of the broth. Believe me, I've tried it at home, despite the common knowledge that I know I could've just gone to the local shops and got me a take-away for less than $10. But we need to challenge ourselves once in awhile, to shake up our bones and bodies and prove that we are indeed alive. So when I tried to prepare the authentic Chinese Beef Noodle Soup at home, I met the star anise.


It is a bit intimidating at first as I haven't a clue what to look for. But when I got home with my produce, it was like mana from heaven (well ok, I'm exaggerating just a little bit). The smell and aroma combined with cinnamon sticks is what retail therapy is to a shopaholic. Seriously. I loved the aroma coming from the kitchen! It was authentic Chinese dishon the menu, and I'm walking down the streets in Chinatown.

Recently, I was taken to preparing another favourite of ours, the Korean Kalbi Chim (Beef Spareribs) recipe from the Filipino Kitchen Library Asian Cooking by Aileen Jaraza, Christine Aquino and Hector Jaraza, of which I have done a separate entry here. It was this time that I found the use for the "star" once more. Although the recipe did not call for the herb, I simply included it for the added flavour and aroma. Once more, the star has proven to me its worth. Five stars to you - anise!

Tuesday, May 13, 2008

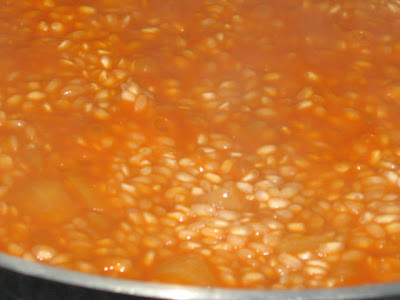
My version - Creamy Prawn Risotto

This is a simple no-fuss risotto recipe, which I learned from my brother in the early months when we arrived here. Having been on rice diet all my life, it was time to succumb to other members of this grain family and my first introduction to Arborio Rice. It is traditionally an Italian grown grain which originated from the town of Arborio in the northern part of Italy in the Po Valley. But as the advent of technology continues, this kind of rice is now grown locally in Australia. But the Italian tradition continues, as this is the best grain to use in risottos.

There are tons of varieties to prepare risotto, and this was a good introduction as it involved our favourite - prawns. To prepare, the following ingredients are a must:


Ingredients

2 cups arborio rice
750g prawns
frozen peas
red capsicum, diced
parmesan cheese
onions chopped
butter- for cooking

As I am novice in the kitchen, my measurements are simply based on hunch, intuition and the actual appearance of the dish.

For starters, the prawn is cooked (boiled) until it has changed colour. Drain and save the prawn broth. Peel the prawns, saving the tail and set aside.

In a large wok or skillet, put in the butter and the arborio rice. Stir until the rice is all coated with butter. Then add the prawn broth (bit by bit and as needed). Let it simmer until the rice is tender, stirring occasionally to avoid sticking on the wok/skillet.


Once the rice is tender, add in the prawns and vegetables (red capsicum and frozen peas). This shouldn't take too long to cook.

Lastly, add about a cup of parmesan cheese. Then give a little stir until the parmesan is all mixed with the rice.


Traditionally, risotto is served dry with the parmesan as a topping or mixed just before serving,a and is usually dry. But for our version, we like it a little creamy.

Now you have a simple prawn risotto dinner. Alternatively, prawn may be altered with chicken, or just some plain vegetables (e.g. asparagus, brocolli, etc).

Sunday, May 11, 2008

Muffins for the Emu's

I baked some muffins for the girls' preschool last Friday. It was a delayed birthday treat for their classmates as I hadn't had the chance last week to prepare them.


These are the two versions we took to school, both taken from The Clueless Baker. Baking from Scratch. Easy as Pie by Evelyn Raab.


The first was the Beautiful Buttermilk Muffins, with chocolate chip variation.

Ingredients
1 cup buttermilk
3/4 cup granulated sugar
1/2 cup vegetable oil
2 eggs
1 tsp vanilla zest (I substituted with vanilla essence)
2 cups all purpose flour
2 tsp baking powder
1/2 tsp baking soda
1 cup chocolate chips (I used Nestle Dark Choco Bits)

Preheat oven to 375 degrees F (190 degrees C). Grease a 12-cup muffin pan.

In a large bowl, beat together the sugar, oil, eggs, vanilla and lemon zest until light(ish).

In another bowl, mix together the flour, baking powder and baking soda. Stir this mixture into the egg mixture, in 2 or 3 additions, alternating with the buttermilk. Beat only until combined - don't over beat! Stir in the chocolate chips into the batter - then spoon the batter into the well-greased (or paper-lined) muffin pan, filling the cups nearly to the top. Bake for 20-25 minutes, until lightly browned on top. Makes 12 muffins.


The other version was for the recipe Chocolate Chocolate Muffins.

Ingredients
2 cups all purpose flour
1 cup granulated sugar
1 tsp baking soda
1/2 cup butter
3 squares (roughly 28g each) unsweetened chocolate (I used the Woolworths Select brand Dark Cooking Chocolate)
1 cup buttermilk
1 egg
2 tsp vanilla
1 cup semisweet chocolate chips (I used Nestle Dark Choco Bits)

Preheat oven to 400 degrees F (200 degrees C). Grease a 12-cup muffin pan.

In a medium bowl, stir together the flour, sugar and baking soda. Set aside.

In a medium saucepan over low heat, melt together the butter and unsweetened chocolate (broken into chunks to hurry things up). Stir until smooth, then remove from heat and let cool for just a minute. Add the buttermilk, egg and vanilla, whisking the mixture until everything is well combined. Stir in the flour mixture, mixing just until all the ingredients are moistened, then add the chocolate chips. Mix until the chips are evenly distributed. Then stop.

Spoon batter into the well-greased (or paper-lined) muffin pan, filling the cups to the top. Bake for 15-20 minutes or until a toothpick poked into the middle of the muffin comes out clean. Let cool for a couple of minutes before removing from the pan, then transfer to a rack to cool more or less completely.


The kids loved this the most (and do I wonder why?). The muffins turned out with a bit of crunchy top (I used raw sugar) and a moist muffin. It was seriously good!

Saturday, May 10, 2008

Banana Breads Galore

I chanced up the NGN Banana Bread Bakeoff from the IMBB events calendar and thought... Why not?! Afterall, I do have that fruit in my blog name, and we had bananas in our fruit tray waiting to be cooked up. And so these banana breads are making their way to this bakeoff.


The first one I took from Eric Treuille and Ursula Ferrigno's Bread - Baking by Hand or Bread Machine, for the Jamaican Banana Bread version.

The Ingredients called for:

250g plain flour (plus more to dust tin)
1 1/2 tsp baking powder
1/2 tsp baking soda
1/2 tsp salt
1/2 tsp ground cinnamon
1/4 tsp nutmeg
60g pecans, coarsely chopped (I used walnuts)
1 egg, beaten
175ml milk
150g granulated sugar
60g unsalted butter, melted
350g peeled and mashed bananas (approximately 3 ripe bananas)

1. Preheat oven to 180 degrees C (350 degrees F/Gas 4). Grease a 1kg (1lb) loaf tin with oil. Generously dust with flour, then turn the tin to coat the bottom and sides evenly. Shake out any excess. ( I simply greased and lined the tin with baking paper)

2. Sift the flour, baking powder, baking soda, cinnamon, nutmeg and salt together in a large bowl. Stir in the pecans (in my case, walnuts) and make a well in the centre. Put the remaining ingredients in a separate bowl and mix until thoroughly combined.

3. Pour the liquid mixture and the bananas into the flour well. Use a spatula to gently fold all the ingredients together to form a wet batter. (Over mixing can result in a heavy bread)

4. Spoon the batter into the prepared loaf tin. Bake in the preheated oven for 1 hour or until golden and well risen. The bread is ready when the edges shrink from the sides of the tin, and a metal skewer inserted into the centre comes out clean.

5. Keep the bread in the tine and leave to stand for 10 minutes. Carefully run a knife around the edges and turn out. Cool on a wire rack.


Although I substituted the pecans with walnuts (as that was what I had in the pantry), I don't think it affected the quality of the bread. This version is good as the loaf was moist and the combined nutmeg and cinnamon made it really tasty with a bit of spice.


The second version I took from A Cook's Book of Baking. Butter. Sugar. Flour .


This simple Banana Bread recipe called for the following ingredients:

250g (2 cups) plain flour
2 tsp baking powder
1 tsp mixed spice
150g unsalted butter, softened
185g (1 cup) soft brown sugar
2 eggs, slightly beaten
240g mashed ripe bananas (about 2 bananas)

1 Preheat the oven to 180 degrees C (350 degrees F/Gas 4). Grease and line the base of a 23 x 13 x 16cm loaf tin

2. Sift together the flour, baking powder, mixed spice and 1/4 teaspoon salt.

3. Cream the butter and sugar in a large bowl with electric beaters until light and fluffy. Add the eggs gradually, beating well after each addition, and beat until smooth. Mix in the banana. Gradually add the sifted dry ingredients and mix until smooth.

4. Pour into the loaf tin and bake on the middle shelf of the oven for 35-45 minutes, or until the top is golden brown and a skewer inserted into the centre comes out clean. Cool in the tin for 10 minutes before turning out onto a wire rack.

This was slightly different, calling for brown sugar and mixed spice. And the results were extremely different too, because it had a really crusty top and it was really sweet (I don't really have a sweet tooth, so sweet in this case is relative). It did turn out quite nice when served with a cup of coffee. The sweet and crusty bread complements the coffee immensely.

Kalbi Chim (Korean Beef Spareribs)


There is a counter kiosk in almost all mall fastfood centres in Manila called "Kimchi". It specializes in Korean dishes and the Beef Spareribs is one of our favourites. It does take a little bit of effort to prepare, but the results are guaranteed satisfaction at the dinner table, at least for the grown ups.

This recipe was taken from the Filipino Kitchen Library, Asian Cooking by Aileen Jaraza, Christina Aquino and Herbert Jaraza. It is one of the books I took with me to Sydney, as a reference for dishes that will be missed.


1k beef spareribs, cut into chunks (I used only about 600g)

3 tbsp granulated sugar

3/4 cup soy sauce


2 tbsp sesame oil


2 cloves garlic, crushed


2 tbsp sesame seeds, roasted and crushed


4 pcs Chinese mushroom (or in this case, I used what I had in the pantry - Shitake mushrooms)


2 1/2 c water


salt and pepper to taste


Score the meaty parts of the ribs and rub all over with sugar. Place in a bowl.

In a small bowl, mix the soy sauce, sesame oil, garlic and crushed sesame seeds. Marinate the beef pieces in the soy sauce mixture for at least 1 hour.

Soak the dried Chinese mushrooms in the water for at least 30 minutes. Drain. Reserve the liquid. Slice and mushrooms and set aside.

Pour off the marinade from the beef pieces and reserve marinade.

In a wok and without cooking oil, sear meat pieces on all sides to seal in flavour. Add marinade and liquid from mushroom. Bring to a boil, then lower flame to simmering and cook covered for 1 hour or until the beef is tender.


The following are part of the recipe but I chose not to include for plain reasons - I didn't have time to buy these:

2 pcs scallions, trimmed and chopped

285g water chestnuts, canned, drained


Remove the cover and add the mushrooms, scallions and water chestnuts.


Cook for a further 30 minutes until much of the liquid has evaporated.


Season with salt and pepper.


Transfer to a serving platter and serve with boiled rice.


For my version, I added some chilli flakes at the last minute. And then added some chopped shallots and some sprinkle of sesame seeds when served. Plus a side dish of sauteed bean sprouts and a bowl of rice.

Monday, May 05, 2008

Excited Blueberry Muffins

I intended to practice making cupcakes and muffins for the Mother's Day morning tea at the girls' preschool on Thursday this week. While browsing through tons of cook books and online recipes, I chanced upon this site that was holding a competition of sorts showcasing "muffins". I thought maybe it'll be a good and exciting challenge to join and experience it for the first time.

And so, while chocolate cupcakes are always a good hit with my girls, I made a new batch of muffins which will be making their way to the Greedy Gourmet's challenge.


The chocolate cupcakes were intentionally plain, but my girls decided to play around with the whipped cream and 100s-1000s so we decorated some just for kicks.


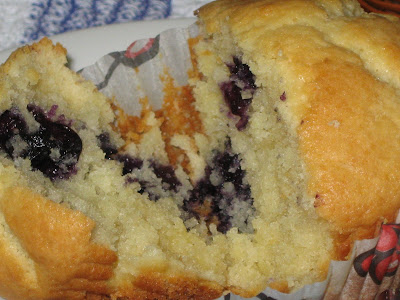
The blueberry muffin were taken from Donna Hay's Off the Shelf, Cooking from the Pantry. The No-Fuss Blueberry Muffins, which were indeed, "no fuss" at all. I chose blueberry not because its in season (its actually not and was indeed pricey at the local grocer) but because blueberries are my my all-time favourite and hubby's as well.

In a bowl, combine 2 cups sifted self-raising flour, 1/2 cup caster (superfine) sugar, 2 eggs, 1/3 cup vegetable oil and 1 cup sour cream and mix well. Sprinkle the mixture with 1 cup fresh of unthawed frozen blueberries and then spoon into 1 cup capacity muffin tins. Bake in a preheated 180 degree C (350 degree F) oven for 25-30 minutes or until cooked through.
Wow! How exact can you get?!!!!


The muffins came out lovely. The smell was really enchanting. Now, these might be no fuss muffins, but they're really excited! I loved how it turned out, with the slightly crunchy top and the soft inside combined with the sweet blueberries. Yum!

LinkWithin

Related Posts Plugin for WordPress, Blogger...