Welcome to adobo-down-under!

Musings. Family. Food. Stories. Cooking. Recipes. Eating. A recipe journal. From simple Filipino dishes to challenging recipes and exciting gastronomical failures. This is for my girls to look back on for comfort, memories, laughs, love and lots of food!
Showing posts with label quick and easy. Show all posts

Tuesday, August 18, 2015

Bottle gourd stir fry

Filipino cuisine is making waves around the globe which makes me proud.  Just recently, I wrote a post about a pop-up afternoon stand up event in Sydney delighted the palates of the locals with the introduction of classic savoury and sweet Filipino dishes. There's quite a few of these Filipino restaurants now in Sydney and it's getting a good following from locals, not just fellow Filos or Pinoys as we usually called ourselves. 


The well known amongst the community is La Mesa along Goulbourn Street, Haymarket.  It has been around since 2002 and previously located in Dee Why.  In 2012 they moved to Haymarket and have since created a good following of locals and tourists.  The decor is reminiscent of an old fashioned Filipino home - a mix of contemporary and classic Filipiniana decor.  The serving platters are all home-grown Filipino vessels flown from the Philippines. Sizzling Fillo in Lidcombe boasts of authentic Filipino dishes served in big portions enough to share amongst 3-4 people. The place invites locals and those who will travel a few kilometres to partake of the generous servings and Saturday night karaoke.  Eating and singing - two of Filipinos favourite things to do.  Sizzling Fillo also boasts of a regular "boodle feast"- a buffet of selected classics served on "your" table on a bed of banana leaves.


My favourite is Cafe Manila in Kirribilli - a small cozy cafe serving traditional Filipino dishes suited to the western palate - leaning away from traditional starchy dishes and the portions are just right. The interior is very minimalist and the tables are quite small creating an intimate experience for the diners. Chef Ricky Ocampo is always in the house serving up dishes with a smile as if you are a guest at his home. The menu is lean and the food is well presented on the plate.  Chef Ricky is one of local Filipino featured in the SBS Food Safari Filpino Food.


Another one in north shore is Pamana Cafe and Filipino Restaurant in Chatswood.  The place is cafe style with tables for two, up to ten.  The menu is more extensive with a range dishes from breakfast to dinner, entree to desserts -  a variety of traditional Filipino dishes both savoury and sweet.  They also offer "boodle feast" on select days. Although the location is quite away from pedestrian traffic, it has since opening in 2013 gathered a local following.


Now this dish is not something you'd see in any of the menus from these restaurants.  This is a super simple dish that's not worthy of a restaurant feature but definitely worth the 30 minutes that you spend to cook it. The thing with Filipino dishes is, if its easy enough to cook at home, you won't find it at restaurants.  We (Filipinos) when at these restaurants, usually order dishes we seldom cook at home, or not at all.


Bottle gourd is an indigenous vegetable in the East Asian region.  It is commonly called "upo" in the Philippines or calabash in some western countries.  The bottle gourd has a lot of health benefits and in some countries, they juice is used to encourage weight loss.


I love the simplicity of this dish.  Almost pedestrian.  You only need 5 basic ingredients.  And can even make it vegetarian by omitting the pork.


Here goes.


Ingredients

250-300 grams pork, cut into cubes

1 piece bottle gourd, sliced

3 cloves garlic, minced

1 onion, sliced

2 tomatoes, sliced

1 cup water

1 tablespoon cooking oil

salt and pepper to taste

fish sauce (optional)


Method

In a medium sized skillet, heat the oil and cook the pork pieces until crispy.  Set aside.

In the same pan, saute the onions and garlic and cook until fragrant, not burned.

Add the tomatoes and stir until soft.

Add the bottle gourd slices and water and bring to boil.

Season with salt and pepper, or fish sauce is using. Season to your taste.

Turn down heat and simmer until the goured is soft and cooked.

Add the crispy pork slices on top.


Disclaimer: The feature on the mentioned restaurants is a simple feedback from the writer's experience dining at these establishments.  Dining at the restaurants were to the writer's own expense.  This is not a paid feature.  The feature is written to assist locals and tourists who may be looking for Filipino restaurants within Sydney metropolitan. 


Saturday, August 08, 2015

Pork and beans


Growing up a few decades ago compared to today, there were so few choices when it came to food.  The cereal variety was maybe about less than ten.  There were no gluten free pasta or bread, no dairy free butter, no sugar free muffins.   Coffee was coffee, no soy, light, chai, etc.  A steak was usually T-bone, no varieties such as Wagyu, Angus, or labels such as corn fed, grass fed, aged, dry aged, etc.  Food was food.  There were no unnecessary labels.  Whether it was fresh - from the ground, from a tree/plant or packed - cans, boxes, plastic packaging.   Today, it's an entirely different story.  Whatever happened to simple food?  

In his 2009 book Food Matters, Mark Bittman mentioned modern agriculture, global warming, sustainability and the change towards conscious eating. These days, we don't look at calories anymore. Consumers are conscious about where their food comes from, the carbon footprint, whether its organic, grown locally or imported from half way around the globe.  This kind of mentality creates a good set of consumers. Smart consumers.  But then we also create a lot of waste.  In Australia alone, consumers waste an estimate of 4 million tons of food each year!  Because what happens is we tend to shop more than what we can actually consume.  (How not to waste food shall be for another post!)


I'm not a fan of food fads but I do believe in simple good food. Seasonal cooking is always how we plan our menu at home.   Simple food prepared at home. With love.  For family and friends.


Now growing up, we were fed with lots of food I wouldn't normally buy these days. Our parents back then fed us with what they knew best.   Powdered orange juice (Tang), canned vienna sausages... including a favorite breakfast fare a million years ago.  Canned pork and beans.  A mixture of beans covered with sweet tomato sauce and about 1 to 2 pieces of pork.  We used to eat it on toasted white bread and loved it for breakfast and even after school snack. And sometimes ate it with rice too.  It's a Filipino thing (rice with everything).

Now this is my take on the canned pork and beans I grew up eating.   A simple dish made of 2 basic ingredients:  pork and beans! 


Ingredients

200 grams pork belly, cubed

300 grams French beans, cut into 2 inch pieces

2-3 cloves garlic, minced

salt and pepper to taste

vegetable oil 

chilli flakes (optional)


Method

Heat a shallow pan and add cooking oil.

Fry the pork pieces until crispy.  Set aside.

Using the same pan, add the garlic and cook until soft and fragrant. Do not overcook or burn.

Add the beans, and stir to cook the beans until bright green, about 2 minutes.

Add the cooked pork and stir to mix through.

Add the chilli flakes (if using) and stir.  Turn off heat.

Serve with steamed rice.


Wednesday, October 08, 2014

Prawn, chorizo and okra stew


Is there a dish or food that you've never ever eaten or tried because of some personal reasons?  Like it's wierd or disgusting?  Maybe you've seen balut? - the duck embryo that is a usual street food in the Philippines and  some parts of Asia?   How about frog legs which is a delicacy in Cantonese cuisine?  And lamb brains?  Ok, so as foodies, are we all supposed to be open to eating and trying anything and everything that is served us or is on offer when we travel ala Anthony Bourdain who has shown us in his TV series No Reservations where he tries fermented shark in Iceland (S1, Ep2), some nasty bits of sheep (S2-Ep1), and how we proclaimed the famou Cebu lechon in the Philippines (roast suckling pig) as the "best pig ever" (S5-Ep7). 


There are few that I don't eat because they are slimy (okra) and bitter (ampalaya or bitter gourd).  Hubby on the other hand, loves these two.  I usually buy them when available and then cook it, for him.  With okra, it is simply boiled then served as a side with some shrimp paste or fish sauce.  He loves them, and most any Filo I know as well.  Until recently, when I found a simple recipe on Food52 and thought why not expand his okra horizon. And also, start a long needed relationship with okra.  


And OMG!  Slimy!  But OMG!  Yum! So I'm hooked.  I love them, slime and all.  The soft texture when cooked complimented by the smoky chorizo and the fresh prawns was magical to the senses.  At first mouthful, I forgot all about the okra's fault (it's sliminess) and just fell in love.  I can't believe what I've been missing all those years!  So now, okra is my lobster (now that's not from Mr. Bourdain but from Phoebe Buffay from Friends S2, Ep14).


And oh, I forgot to mention no offense to anyone, but Vegemite is another one of those I least like.  One of those things we need to work on, learning to be Australian.


Inspired by the recipe from Food52, here's my simple version of 5 basic ingredients:

Ingredients

1 cup sliced chorizo

250g okra, sliced

2 tomatoes, quartered

2 cloves garlic, minced

500g fresh peeled prawns

dried chillies or flakes (optional)

olive oil

salt and pepper to taste


Method

In a heavy based skillet, heat some olive oil covering the base

Add the chorizo and stir to cook, rendering the fat.

Add the sliced okra, season with salt and pepper and stir to cook the okra until soft and the strings from the okra begin to be visible.

Add the garlic, tomatoes and prawns and continue to cook on medium heat.

Turn off heat and add the chilli flakes if using.

Serve with steamed jasmine rice. 


Tips and tricks:

* You can add thyme while cooking for extra lemony taste. 

* I have used lemon rind and added it in the last minute of cooking.

* Add chopped parlsey for garnish.

* The recipe is a take off from the classic gumbo from southern Louisiana but will less ingredients to suit our preference.


Tuesday, September 30, 2014

Baked maple pears with toasted pistachios


No more whingeing around here of being too cold.  We have been blessed with warm air and clear blue skies.  And so I am catching up on some needed writing and blogging as it is the end of September, and we are halfway through to spring.  Spring cleaning at home and the backlog of recipes and photos to post.  

We have revamped our veggie garden as the seedlings planted in winter did not survive and to take the easier route, we bought some ready-to-plant veggies from the local nursery.  Hopefully, there will be some harvest of French beans, eggplants, strawberries, Habanero and birds eye chillies soon.  Our calamansi plant is finally showing some fruits after last year's drought.  This makes me very happy as any Filo would be.


And now catching up on some blog posts, this recipe is the easiest dessert there is that you can bring to any potluck party.  The idea to make this was initially to make it for a vegan at work who was retiring.  And I also brought this to a work birthday lunch and ever since, people have asked for the recipe and they have made it at home with spectacular results.   It's really easy.  I love easy dishes.  Those that you prep and then you just wait for the magic to happen.  Be it a slow braised on the stove, or a baked maple pear in the oven.  You prep it and you wait for an hour.


The recipe is adapted from an old cookbook from my shelves - Marie Clare Fresh + Fast Simply Delicious Healthy Food


To make these baked maple pears

Ingredients:

7 Corella pears, halved and cored*

3 tablespoons real maple syrup

2 tablespoons extra virgin olive oil*

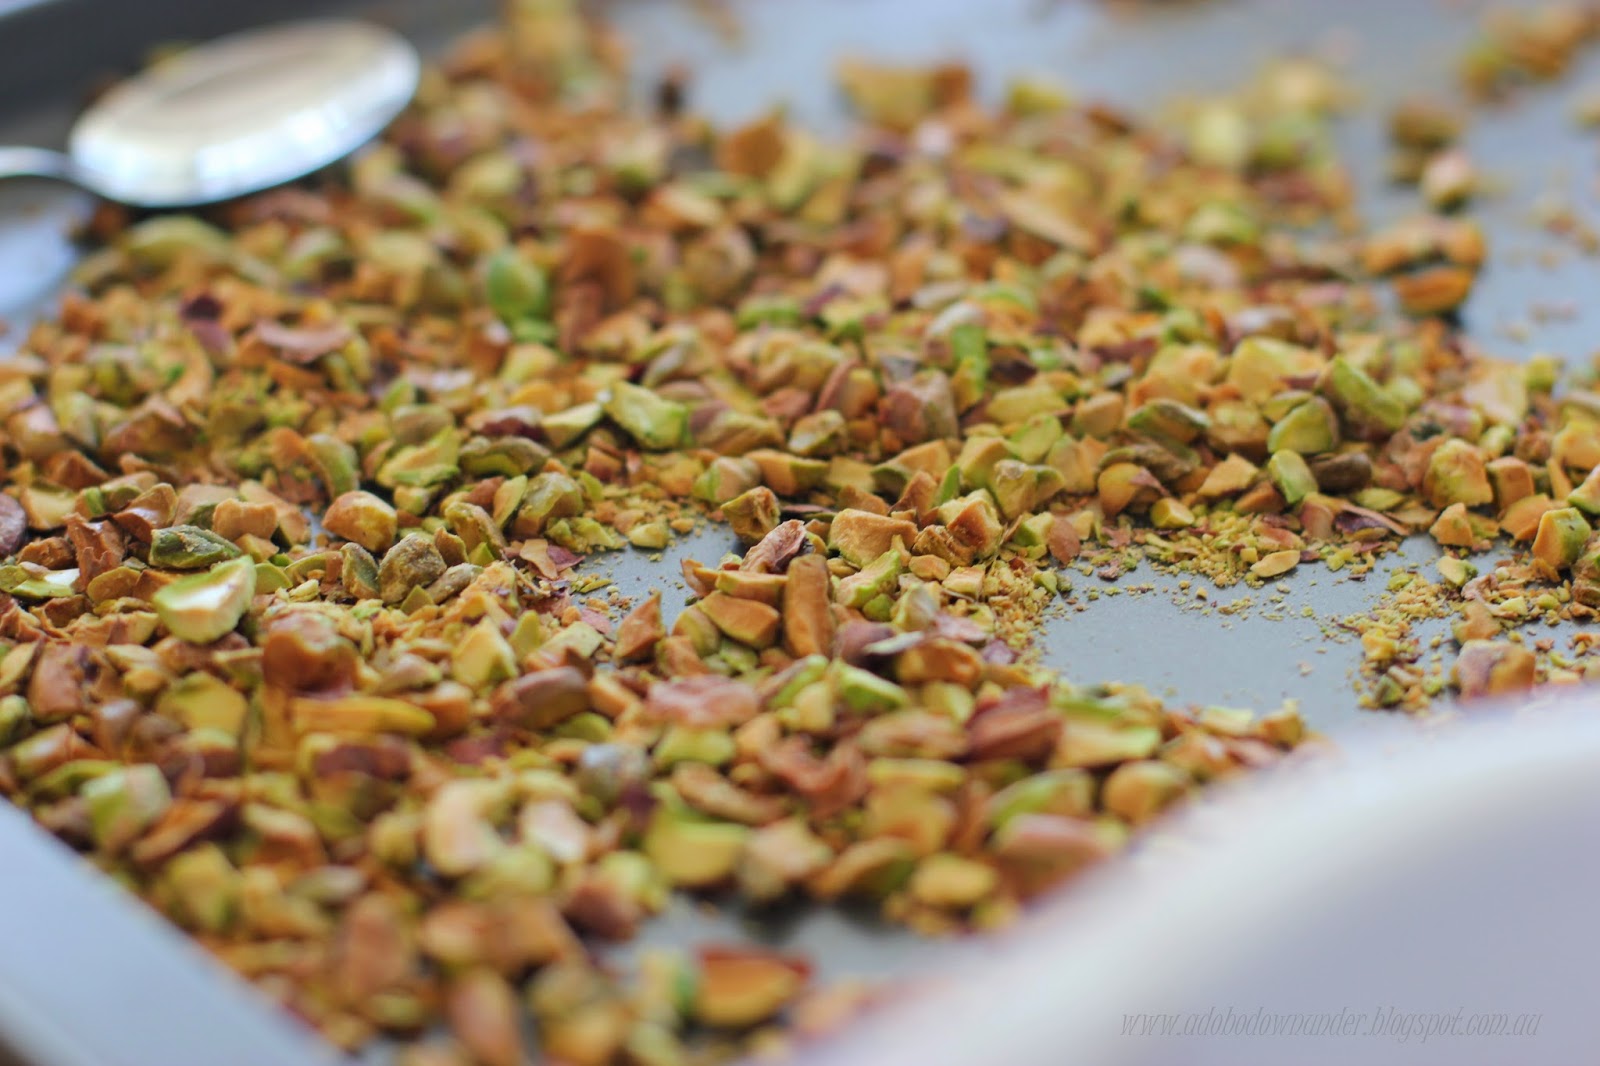
1 cup toasted pistachios, roughly chopped

1 cup creme fraiche or whipped cream


Method

Preheat oven to 180*C

Cut a thin slice from the skin side of the pears to give them a flat surface.

Place the pears onto a shallow baking dish, skin side down.

Drizzle olive oil and the maple syrup onto the pears.

Cover with aluminum foil and bake in the oven for 1 hour.

The pears should be tender when a butter knife inserted comes out smoothly.

Serve with the creme fraiche or thickened cream on the side, and the toasted pistachios.


Tips and tricks:

* The original recipe called for unsalted butter to rub on the pears.  I used olive oil as I brought it for someone who is vegan.

* You can use other pear varieties. Corella pears tend to be tougher than most so it cooks for an hour.  Other pear varieties are tender and may be baked for less than an hour.

* You can make as many or as little as you like, just adjust the maple syrup to your requirements.


Tuesday, July 15, 2014

Seafood marinara stew


Winter is creeping up on us like an unwanted guest. It's the middle of July and of course it is cold.   I have always written many many times in the past that we dread winter. Well I do. Sans the layering of clothing and comfortable matching scarves and beanies, and beautiful leather boots, I could do well without winter.  Really.  But I’m embracing our life here in AU and part of assimilating into the Australian way of life is well, embracing winter and all the other seasons that come and go.  But you have to know that winter... is my least favourite. 


When it comes to winter cooking and food, I love simple recipes.  My favourites are dishes that shout fresh, easy to reach ingredients, simple cooking methods with delicious results.  While I do admire chefs who are into fusion and gastronomy, I’m not the type who would attempt pesto jelly, or strawberry foams.  I like simple cooking.  Time spent in the kitchen is precious, and any effort made to prepare, whether it took 10 minutes or 6 hours always spells love. 


This one, no matter what angle shouts L-O-V-E.  Ingredients are simple, easy to make and wow! It's my easy version of the French seafood boullabaisse, minus all the other ingredients.  The seafood mix is anything you get from the fish markets. 

You dive into this with some toasted sour dough or any fresh bread, and you’ll come back up feeling the love.  You’ll get lots of warm hugs from this for sure. 


 Ingredients:


1kg mixed seafood (marinara mix in shells)


1 jar 350 ml passata sauce (tomato sauce)


3-4 fresh tomatoes, quartered


1 onion, sliced


2-3 cloves garlic, chopped finely


½ cup fresh parsley, roughly chopped


½ teaspoon course/ground oregano

Salt and pepper to taste


Olive oil


Tablespoon of butter (optional)


 Method:


In a heavy based pan or skillet, heat about 2 tablespoons of olive oil.


Add the garlic and onions and cook until soft.


Add the tomatoes and cook until soft.


Add the passata sauce, bring to boil then turn down heat to simmer.


Season with salt and pepper, and sprinkle the oregano.


Add the seafood, place lid/cover and simmer for 10-15 minutes or until all seafood pieces are cooked through.


Add the butter and let it melt into the sauce.  


Top with the chopped parsley.


Tips and tricks:

* I add the butter in the latter part of the cooking just to add that gloss in the sauce.  You don't have to add butter if you don't want to, but that its a secret ingredient in most restaurants - the chefs add that for the shine and gloss.

* You can also add fresh or dried thyme for extra flavour.  They add a rich depth to the stew.


Tuesday, April 01, 2014

Peanut butter cookies with coconut oil (made with homemade peanut butter)


Peanut butter cookies is one of the two things I remember we baked at home, while growing up.  We were not a baking family.  We were more grilling and stove top people.  The other thing we baked at home were pound cakes.  Yes!  And I remember we used Blue Bonnet butter.  US imports into the PI back then which were aplenty.  And pound cakes and peanut butter cookies were a staple in our kitchen.    The most fun out of making the peanut butter cookies were the criss cross patterns which me and my siblings would fight over who should do it.    


These days, with peanut butter overtaken by Nutella in recent years, the girls were not a bit interested with these.  So I had these to myself and my siblings when they came over.


I'd like to say these are healthy because butter is substituted with coconut oil, and we also made our own peanut butter.  So pretty much, we knew what went into these cookies. 


The cookies came out soft and chewy (as we wanted), but you can always make it crunchy.


If you want to make this with your own peanut butter, The Kitchn has the step by step-step easy procedure to make them.  Of you can simly use store-bought peanut butter.


First you will need peanuts.

For our version of this peanut butter, I used salted peanuts because I didn't want to add any more salt while making them.  I also roasted them in the oven first then cooled before making the nut butter.


Then they go into your food processor.  The first pulse gives you a grainy texture of milled or pounded nuts.


The next process gives you a smoother nut butter and almost ready to use.  I just added 2 tablespoons of vegetable oil and it was ready!  Poured into a jar and kept at room temperature.  It lasted for more than two weeks.   But of course, we ate them with warm Filipino pandesal bought from our local Asian grocer immediately.  Taste test for quality, as you do. 


To make the peanut butter, I adapted the recipe from Elise at Simply Recipes.

 
Ingredients:

100 grams caster sugar

125 grams light brown sugar, packed

 1/2 cup creamy peanut butter (store bought or home made)

1/2 cup coconut oil

1 egg

325 grams plain flour

1 teaspoon baking soda

1/2  teaspoon baking powder

1/4 teaspoon salt


Method

In a medium sized bowl, combine the dry ingredients and mix with a whisk.

In the bowl of your stand mixer, beat the coconut oil and sugar until creamy, 2 or more minutes.

Add the peanut butter and eggs and continue beating until light and fluffy.

Add the dry ingredients in 3 batches, continuing to mix with every addition, and until the dough comes off the sides of the bowl. 

Wrap the dough in cling film and refrigerate for 3 hours.

Preheat oven to 175*C.  Prepare a cookie sheet with baking paper or silicone mat.

Shape the dough into rounds, golf ball size.  Place on the prepared pan/cookie sheet 2-3 inches apart.

Flatten the cookies using a fork with a criss cross pattern.

Bake in the oven for 15 minutes for chewy cookies, or until golden.

For crispy cookies, bake in a preheated 180*C oven for 10-12 minutes.


These cookies are not sweet, as I lessened the sugar a little bit, and they were surprisingly good.  There were no coconut flavour or odour which some people dislike when using coconut oil.


Tips and tricks:

* To use coconut oil, it helps when the oil is a little bit solid.  Usually, coconut oil solidifies when the weather is cooler.  If you use liquid coconut oil, it will take longer to beat it until light and fluffy.  To solidify your coconut oil, measure what you need and place it in the fridge overnight, and just take it out an  hour or more before using.  

* The cookies lasts longer than when butter is used.  I tested a few of these, and they kept for two weeks in an air tight container room temperature.


Thursday, January 02, 2014

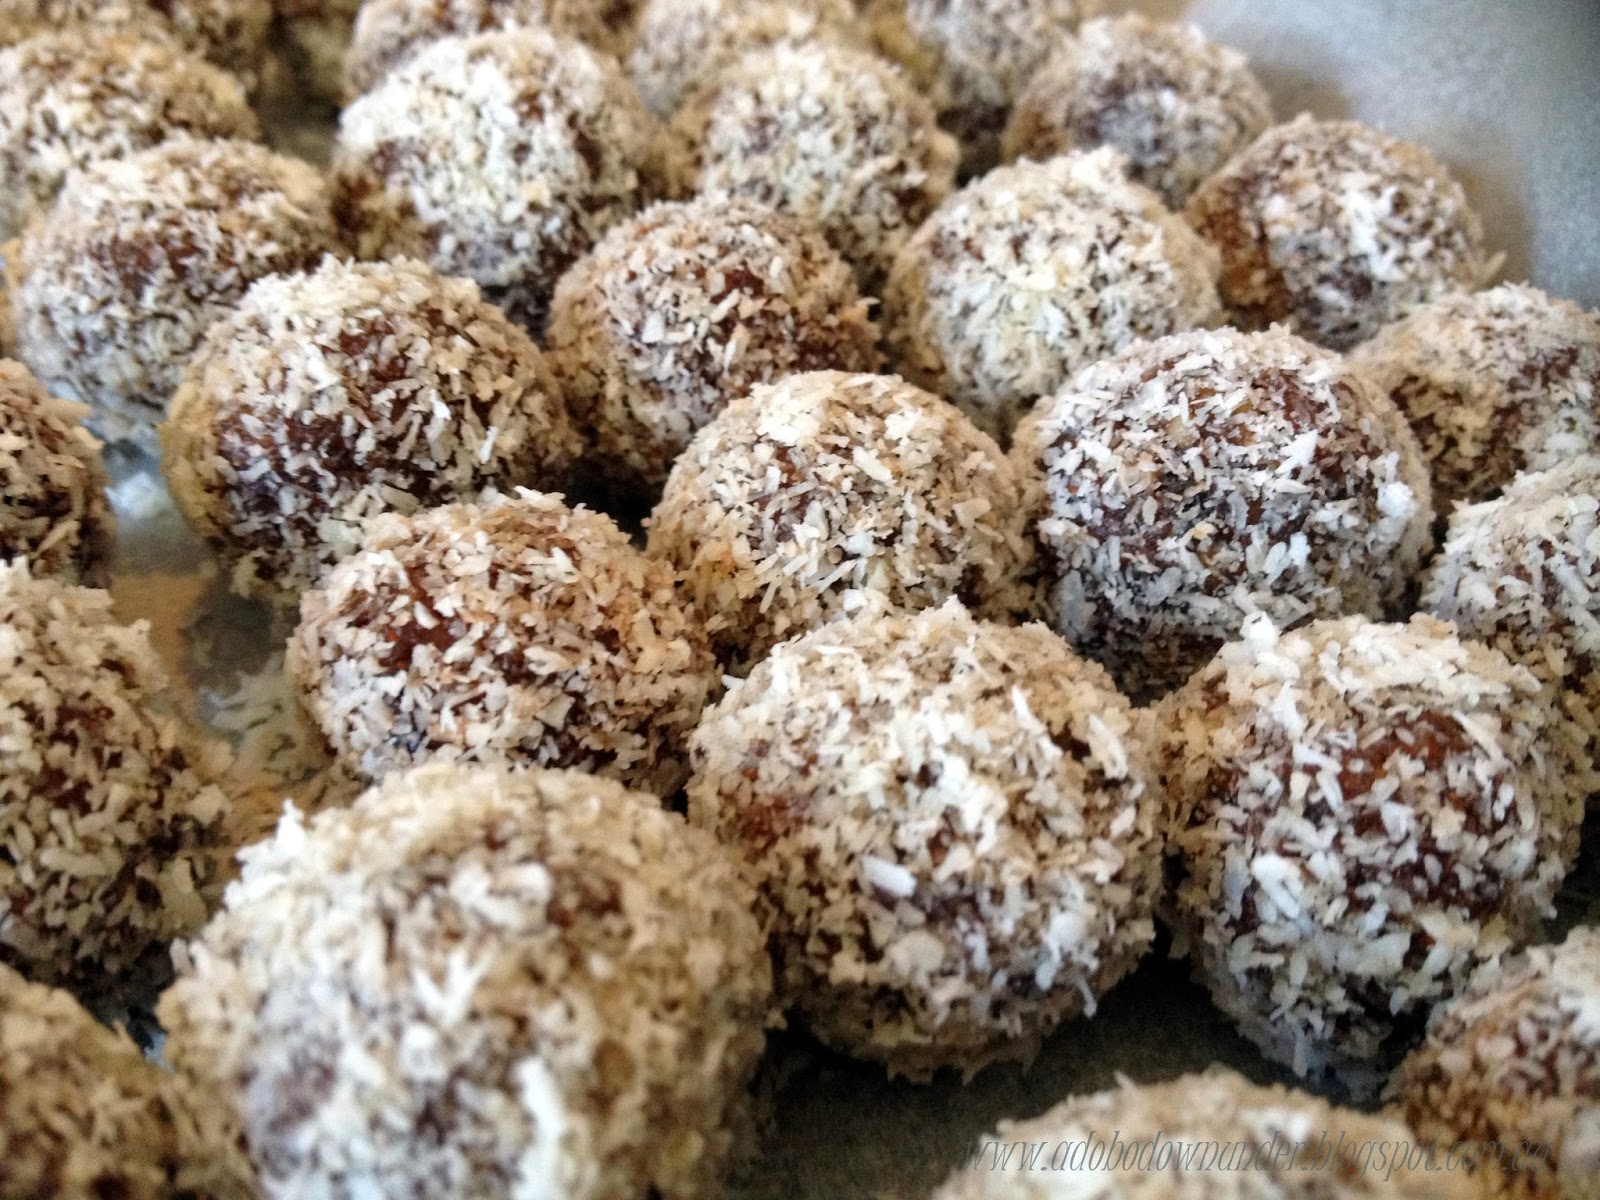
Protein truffles (protein balls)


coated in dessicated coconut


Wow!  How quick was that?!  2013 all done and dusted!  What a year it was!  Had a few bumps and bruises along the way but worth all the lessons learned.


Mid last year, I stopped eating sugar.  Not entirely quitting sugar, but not eating processed sugar. Nothing in my coffee, no cakes, cupcakes...  that kind of thing.  Hard to believe with all the baking I do, but indeed I did.  And I've been off it since.  Ocassionally, I'll nibble on some dark chocolate but that's about it.  It was a decision made entirely out of gut feel and a combination of all sorts of information gathered what I've read mostly.  No scientific or research study conducted.  Just a straight up decision to do so.  Late last year, I also got hooked into kale and making my nutriblasts, thanks to my trusty Nutribullet - a worthy purchase from home TV shopping (don't judge me!).


How can I bake so much sweets and not eat sugar?  Well, when I'm baking sweets, my kids and some very eager taste testers are more than happy to taste them for me - hubby, family, friends.


Anyways. Now this quitting sugar and drinking nutriblasts somehow sparked a good trend in the office.  And an office mate shared this recipe which he got from a local magazine/paper (he was not sure which one, so apologies to the source).  They're healthy balls of deliciousness, and if you're in to the "raw" bandwagon, you will love this one!


And to start the this awesomeness of a year rolling, here's a recipe for protein truffles which were supposed to be an SABH post but did not make it to deadline.  You know how busy December can be.  I made this to give away as Christmas homemade treats, and receivers loved them!  I'm sure you will too!  


coated in cocoa powder


Ingredients


100g walnuts, roughly chopped

100g natural almonds, roughly chopped

2 tablespoons pepitas

170g pitted dates

100g dried apricots

100g pitted prunes

1 tablespoon peanut butter

2 tablespoons cocoa powder

1 tablespoon cinnamon powder

2 tablespoons honey

Pinch of sea salt

100g dessicated coconut, for coating; or

100g cocoa powder, for coating; or

100g melted dark 70% chocolate for coating.


Method

Combine walnuts, almonds and seeds in a food processor and process until you get fine crumbs.

Add the dates, apricots and prunes and process until smooth.

Add the peanut butter, cocoa powder, cinnamon, honey and sea salt and process until the mixture starts to form into a ball.  

Place the protein ball of dough in a bowl and keep in the fridge to chill for half an hour to an hour, to keep it firm.

Prepare three separate bowls for your coating.

Using a teaspoon, scoop a spoon full and then roll in between lightly wet hands.

Roll into any of the chosen coatings (dessicated coconut, cocoa powder or melted dark chocolated).

Keep in an airtight container in the fridge for up to two weeks.

Yield: will depend on how big or small you want the protein balls/truffles to be.


coated in dark chocolate


Now that it's a new year, time to make some resolutions!  Make sure you add these to your regular plan.  It's healthy and delicious, for real!

 
A happy and awesome 2014 to all!  May this year bring you more blessings, peace, wellness and happiness within.


Tuesday, November 26, 2013

Mixed vegetable soba noodles salad with peanut sauce


Traditional Filipino cuisine does not have a lot of fresh vegetable salad dishes in its repertoire.  Most vegetables are cooked in soups or stews, some are steamed and served with a side of dip or some form of chutney or relish.  It's quite surprising because even with the warm tropical climate, cooked vegetables are almost always the only option in most homes across the island.  The reason is that while there are available salad vegetable varieties, they are pricey as they come from the upper north or the south where the climates are cooler.   

Growing up, I can't remember salads serve on the dinner table except for the usual tomato-onion-green mango that comes with a good barbeque, classic salads are only to be had when dining out in restaurants.  


Living in Australia has opened a lot of fresh green doors for me.  My kids are now accustomed to fresh salad and veggies on the table, lettuce in their sandwiches, cucumber slices in their lunch box... the works.  Especially as the season becomes warmer, fresh and cold salads are the best way to serve the day's healthy portions. 


Now the real hero here is the dressing, aka peanut sauce.  The soba noodles add the healthy protein touch.  This recipe is adapted from Pallavi Gupta through Honest Cooking.

To  make this salad just add vegetables which you are keen to eat fresh and raw - cucumbers, lettuce leaves, cherry tomators, grated carrots, slices of capsicum. You can just play around with the quantities.   But for this salad of 4 serves, I used:


Ingredients:

60 grams organic soba Hakubakku brand, cooked according to packet instructions then drained through cold running water.
(I used 2 bundles from the 90g pack)

half capsicum, julienned

6 pieces cherry tomatoes, sliced in two

1 cucumber, sliced

1 carrot, julienned

1 brocolli, stems removed

2 stalks of spring onions, sliced


For the sauce:

1/3 cup smooth peanut butter

1 red chilli, finely diced

1 clove garlic, finely diced

2 tablespoons sweet chilli sauce

2 tablespoons soy sauce

60 ml warm water (or less)

Combine the peanut butter, chilli, garlic, sweet chilli sauce and soy sauce in a bowl and whisk together.  Add the warm water a tablespoon at a time and continue whisking until you get the desired consistency of the sauce.

 Place the cold soba noodles in a large bowl, add the vegetables and toss together.  Drizzle the peanut sauce when serving.

Tips and tips

* You can add as many or as few raw/fresh vegetables in this salad.  Just make sure you slice them thinly (julienned).

* You can make the sauce as thick or as thin as you like, just add (or don't add) warm water as you prefer.  

* I made this a day ahead and it became think in the fridge.  I diluted it with a little bit of warm water and added a few more teaspoons of sweet chilli sauce to suit my taste.  


Perfect for the warm spring weather for a weekday lunch, entree or to accompany hot BBQ on a weekend.

Enjoy!


LinkWithin

Related Posts Plugin for WordPress, Blogger...