Welcome to adobo-down-under!

Musings. Family. Food. Stories. Cooking. Recipes. Eating. A recipe journal. From simple Filipino dishes to challenging recipes and exciting gastronomical failures. This is for my girls to look back on for comfort, memories, laughs, love and lots of food!
Showing posts with label fruits. Show all posts

Friday, August 28, 2015

Lemon and sour cream cake with raspberries


I found a new hobby.  Colouring books!  If you haven’t already noticed, adult colouring books is the trend at the moment and publishing companies are selling them by the millions.  Marketed as therapeutic and anti-stress, colouring books for adults have become hip thanks to social media.  People who are into colouring books posts their creations on social media and it just creates the pull which is making the publishers very happy.


A standard page would take me from an hour to 3 hours, glued to the page instead of watching some TV series on Netflix or browsing on Facebook and Instagram.  While it may be my own form of digital detox, it does deliver its own spell of mindfulness and calmness claims.  Indulging in a new hobby, engrossed with colour pencils sliding across the page, sticking to the lines, mix matching colours onto patterns somehow gives me a sense of fulfillment as I create something visual and beautiful.  I started borrowing colour pencils from the girls, but now that I have my own set, I can colour to my heart’s content.


Although this does not replace my love for cooking, baking and writing, it does give me something to do while waiting for dinner to cook, or the cake to be warm and the cookies to cool.


How about you?  Have you started a new hobby lately?


Now to this cake that is a revisit from the archives.  A lemon yoghurt cake dressed with raspberries.  This is my go to cake recipe when I'm asked to bring a cake.  Why?  Because it's easy as A-B-C, 1-2-3.  No need for a mixer.  Just good ol' fork and little bit of elbow grease.


Ingredients

1 and 3/4 cups sugar

2 eggs

1/2 teaspoon salt

2-3 teaspoon lemon juice

grated rind of 2 lemons

3/4 cup light olive oil

1 cup sour cream

2 cups self-raising flour

1 cup (or more) fresh or frozen raspberries

Icing sugar for dusting (optional)


Method

Preheat oven to 180*C.  Line a round 20cm cake tin with baking paper.

In a mixing bowl, mix rind, oil, eggs and sugar with a fork.

Add remaining ingredients and combine well.

Add the raspberries and stir to distribute around the pan and some to sprinkle on top of the batter.
Pour into cake pans and bake at 180 degrees C for 30 minutes.

Leave to cool on a cooling rack, then turn out onto a plate.  

Dust with icing sugar (if using).


* You can use natural yoghurt or buttermilk as substitute for sour cream and the result will be the same.


Tuesday, September 30, 2014

Baked maple pears with toasted pistachios


No more whingeing around here of being too cold.  We have been blessed with warm air and clear blue skies.  And so I am catching up on some needed writing and blogging as it is the end of September, and we are halfway through to spring.  Spring cleaning at home and the backlog of recipes and photos to post.  

We have revamped our veggie garden as the seedlings planted in winter did not survive and to take the easier route, we bought some ready-to-plant veggies from the local nursery.  Hopefully, there will be some harvest of French beans, eggplants, strawberries, Habanero and birds eye chillies soon.  Our calamansi plant is finally showing some fruits after last year's drought.  This makes me very happy as any Filo would be.


And now catching up on some blog posts, this recipe is the easiest dessert there is that you can bring to any potluck party.  The idea to make this was initially to make it for a vegan at work who was retiring.  And I also brought this to a work birthday lunch and ever since, people have asked for the recipe and they have made it at home with spectacular results.   It's really easy.  I love easy dishes.  Those that you prep and then you just wait for the magic to happen.  Be it a slow braised on the stove, or a baked maple pear in the oven.  You prep it and you wait for an hour.


The recipe is adapted from an old cookbook from my shelves - Marie Clare Fresh + Fast Simply Delicious Healthy Food


To make these baked maple pears

Ingredients:

7 Corella pears, halved and cored*

3 tablespoons real maple syrup

2 tablespoons extra virgin olive oil*

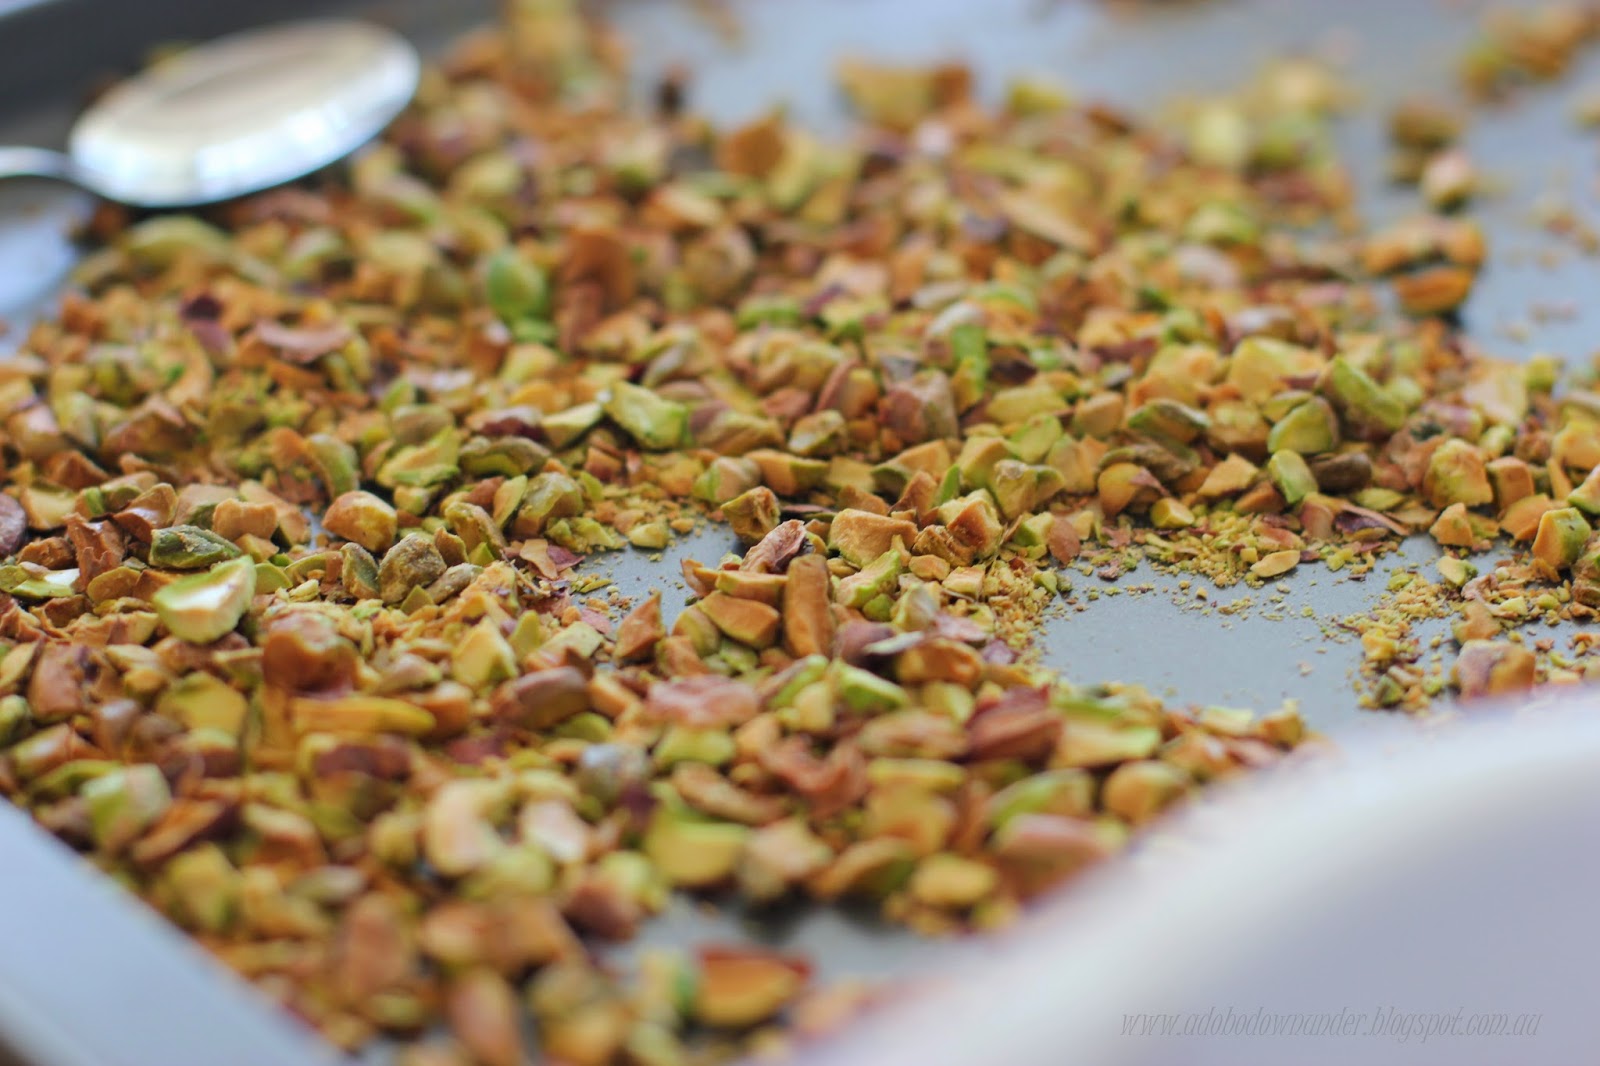
1 cup toasted pistachios, roughly chopped

1 cup creme fraiche or whipped cream


Method

Preheat oven to 180*C

Cut a thin slice from the skin side of the pears to give them a flat surface.

Place the pears onto a shallow baking dish, skin side down.

Drizzle olive oil and the maple syrup onto the pears.

Cover with aluminum foil and bake in the oven for 1 hour.

The pears should be tender when a butter knife inserted comes out smoothly.

Serve with the creme fraiche or thickened cream on the side, and the toasted pistachios.


Tips and tricks:

* The original recipe called for unsalted butter to rub on the pears.  I used olive oil as I brought it for someone who is vegan.

* You can use other pear varieties. Corella pears tend to be tougher than most so it cooks for an hour.  Other pear varieties are tender and may be baked for less than an hour.

* You can make as many or as little as you like, just adjust the maple syrup to your requirements.


Monday, June 30, 2014

Coconut tapioca pudding with red papaya


We have been back from a very brief trip to the Philippines and there’s nothing like a holiday to re-energize the senses.  Especially going back to one’s home country where the familiar is always welcomed, where family and friends are missed and food, oh so craved.


Papaya is one of those easily available year round back home and best eaten as is, usually with a squeeze of the local citrus (calamansi), or lemon/lime.  It’s one of those tropical fruits that I grew up eating and a favourite now at home by the girls.  We’re lucky that Australia has papaya grown locally now. Whatever the variety (red papaya, yellow or pawpaw), they are packed full of A vitamins, potassium and beta-carotene. 


For this quick and easy dessert, morning or afternoon tea, you’ll need:

1 cup small tapioca pearls

2 400ml can coconut milk

1.5 cup caster sugar

½ slice of red papaya, diced squeezed with the juice of half a lime

zest of half a lime

Toasted coconut (optional) for garnish, or drizzled with honey

Cook the tapioca pearls in 10 cups boiling water.  Once the pearls are slightly translucent (there is still a white dot in the middle), turn down heat to low and simmer until the tapioca pearls are cooked – they will be transparent.

Drain onto a strainer with cold water.  Set aside.

In  a pot, boil the coconut milk with sugar, until sugar has dissolved.

Add the cooked tapioca pearls and turn off heat.

These can be served as is, warm.

Or cool slightly, spoon onto small bowls or cups.  

Top with a some diced papaya, toasted coconut (if using) and some lime zest. 


Tips and tricks:
* Because the tapioca is starchy, draining the cooked pearls in cold water will removed some of that starch.  It will however help thicken the pudding, so don't over wash the pearls.


Disclaimer: This post is written as part of the Papaya Australia recipe challenge.  The papaya used in this post were provided by Papaya Australia. 
 

Monday, January 20, 2014

Peaches, strawberry and orange popsicles


It’s been scorching in Sydney and all across Australia as the heat surges to its 40s.  Adelaide was just declared the hottest city in the planet last week as temperatures soared to 46.5* and the tennis players at the Australian Open can’t escape from what is summer in Australia.   I’m not complaining though.  I love summer and everything that goes with it – Australian flies and all. 


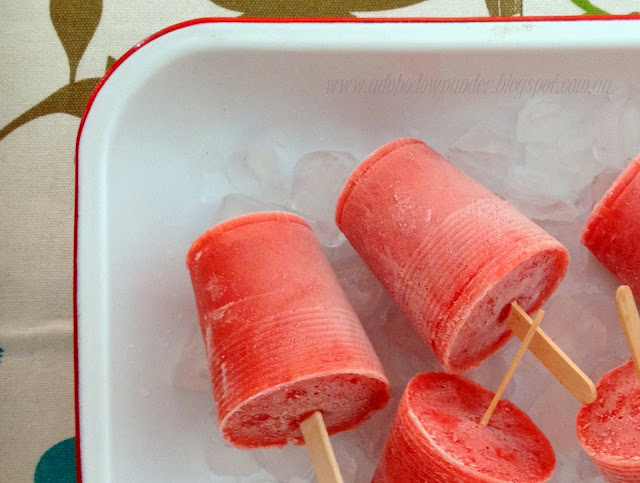
It's summer and stone fruits are a plenty!  Sometimes I get overly excited at my local fruit and veg shop and just buy buckets load.  Sadly, with the heat most fruits soften quickly than normal at room temperature.  So some of these were put to great use - home made fruit pops or popsicles.  They're healthy, all natural and great to combat sweet cravings in the summer heat.


And a big thanks to Swah for hosting this month's Sweet Adventures Blog Hop!  Check out her elegant white tea, pomegranate and mint popsicles!  


To make these popsicles, we used plastic cups and wooden disposable forks.

4 peaches, pits removed
250g strawberries, hulled
juice of 4 valencia oranges
1-2 cups water

Using a blender, mix/process the fruits then add the orange juice slowly.  Add the water as much or as little as you want.   We used all 2 cups.

Pour into small plastic cups.  Then place in the freezer for 30 minutes.  When the popsicles are slightly firm, place wooden disposable popsicle sticks or wooden disposable forks.

Freezer overnight or for at least 6 hours.

Enjoy!


These popsicles definitely brought out the party mood in our home. 


Thursday, January 02, 2014

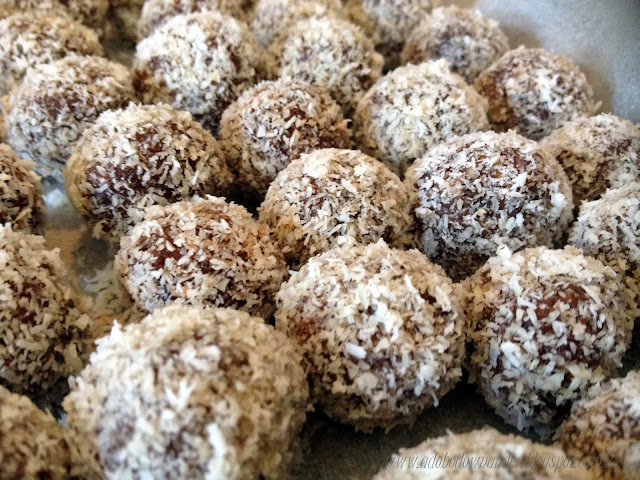
Protein truffles (protein balls)


coated in dessicated coconut


Wow!  How quick was that?!  2013 all done and dusted!  What a year it was!  Had a few bumps and bruises along the way but worth all the lessons learned.


Mid last year, I stopped eating sugar.  Not entirely quitting sugar, but not eating processed sugar. Nothing in my coffee, no cakes, cupcakes...  that kind of thing.  Hard to believe with all the baking I do, but indeed I did.  And I've been off it since.  Ocassionally, I'll nibble on some dark chocolate but that's about it.  It was a decision made entirely out of gut feel and a combination of all sorts of information gathered what I've read mostly.  No scientific or research study conducted.  Just a straight up decision to do so.  Late last year, I also got hooked into kale and making my nutriblasts, thanks to my trusty Nutribullet - a worthy purchase from home TV shopping (don't judge me!).


How can I bake so much sweets and not eat sugar?  Well, when I'm baking sweets, my kids and some very eager taste testers are more than happy to taste them for me - hubby, family, friends.


Anyways. Now this quitting sugar and drinking nutriblasts somehow sparked a good trend in the office.  And an office mate shared this recipe which he got from a local magazine/paper (he was not sure which one, so apologies to the source).  They're healthy balls of deliciousness, and if you're in to the "raw" bandwagon, you will love this one!


And to start the this awesomeness of a year rolling, here's a recipe for protein truffles which were supposed to be an SABH post but did not make it to deadline.  You know how busy December can be.  I made this to give away as Christmas homemade treats, and receivers loved them!  I'm sure you will too!  


coated in cocoa powder


Ingredients


100g walnuts, roughly chopped

100g natural almonds, roughly chopped

2 tablespoons pepitas

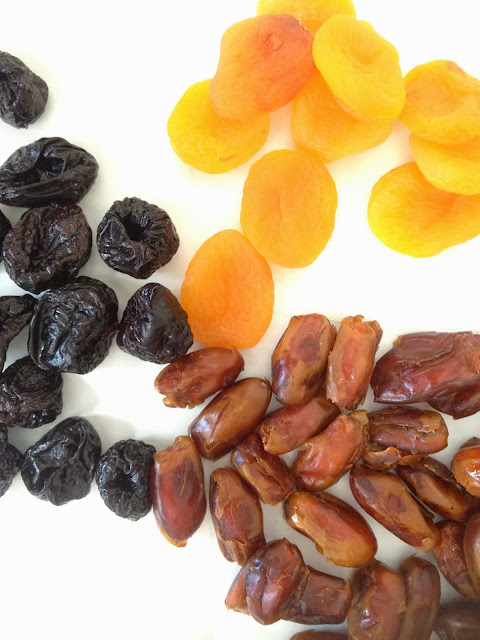
170g pitted dates

100g dried apricots

100g pitted prunes

1 tablespoon peanut butter

2 tablespoons cocoa powder

1 tablespoon cinnamon powder

2 tablespoons honey

Pinch of sea salt

100g dessicated coconut, for coating; or

100g cocoa powder, for coating; or

100g melted dark 70% chocolate for coating.


Method

Combine walnuts, almonds and seeds in a food processor and process until you get fine crumbs.

Add the dates, apricots and prunes and process until smooth.

Add the peanut butter, cocoa powder, cinnamon, honey and sea salt and process until the mixture starts to form into a ball.  

Place the protein ball of dough in a bowl and keep in the fridge to chill for half an hour to an hour, to keep it firm.

Prepare three separate bowls for your coating.

Using a teaspoon, scoop a spoon full and then roll in between lightly wet hands.

Roll into any of the chosen coatings (dessicated coconut, cocoa powder or melted dark chocolated).

Keep in an airtight container in the fridge for up to two weeks.

Yield: will depend on how big or small you want the protein balls/truffles to be.


coated in dark chocolate


Now that it's a new year, time to make some resolutions!  Make sure you add these to your regular plan.  It's healthy and delicious, for real!

 
A happy and awesome 2014 to all!  May this year bring you more blessings, peace, wellness and happiness within.


Wednesday, September 25, 2013

Avocado ice cream

Spring is here and it's been wonderfully warm.   I guess we are lucky as winter was not that cold and now spring is a tad bit higher in the temperature scale.  It did soar up to 41*C last year in the summer, so we can expect another scorching HOT summer down under.  I don't mind HOT, just as long as bushfires are contained and everyone exercises caution - you know. Slip-Slop-Slap


And as the warm days come, its time to share this ice cream recipe found from a local supermarket magazine.  Its easy, no need for an ice cream maker.  And it has a touch of tropical in it with the addition of coconut milk and its egg free too.  Australian avocados are abundant at the moment at my local green grocer and they're beautiful! Nice and clean on the inside and the seeds are just the right size so you get a good portion of avocado flesh.  I won a tray of these yummy goodies a couple of weeks back which I shard on IG.  I made lots of savoury dishes with it but not a sweet one.   


In Asia, avocados are actually used mostly for sweets - in fruit shakes mostly and in ice cream.  Besides the classic guacamole, it was only in Oz that I adopted the habit of adding it to savoury dishes like chicken or salmon to prepare a sandwich or eating as is with just pepper or salt, not the usual mashed with milk and sugar.   In the Philippines alone, avocados are eaten as a dessert. 


To make this yummy avocado ice cream:

Ingredients:

3 medium avocados

2 tablespoons lemon juice

1 395g can of condensed milk

1 270ml can of coconut milk

1 teaspoon vanilla extract

toasted nuts to serve


Scoop avocado flesh and spoon into food processor with lemon juice.  Process until smooth.

Add condensed milk, coconut milk and vanilla and continue to process until mixed thoroughly.

Pour into an air tight container and place in the freezer until slightly frozen, about 2-3 hours.

Spoon everything back into food processor and process again until smooth.

Place into air tight containers and freeze until ready to eat.

Thaw for at least 10-15 minutes before serving.

To serve, add some toasted nuts (pistachios or almonds work nicely).


Tips:

* The lemon is important as it helps the avocado retain its green colour and not turn brown.

* After 3 hours in the freezer, the avocado ice cream will be a little bit icy but not yet frozen.  It's important process them again to get the creamy texture result.

* When ready to serve, depending on the weather and the season, thaw the avocado 10-15 minutes before serving.  Then top with toasted nuts.


Saturday, June 22, 2013

Mango hazelnut torte


It's halfway through to winter in this part of the Southern Hemisphere, and I'm dreaming of tropical places. I miss my home country during this time especially when family and friends have just gone back from their summer outings and post drool-worthy photos online.  Sigh. 


Personally, the only upside of winter is wearing boots, scarfs and jackets.  I just love wearing them.  And since I come from the tropics, winters always leave me cold even with the slightest dip in temperature.  I'd be walking around with the complete package while some people in the shops are simply wearing T-shirts and thongs.  Seriously. It's winter people!  Gear up!  I found this article in the SMH back in May which I support completely.  Dress for the winter cold!


And while some of us can only dream of warm sunny skies and tropical escapes, here's a summer inspiration for those in the Northern Hemisphere who have access to some fresh ripe mangoes at this time.  And if you're really keen, keep this somewhere and make it when its summer at your place.  


This is a mango torte that's famous in the Philippines.  You'd see these at specialty cake shops like Dulcelin Gourmet and  Cuerva Bakeshop among a few. Original mango tortes sold in Manila are made of a cashew-meringue base and topped with buttercream.  I made this version very light using creme chantilly (whipped cream with icing sugar) spread around the base and piped in between the mango balls, instead of a basic buttercream.  The base is a recipe for a classic dacqouise which I made for my version of the sans rival for the Sweet Adventures Blog Hop in March last year, but substituted the almond meal with hazelnut meal.


Whip egg whites to stiffness.  A beautiful sight!


Fold through the 110g ground hazelnut (hazelnut meal)


Pipe two 20cm rounds onto a baking sheet with baking paper.  Left overs are piped into small rounds, for sampling and testing.  Bake at 100*C for 1 hour and 15 minutes.  


Mangoes are scooped with a melon baller.  Sweet!


They look really fancy, schmancy....


To make this hazelnut torte, you'll need:

3-4 fresh mangoes


Using a melon baller, scoop out balls from fresh mangoes and set aside.

Assemble the torte.

Place your dacquoise on a round tray.  Spread some creme chantilly on top, then layer the other round dacquoise and spread some more creme chantilly.

Place the mango balls on the top.

Using a piping bag with star tip, pipe the creme chatilly in between the mango balls and around the torte.

Serve immediately.


Tips:
* If you can make the base as thin as you can, the crispier and crunchier it will be as a base. Make sure to keep the dacqoise in an airtight container when making a day ahead.

* Because this is a meringue-nut base torte, using whipped cream for the topping will moisten the base so it's advisable to assemble the cake a few minutes before serving. Otherwise, susbtitute the topping with your favourite buttercream recipe.

* When making creme chantilly (or whipped cream), make sure your mixing bowl is cold.  Keep it in the fridge for half an hour before you start whipping.  You can add as much icing sugar as you want (I usually just use 25 grams - not too sweet).  You can also opt not to flavour the whipped cream with vanilla.  Its up to you.


PS - I have made this recipe many times during the summer but have only recently been able to clean up photos and files.  Been fighting the monkey mind mode for some time.  Thanks to Chari-G from My Glory Box for the inspiration and pushing me once in awhile from my lazy mode.  xx


LinkWithin

Related Posts Plugin for WordPress, Blogger...