Welcome to adobo-down-under!

Musings. Family. Food. Stories. Cooking. Recipes. Eating. A recipe journal. From simple Filipino dishes to challenging recipes and exciting gastronomical failures. This is for my girls to look back on for comfort, memories, laughs, love and lots of food!
Showing posts with label no bake. Show all posts

Thursday, January 02, 2014

Protein truffles (protein balls)


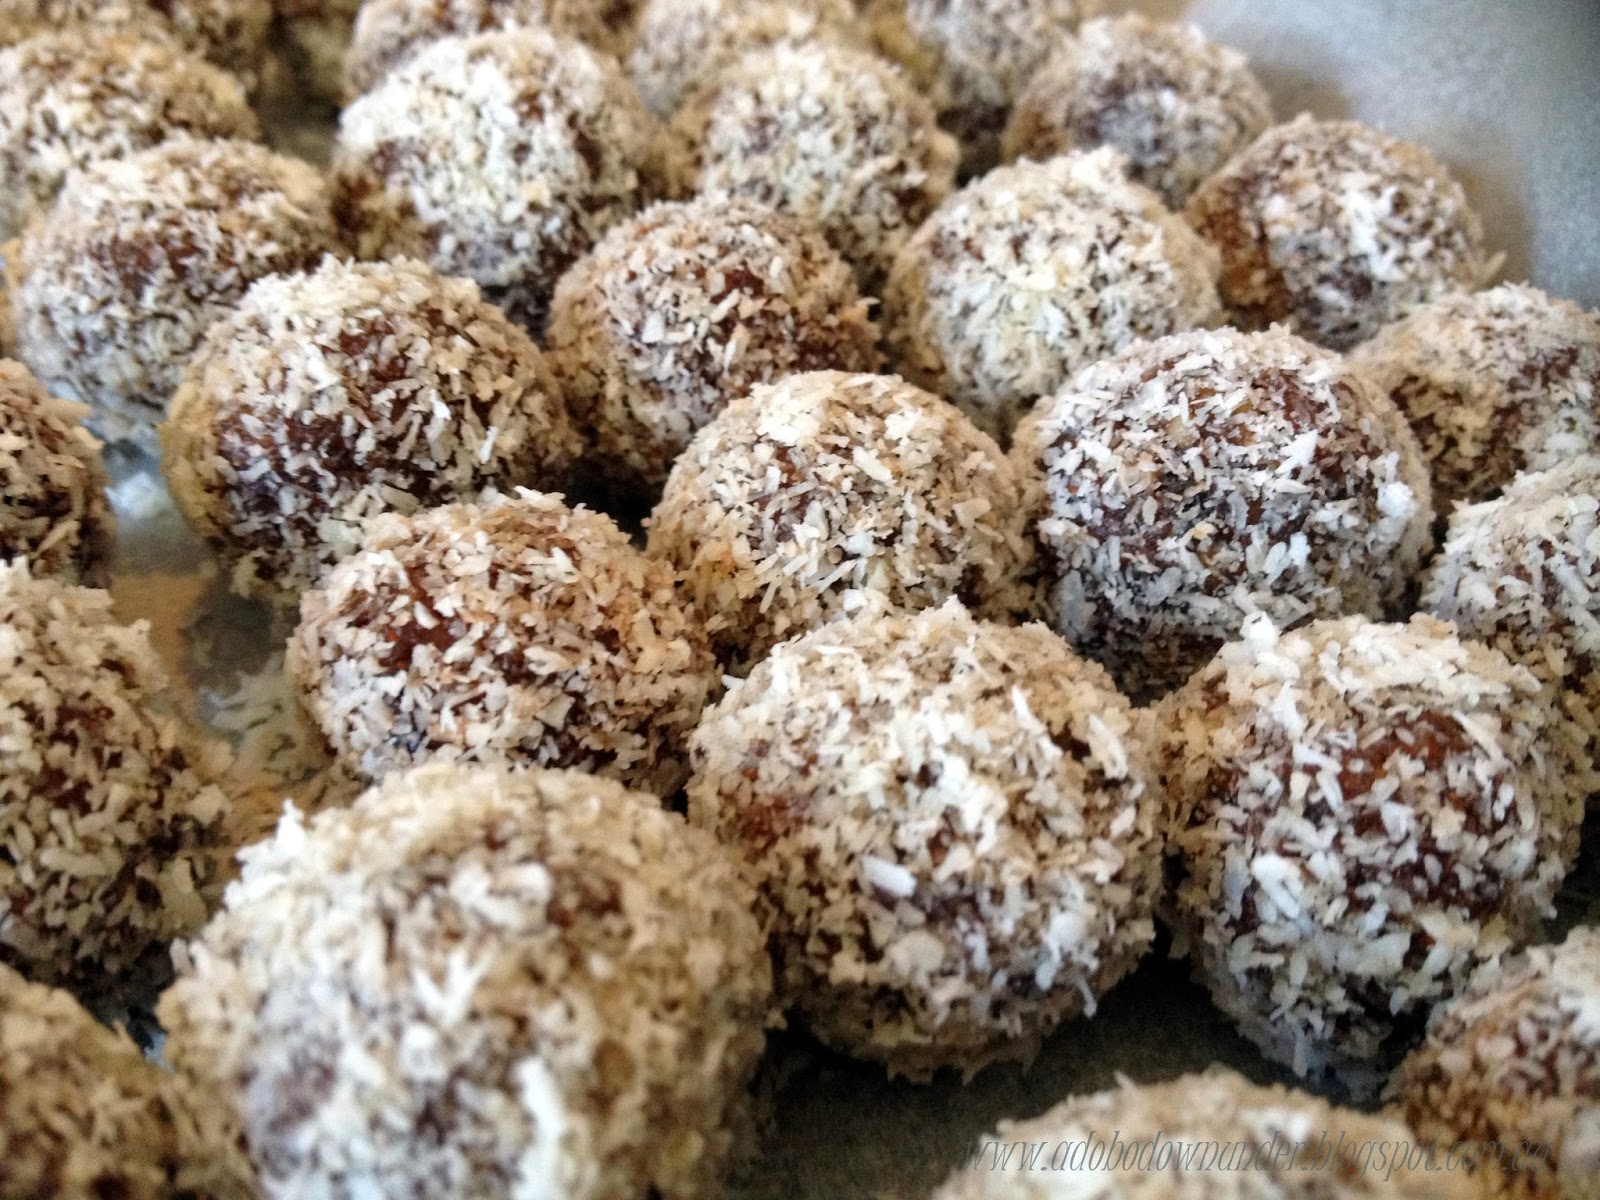
coated in dessicated coconut


Wow!  How quick was that?!  2013 all done and dusted!  What a year it was!  Had a few bumps and bruises along the way but worth all the lessons learned.


Mid last year, I stopped eating sugar.  Not entirely quitting sugar, but not eating processed sugar. Nothing in my coffee, no cakes, cupcakes...  that kind of thing.  Hard to believe with all the baking I do, but indeed I did.  And I've been off it since.  Ocassionally, I'll nibble on some dark chocolate but that's about it.  It was a decision made entirely out of gut feel and a combination of all sorts of information gathered what I've read mostly.  No scientific or research study conducted.  Just a straight up decision to do so.  Late last year, I also got hooked into kale and making my nutriblasts, thanks to my trusty Nutribullet - a worthy purchase from home TV shopping (don't judge me!).


How can I bake so much sweets and not eat sugar?  Well, when I'm baking sweets, my kids and some very eager taste testers are more than happy to taste them for me - hubby, family, friends.


Anyways. Now this quitting sugar and drinking nutriblasts somehow sparked a good trend in the office.  And an office mate shared this recipe which he got from a local magazine/paper (he was not sure which one, so apologies to the source).  They're healthy balls of deliciousness, and if you're in to the "raw" bandwagon, you will love this one!


And to start the this awesomeness of a year rolling, here's a recipe for protein truffles which were supposed to be an SABH post but did not make it to deadline.  You know how busy December can be.  I made this to give away as Christmas homemade treats, and receivers loved them!  I'm sure you will too!  


coated in cocoa powder


Ingredients


100g walnuts, roughly chopped

100g natural almonds, roughly chopped

2 tablespoons pepitas

170g pitted dates

100g dried apricots

100g pitted prunes

1 tablespoon peanut butter

2 tablespoons cocoa powder

1 tablespoon cinnamon powder

2 tablespoons honey

Pinch of sea salt

100g dessicated coconut, for coating; or

100g cocoa powder, for coating; or

100g melted dark 70% chocolate for coating.


Method

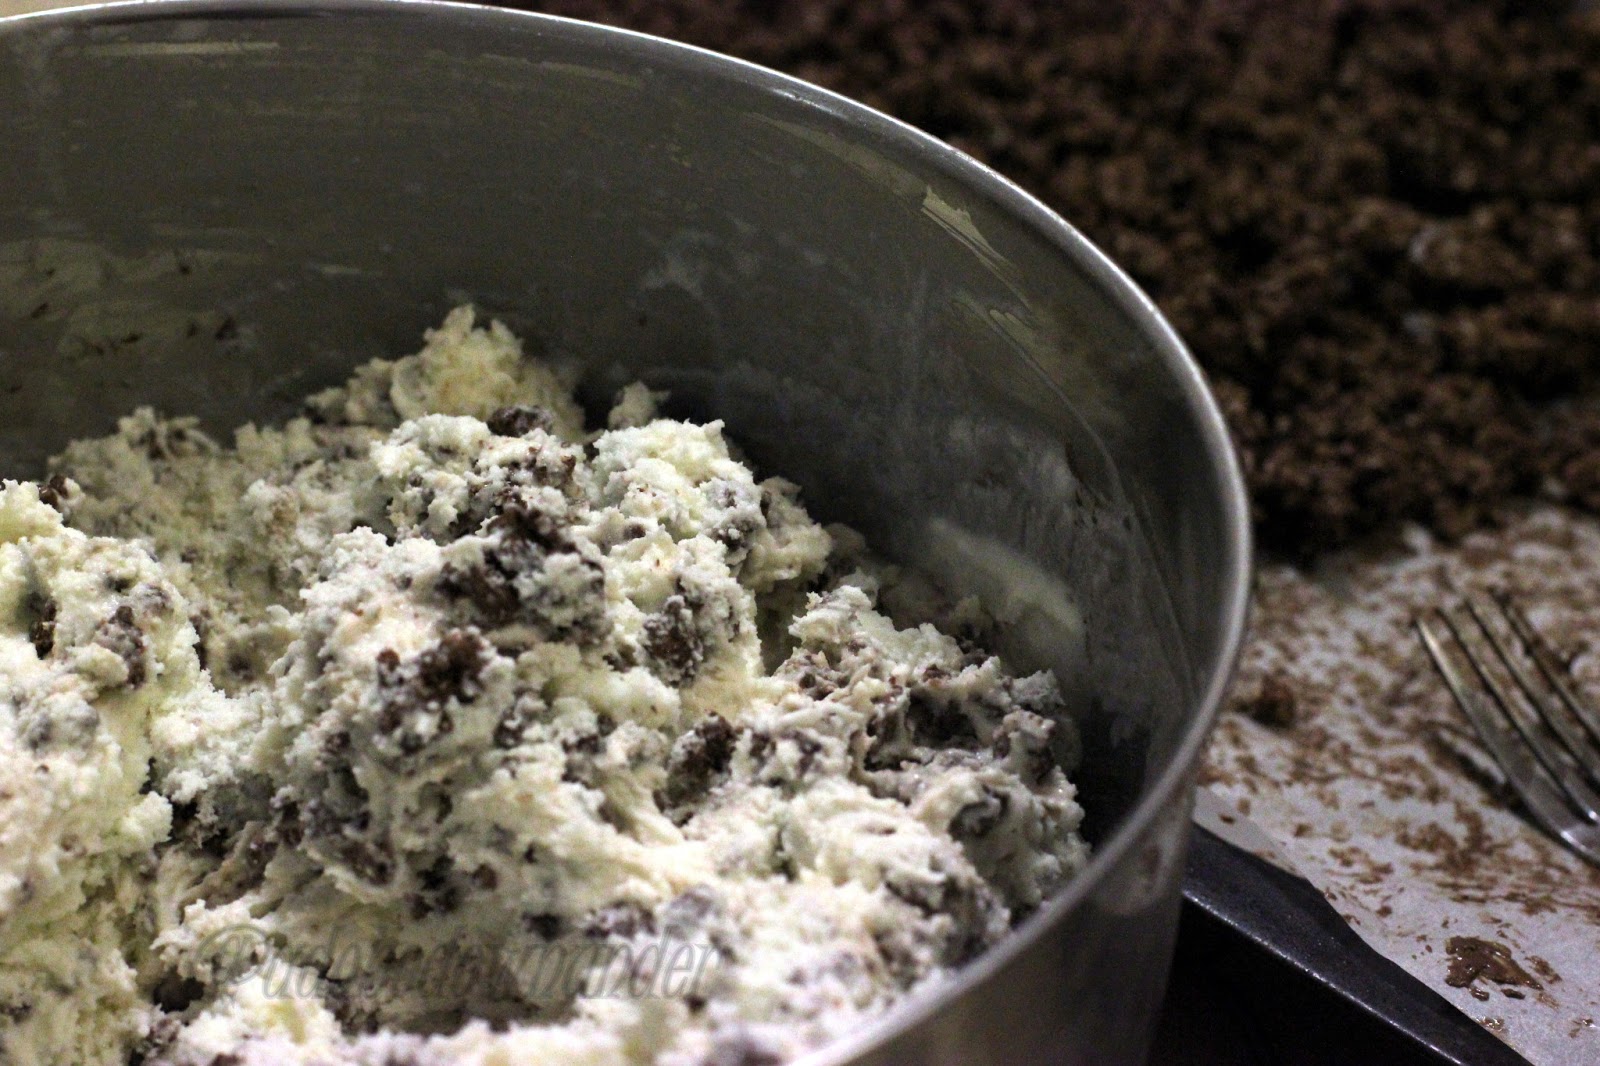
Combine walnuts, almonds and seeds in a food processor and process until you get fine crumbs.

Add the dates, apricots and prunes and process until smooth.

Add the peanut butter, cocoa powder, cinnamon, honey and sea salt and process until the mixture starts to form into a ball.  

Place the protein ball of dough in a bowl and keep in the fridge to chill for half an hour to an hour, to keep it firm.

Prepare three separate bowls for your coating.

Using a teaspoon, scoop a spoon full and then roll in between lightly wet hands.

Roll into any of the chosen coatings (dessicated coconut, cocoa powder or melted dark chocolated).

Keep in an airtight container in the fridge for up to two weeks.

Yield: will depend on how big or small you want the protein balls/truffles to be.


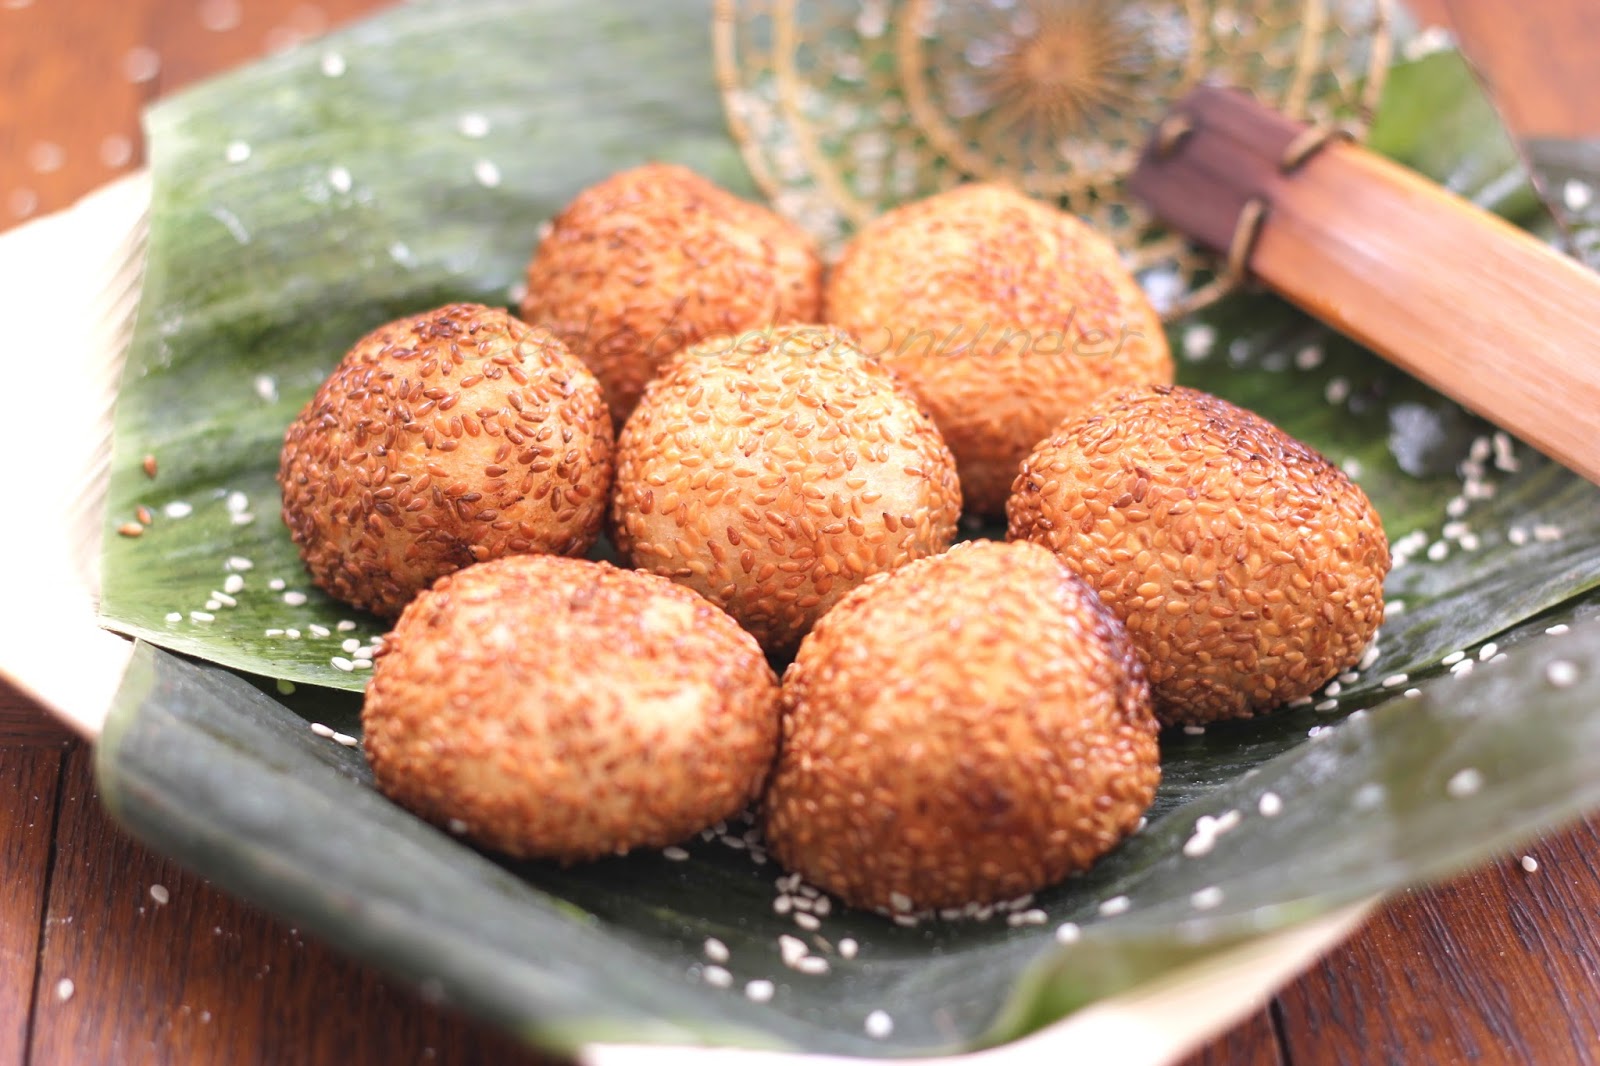
coated in dark chocolate


Now that it's a new year, time to make some resolutions!  Make sure you add these to your regular plan.  It's healthy and delicious, for real!

 
A happy and awesome 2014 to all!  May this year bring you more blessings, peace, wellness and happiness within.


Sunday, June 23, 2013

Deep fried buchi (sesame balls) with purple yam filling


There's a lot of fried foods out there.  And I mean the unconventional types - not the usual foods that one would deep fry at home.  Thanks to the influence of modern fast food cuisines, we've had a lot of deep fried trends pushing through the boundaries of health conscious folks.  There's deep fried hamburgers, deep fried butter, deep fried coke, deep fried ice cream to name a few.


Filipinos have a lot of fried foods.  Sweets included.  There's banana-cue or banana fritters, camote-cue or toffeed sweet potato.  I guess because the frying pan is one of the cheapest and most accessible cooking tool.  For a country like the Philippines, where the availability of ovens in homes is not common, the frying pan is an important cooking gadget - where one can stir, fry and even steam.   And its simple to use - just to pull out a pan, turn on the heat and fry away.  Street food around Manila consists of mostly fried food.  And this is one of those.  Called "buchi" in Tagalog, it is very similar to the Chinese yum cha sweet sesame seed balls.  In the Philippines, these are usually sold stuffed with sweet mung bean paste and sometimes without the filling, called the "karioka".


For this month's Sweet Adventures Blog Hop theme of From the Fying Pan hosted by The Capers of the Kitchen Crusader, I am sharing this Filipino recipe which we love at home.  A simple deep fried sweet dessert or snack treat, consisting of 3 main ingredients: glutinous rice flour, sesame seeds and store bought purple yam jam (ube jam). If you want to take the longer route, you can always make your own sweet red or mung bean paste for the filling.


Glutinous rice flour or sticky rice flour, sesame seeds and purple yam jam can be bought from your local Asian grocer or Filipino shops


Mix together 3 cups glutinous rice flour, 85 grams caster sugar and 250ml water to make a dough.  The dough should be a little bit moist but not too wet.


To make this deep fried buchi (sesame balls), you will need:

3 cups glutinous rice flour

85 grams caster sugar

250ml water

1 cup purple yam jam (or any preferred filling)

1 cup sesame seeds

250ml vegetable oil or more for frying


Using a large bowl, combine the flour, sugar and water and mix with your hands thoroughly to make a dough.

Place the sesame seeds in a separate small bowl. Set aside. 

Divide the dough into 20 round balls or more if you intend to make smaller treats.

Using a rolling pin, flatten one ball then scoop a teaspoon of your filling into the disc.

Put the edges together and shape it back into round balls with your hands.

Roll the stuffed balls into the sesame seeds.

Repeat for all the dough.  

Prepare a deep skillet and heat with about a cup of vegetable oil.

Once the oil is hot, slowly drop the buchi balls into the hot oil and cook until golden.  

Scoop out with a spider (in picture) or a slotted spoon.

Drain on paper towels.


Tips:

* The thinner you can flatten the dough, the more filling you can put in the buchi balls.

* When cooked, the dough should have a translucent colour and a little bit elastic.  If the cooked dough is still white, it's not yet fully cooked.

* The oil should not be too hot as it will burn the outside but leave the inside dough still uncooked.

* Be careful when deep frying. A deeper pot is advisable, if you don't have a deep fryer.

* You can opt not to fill the buchi balls with anything.  Simply make smaller rounds or flatten them before rolling in sesame seeds then deep fry.

* You can buy sweet red bean paste from Asian shops or you can also make your own homemade paste filling. The Beancounter has a recipe here.


These are the un-stuffed buchi balls which the kids love to eat - no stuffing for them.  Simple and sweet!


Friday, June 14, 2013

Nutella crunch ice cream cake


That moment as a parent, when your kids turn into teenagers is when you try and pull the reigns a little.  An invisible one.  Tighten it up a little bit.  I guess its every bit exciting and daunting to have kids enter that phase.  You know when they start being independent, going out with friends without you.  There's that knot in my stomach everytime my teen is out with friends - at the movies, at the mall, at sleepovers.  There's always that unnecessary paranoia.  It gets animated, so I'm not going to have to tell you the details.  The ups and downs of understanding the hormonal changes in girl teens can be exhausting.  Its like a roller coaster ride.  One moment, high pitched and excited.  Then the next thing you know, there's some drama happening.  But then there are also those cuddles and hugs and kisses just because.  That's when I know she's still my baby.   


My daughter turned 16 recently.  A milestone number.  We hosted a sleepover party for 10 teen girls which can be listed in our "craziest things you've done" list.  Of course I lost some needed sleep that night.  More worried about our next door neighbour's sanity than mine, but we survived.  And here's a revelation. Girls eat as much as the next boy.  A bucket of KFC, mountains of chips and gravy and 2 large pizzas was dinner.  With breakfast, we made sure there's enough eggs and bacon for everyone.  Lunch onwards was a small backyard barbecue with close mates and family and friends.  A simple celebration that of course,  required cake.   She requested ice cream cake.  And this was a Pinterest-find.  And this was perfect - all her favourite things.  Nutella, rice bubbles and vanilla ice cream!  This recipe is adapted from A Family Feast.


Taken with my iPhone.  The photo's a bit blurry.  And the ice cream at melting point!

This is an easy cake to make.  Its got that crunch like a cookies and cream ice cream.  As it is winter in Sydney, the cake held itself up longer (20 minutes taken out of the fridge before slicing).  


To make this easy-peasy yummy ice cream cake:

3 litres vanilla ice cream

2 cups Nutella hazelnut spread

6 cups rice bubbles


Line one or two cookie sheets with baking paper.

In a large non stick skillet and on low heat, melt the Nutella then add the rice bubbles.

Mix thoroughly with a silicone spatula making sure all the rice bubbles are covered in Nutella.  

Spoon the Nutella rice bubbles onto the cookie sheet/s and spread evenly.  

Let it cool for 15 mintues at room temperature, then place in the freezer to chill further.


While the Nutella rice bubbles is cooling, bring your ice cream out from the freezer to thaw.  The ice cream needs to be soft, but not melting.

Prepare a 23 cm spring form cake pan/tin.  Spray the sides a little canola oil and line with baking paper.  This will make it easier to loosen the frozen cake from the tin when serving.

Once the Nutella rice bubbles have hardened (not frozen), use a knife and fork to separate them into small nuggets.

Using a large mixing bowl, place softened ice cream and mix with half of the chilled Nutella crunch. Use a spatula and mix thoroughly so that the Nutella crunch is evenly scattered within the ice cream.


Spoon the ice cream into your prepared pan, pack firmly and smooth the top with a spoon.

Scatter the remaining Nutella crunch on the top of the ice cream cake. Using the back of large spoon or spatula, smooth the crunch on top of the cake.

Freeze for 4-6 hours or overnight.

Take the ice cream from the freezer to thaw 10-15 minutes before serving.  Run a butter knife around the sides of the pan to loosen the cake.  Remove the sides of the pan then remove the baking paper.

Before serving, run the knife through hot water in the tap, then wipe dry with a kitchen towel.  Then slice into portions. 


Aah teenhood. It's always "Wow!" in all manner of emotions.  And we're only up to our oldest.  We still have our three younger ones to go through.   

And now that she's 16, she declares she wants to take her L's.

Someone please pass me some wine.


Tuesday, May 21, 2013

Peanut butter choc-chip cookie dough bites


"Think what a better world it would be if we all, the whole world, had cookies and milk at about 3 o'clock in the afternoon and then lay down on our blankets for a nap." - Barbara Jordan


That would be a great idea, right?  I mean imagine, the whole world - politicians, world leaders, miners, teachers... everyone, would actually sit down at 3 o'clock in the afternoon, have some cookies and milk and take a nap!  Imagine what it would be like!  It would be WOW!  There's be some giggling, and laughing and for a few minutes each day, there'd be harmony and peace.  Really!  


I've read about that quote by American politician and leader of the Civics Rights Movement Barbara Charline Jordan in the book by one of my favourite authors Robert Fulghum in his book All I Really Need to Know I Learned in Kindergarten. It's one of those staright-forward-simple books that inspires and makes you laugh and think a little.  I've quoted this book many times in previous posts, including this here.   And writing this post, I am once again drawn back to it.  If you haven't had the chance to read it, go get yourself a copy and read on!  I promise you, you'll sit back and smile at every page.


Now back to the order of things.  This month's theme at the Sweet Adventures Blog Hop is hosted by the lovely Nic from Dining with a Stud.  She's come up with a real challenge of sweets without heat. Check out her raw chocolate ganache tart - with a surprise ingredient!   The pictures are so drool-worthy!


Initially I thought there's no way I can make anything sweet without heat - but then I remembered when cookie doughs became a hit a few years back.  Maybe an onset from Ben & Jerry's ice cream flavour combinations.  Who knows.   But I first saw them from Joy the Baker , bookmarked and never really got the chance to try.  Recently though, I've been back on the Pinterest arena and once again hooked on pinning and browsing, with lots of hours wasted (?) bookmarking and planning stuff to do.  And so this post is inspired by a Pinterest-find from the Disney Family.com site - cookie dough bites.  


To make these peanut-butter-chocolate-chip-cookie-dough bites:

125g unsalted butter, softened

3/4 cup packed light brown sugar

1 tsp vanilla extract

1/4 teaspoon salt

1 cup flour

1 tablespoon peanut butter

1 cup bittersweet/dark chocolate chips


Method

In a large mixing bowl, cream together sugar and butter until pale.

Add the flour, vanilla, salt and peanut butter and continue to beat until everything is incorporated.

Add the chocolate chips and mix with a wooden spoon.

Using a teaspoon, shape into round balls.  

Chill for a few minutes.


These are quite addictive.  They're sweet with some bursts of saltiness.  Something like a chocolate-covered pretzel or a salted caramel ganache.  I must say the peanut butter made it a little bit better.  Packed and wrapped with a ribbon - they can be great Christmas presents too!  Eaten as is, chilled or covered with melted dark chocolate, these are great anytime of the day. With milk, and possibly a nap afterwards. 


Thursday, February 14, 2013

Chocolate biscuit cake


We have lost the plot.  Hubby and I. No its not about the new TV series Arrow, or some other reality cooking show.   We have lost the plot of Valentine's day.  Yup. We've gone crazy.   We've separated from the revolution of cards with hearts and chocolates and flowers and fluffy toys. The truth is, we're not big on Valentine's.  Although I wouldn't mind getting flowers and chocolates and a card on this red day, the practical side of me always prevails. 


Flashback 1994.  The air waves were filled with Boyz II Men, Mariah Carey, Toni Braxton, All 4 One and my fave Babyface.  I think its the most romatic decade, the 90s. Lots of jazz and rhytmn and blues kind of music and Kenny G's.   We met at the office.  After many many days and nights dining and wining (more like beer guzzling), and chocolates and flowers and jewelries and concerts and movies and road trips, we got hitched.  Fast forward to today and four kids after, Valentine's day got lost in the equation.


So romantic cards and flowers were replaced with heart shape cut outs and doodles and drawings and art creations and hand-made cards by the kids. Chocolates have been replaced by heart-shaped gummies and lollipos and cookies.   No more date nights here.  But I don't mind.  We don't mind.  Because the truth is.  Even though we're not big on Valentine's, we do celebrate love all year round.  


And for a Valentine's day post, here's a rich decadent dessert inspired by Prince William and Princess Kate's wedding cake.  Now how's that for romantic?  Recipe is adapted from Betty Crocker


To make this Chocolate Biscuit Cake
Print recipe

1 pack 250g Milk Arrowroot Biscuits

250g dark chocolate (72%)

160 ml thickened cream

30g unsalted butter


For the  dark chocolate ganache icing:

250ml thickened cream

230g dark chocolate (55%)

15g unsalted butter


Method:

Line a 20cm round cake tin with aluminum foil and spray with canola oil.

In a small bowl, roughly break the biscuit pieces with your hands.  Set aside.

Place the chocolates in another bowl and set aside.


In a small saucepan,  heat the cream and the butter and stir until the butter has melted.  Bring the mixture to a boil and take off heat.

Pour the warm cream into the bowl with the chocolates and stir with spatula until smooth.

Add the biscuit pieces and gently stir to coat.


Spoon the mixture into the prepared pan and press gently with the back of a spoon.

Refrigerate for 3-4 hours or overnight.

 To make your chocolate ganache icing.  Place your chocolates in a bowl and set aside.  Heat the cream and butter in a saucepan until butter has melted.  Add to the chocolates and stir until chocolate has melted.


Once the cake has been refrigerated and is firm, remove from the pan by inverting the cake upside down onto a wire rack or a plate.

Pour the chocolate ganache icing over the cake and using a spatula, spread some of the icing on the sides of the cake.  


Tips:

 - You can wait for the ganache to cool a little bit if you prefer a spreading consistency rather than pouring it over the cake;
-  You can use any kind of biscuit or sugar cookies of choice as long as they're not too soft or too hard;
- You can decorate the cake with any fruit of choice.  The strawberries and raspberries worked well with chocolates as you can see.
- You can serve this immediately or refrigerate after frosting.  If chilled, take out of the fridge for 30 minutes before slicing to let the cake rest soften a bit.


But even though the practical side of me does always prevail, there's always something that we manage to pull out on Valentine's day.  Be it a small piece of chocolate or a sweet note that says, "Hey you!  I love you!"  And in all seriousness, love is and always will be here.  I know.  Because even though we both said its not a bit deal, hubby pulled through  and surprised me this morning with a card and a bunch of roses.  Now, ain't love grand.


Monday, January 28, 2013

Coconut panna cotta with mango salad

A week or so ago we took the girls to their first ever late movie (way past regular bedtime).  And this was to watch the much acclaimed Life of Pi.  The whole family watched the 2 hour spectacle of amazing film graphics and an absolutely heart warming story.  As summer’s been pretty hot, it was a good weekend option to hit the cinema on a warm night.

As there have been mixed reviews about the movie – some raved how great it is.  While some ranted about the movie missing some of the details and made up with colourful graphics.  I’m on the other camp.  I loved it.  The story, the visual effects, the music background.  The whole lot. It was a superb movie that helped spruce up sales of the book once again.  The book published in 2001 has gathered a good following after its release and has even been awarded the Man  Booker Prize – a prestigious international literary award.  After watching, I now got hold of the book and have been glued.  It is indeed amazing and the memory of Richard Parker makes me smile as if I shared that journey with Pi on that boat. 


Now back to to reality and the monotonous routine of the school holidays.  The girls are kept enticed thanks to technology and TV during the days of the week that I'm working.  On most days, its just the same.  I can't seem to pull them off these supposed distractions and push them outside in the sunshine.  Sometimes I wonder if getting those hours of silence and no-bickering actually good.  Either for them, or for us - the parents.  But then, I try to sit back, sigh and think. Oh well.  It's the school holidays after all.


This dessert was originally made for the Sweet Adventures Blog Hop for this month, but was quickly replaced when I discovered this new cookbook that I'm dying to get my hands on.  The maja ube (purple yam and coconut pudding) proved to be more visually inviting and was tropical in every sense.  But this is a simple and delicious dessert that is also worth the effort, and so here it is.  And while it's still summer, make use of the season's bounty.  Mangoes!  This recipe is adapted, from House (a local retailer of kitchenware, cookware etc) in-house magazine Christmas 2011 edition. 


To make this coconut panna cotta with mango salad:
(Print the recipe here)

Ingredients
300ml coconut cream

300ml single cream

2 gelatin leaves (gold)

120g caster sugar

2 vanilla pods

3 mangoes, diced

zest of 1 lime

juice of 1 lime

mint leaves or toasted coconut (optional for garnish)


Method

In a small bowl, soak the gelatin leaves in cold water to soften.

 In a medium sized pot, combine the coconut cream, cream and caster sugar.

Slice the vanilla pods and scrape the seeds into the pot with the coconut cream mixture.

In medium heat, bring the coconut cream mixture to a boil.  Set aside to slightly cool.

Add the soft gelatin leaves and whisk.

Strain using a fine sieve into a jug.

Pour into prepared glass bowls (we used about 4 small plastic flutes and 3 ice cream bowls).

Let the panna cotta cool in room temperature then place in the fridge to fully set and cool.

Prepare mango salad.  In a small bowl, mix the diced mango with the lime juice and zest.

To serve, top the panna cotta with the mango salad and garnish with mint leaves.


TIPS:

* Do not substitute thick cream/double cream to the single cream.  Single cream is lighter and thinner in consistency and has minimum of 18% milk fat.  Usually used for pouring on desserts. You will have a  heavy panna cotta if you use this.
*Do not add the gelatin leaves to a HOT mixture or the gelatin will simply melt and the panna cotta will not set. 

* You can leave the panna cotta in the fridge overnight if serving the next day.  Place on a tray and cover with cling wrap. 


Tuesday, January 08, 2013

Steamed milk cupcakes (Filipino puto)


There's an unwritten Filipino tradition that every family observes on the eve of new year. It doesn't matter which part of the world we are, generally all Filipino families practice this.  And that is to plate or serve round types of food.  Whether its a basket full of round fruits or dishes with round ingredients, it is a custom that's hard to ignore.  Why?  Well supposedly round-shaped foods and fruits bring good luck for the new year. Everybody wants good luck for the new year, right?  Who wouldn't?

This practice is obviously brought and influenced by the Chinese. Whether its fad or tradition, we follow what we grew up with. So round fruits always adorn our table every new year.  Here's an old article mined from 2010 about this practice.


And while we are in the subject of round foods, why not a classic Filipino round sweet treat for a first post of the year!  So  here it is, a recipe shared to me by an ex office colleague for steamed milk cupcakes, or "puto" as what is locally called back home.


Puto/s are traditionally made using rice flour, hence called steamed rice cupcakes or cakes.  They're also made using banana leaves trimmed to fit the round mini cakes.  They also come in lots of colours (no flavours) and sometimes with pandan and coconut flavours.

But this particular recipe is easy.  It uses plain flour and pantry staples.  And its no bake.  I've prepared this using a make-shift steamer: a large wok, a round grill or cooling rack placed on top of the water and mini cupcake pans. Of course if you own a steamer, this will be an easier feat.  Otherwise, you can always use the oven and make this using a bain-marie: a roasting rack with a little water, your cupcake pan then covered with aluminum foil. 


To make this recipe
(Print the recipe here)

Ingredients

3 cups all purpose/plain flour

1 1/2 cups milk or 1 can 375ml evaporated milk

3 tablespoons baking powder

2 cups caster sugar

1 1/2 cups water

3 eggs

cheese slices/squares or grated for topping


Method
In a large bowl using a whisk, mix all ingredients together.

Pour into muffin/cupcake pans.

Top with cheese.

Place in the steamer (or bain marie in the oven) and cook for 20 minutes.

Test with a toothpick or skewer.  Stick should come out clean.


The classic combo for this sweet treat is puto and dinuguan (blood pudding).  If you haven't tried this, just leave it to your imagination.  It may seem a odd.  Wierd even. But the combination is divine. Savoury and sweet at the same time.  Black and white.  Ebony and ivory.  But that's Filipino food for you.    It's like no other I must say.  Now I'm not going to push anyone to try dinuguan (blood pudding, why I'm the only one at home who likes this stuff!  And I'm yet to learn how to make it!), but this sweet round treat should be an easy must-try for those who are keen for something different.


So how about you?  Do you have family traditions that you follow from where you grew up?  Or are you making your own traditions?  And while we're at it, do you have any foodie resolutions and goal this year?


Wednesday, October 17, 2012

No-bake mango ice-box cake

The heat is on!  And these sweet yellow juicy mangoes are beginning to show off their plump cheeks at my local fruit shop.  While they're not yet that cheap at $2.99 a piece, we can't help but indulge a little bit.  This is the girls all time favourite fruit.  The only one thing that they ALL love, in common - in whatever form.  Fresh, dried and even dressed up with cream and layered with some graham crackers.  Yep. Simple.  No-bake.  Fresh!  This was inspired by an old post using strawberries.


While summer is just around the corner, it is the best time to make use of some of Australia's best produce!  We like the Calypso variety better as they are not that hairy compared to the Kensington Pride kind.  But mangoes are mangoes and whenever they're in our home, they add harmony to the creatures around.


Ingredients:
(Print this recipe)
3 ripe mangoes - halved, discard stones, then cut the flesh into strips  (see photo)
1 cup thickened cream 
¼ cup icing sugar (add more if you want it sweeter, or omit entirely), plus extra for dusting (optional) 
½ teaspoon vanilla extract 
4-5 packets of My San Graham Crackers (or any kind of flat biscuits/cookies.  Savoiardi or sponge fingers will work well too.) 
¼ cup toasted pistachios (optional)

Make straight line slits on the flesh as thin as you want.  Then scoop the strips with a spoon.


Method:

In the bowl of your standmixer, whip the cream and the icing sugar until you get soft peaks.  Add the vanilla and mix well.

Using a 14cm x 20cm rectangular Pyrex glass dish, spread a thin layer of whipped cream on the base of your dish.

Place a layer of the graham crackers (or whatever variety of cookie or biscuit you’re using) on the cream.

Spoon some whipped cream and spread on the crackers/biscuits. .  Add and layer the mango strips.  Spoon and spread more whipped cream on the mangoes. Repeat the layers until you get the dish filled.

Chill in the refrigerator to set for 2-3 hours, or overnight.


When serving, you can choose to cut them into portions.  Or give everyone a spoon and scoop away! 
 

Variations: 

  • sprinkle some toasted pistachios on top after chilling and before serving, for that added texture. 
  • dust with icing sugar 

NOTE:  If you're using thicker varieties of biscuits or cookies, you must consider as well, the size of your dish.   


TIP: Place your empty bowl in the fridge before whipping the cream.  This accelerates achieving soft peaks.  Or place a bowl of ice under your mixing bowl while whipping the cream which will work as well.


And here's a short note from an old post about graham crackers: "*Graham crackers originally are American-made biscuits made of graham flour. For this cake, we used a Philippine brand which are available at Filipino shops and some Asian grocers.  Digestive biscuits are the closest substitute to graham crackers as far as the taste is concerned, although digestive biscuits are somewhat too thick.  Ladyfinger or savoiardi  may also be used as substitute but will limit the layers of the cake and lessen the chilling time as these sponge biscuits will soften faster."


We love mangoes!  Coming from a tropical country where these babies abound year round, it takes every bit of patience to wait until they are in season in AU.  Mangoes are excellent eaten fresh, and great with anything!  And this no bake dish I promise you,  is quick, easy and so refreshing with every bite.  We made this for a weeknight dessert, with some of the crushed crackers on top.  They keep well in the fridge for as long as everyone doesn't sneak and have a slice or two.  Ssssshhhhh...... I hear footsteps!


LinkWithin

Related Posts Plugin for WordPress, Blogger...