Welcome to adobo-down-under!

Musings. Family. Food. Stories. Cooking. Recipes. Eating. A recipe journal. From simple Filipino dishes to challenging recipes and exciting gastronomical failures. This is for my girls to look back on for comfort, memories, laughs, love and lots of food!
Showing posts with label summer. Show all posts

Monday, September 21, 2015

Black sticky rice revisited


My muscles are recovering from yesterday’s Bridge Run, which was approximately 10k from Milsons Point ending at the Government House along Macquarie Street.  Unlike last year’s experience, this year brought more sore muscles and pain in my butt, thighs and legs. As I ran, jogged and walked the route in light rain, I kept thinking of Murakami’s book which reminded me of his experience in the many marathons that he runs around the world – how he prepares for each mentally and physically.  I constantly had to remind myself to concentrate on the breathe and focus on the path ahead, one step at a time.  This kept me focus for the whole 1 hour and 32 minutes.  The weather wasn’t as glorious as it could have been, but the view always gets to me - passing under the magnificent Harbour Bridge, the spectacular harbour and the iconic Sydney Opera House. I can never get tired of these Sydney wonders!   

Soaking in the light drizzle, my head was soaked from a combination of rain and sweat.  My work colleagues who joined me have dispersed into the distance as we approached the bridge, and I could only whisper in between breathes, “hey, wait up!” , each of them already zooming around other runners as they satisfy their own fitness goals.  There were moments of doubt when my thoughts turned to stopping and giving up and cheating by taking off my bib and going through the Domain and ducking in with the crowds at the finish line. The medal was not something aimed for anyway.   But there was that nagging thought inside me, pushing me to go take that extra step, take that next kilometre in stride and it’s all going to be fine.    


Running alone amidst a crowd of thousands (does that sound weird?), it was so easy to get distracted by the noise from the spectators, music from sponsor stalls along the route, the cheers from the volunteers as they hand cup after cup to the runners. Breathing in and out, slowly pacing myself, I see older men and women triumphantly passing me with their slow calculated pace and that kept me inspired.  Oooh, oooh, oooh.... inhale, ooh ooh ooh ooh, inhale.  I calculated my breaths as if I was breathing through flows in my Vinyasa yoga practice.  Although it is not a marathon by any standard, the run/job/walk was something I did not prepare for.  Except for my 2x yoga sessions and intermittent 30-minute walk around the block a week, there were no special trainings that went with the decision to do another Bridge Run this year.  It was another whim decided amongst office colleagues.  Albeit the sore muscles, I felt it was one of the most exhilarating runs I’ve ever done, as well as the longest.    


As I turn onto Macquarie Street, the running crowd from the opposite lane approaching the finish line is always an inspiring sight.  As I slowly ran my way following the course, I can’t help but get distracted and amazed at each of runner sprinting their way towards the finish line.  Their faces expressing varying degrees of intent, focus and determination. Some huffing and puffing but still eyes set forward to the finish line. Some sweating so much, red faced by eyes glued straight ahead. 


Although this is my 3rd Bridge Run experience, this year has given me a strong sense of belief in myself – where usually doubt sits comfortably.  I felt energized after the run and had so much energy even until late last night, when the muscles started tightening and soreness creeping slowly into each muscle tissue.   I went to my yoga practice with slightly stiff legs today, but as always, I come out feeling taller and calmer. 


And after a day of strenuous activity, there’s nothing that I would love more than to indulge in comfort food.  So we’re revisiting an old post with new photos! (It’s actually just an excuse to give life and new photos to posts from the archives!) Black sticky rice with coconut cream and toasted sesame seeds!  I tell you.  This one cuddles you in all the right places.  Sore muscles or not.


Ingredients:


3 cups black glutinous rice
3 pandan leaves, tied in a knot

1 tsp salt 
375g palm sugar. grated
1/2 cup water
1/2 cup toasted sesame seeds
500ml coconut cream (use Kara brand in tetra pack)


Wash and rinse the rice until water is almost clear.  The water will still be a little bit dark but clean.  (This took about 5-6 wash-and-rinse)

Place the washed rice in a 6L or 8L pressure cooker.  
Add water to cover the rice, 6cm above the rice level.

Add salt and pandan leaves.  
Close pressure cooker lid tightly and bring to boil on high heat, approximately 5 minutes.

Once boiling (pressure cooker hissing loudly), reduce heat to low (hissing gently) and simmer for 15 minutes.

Remove from heat and let cool/decompress for another 15 minutes. 

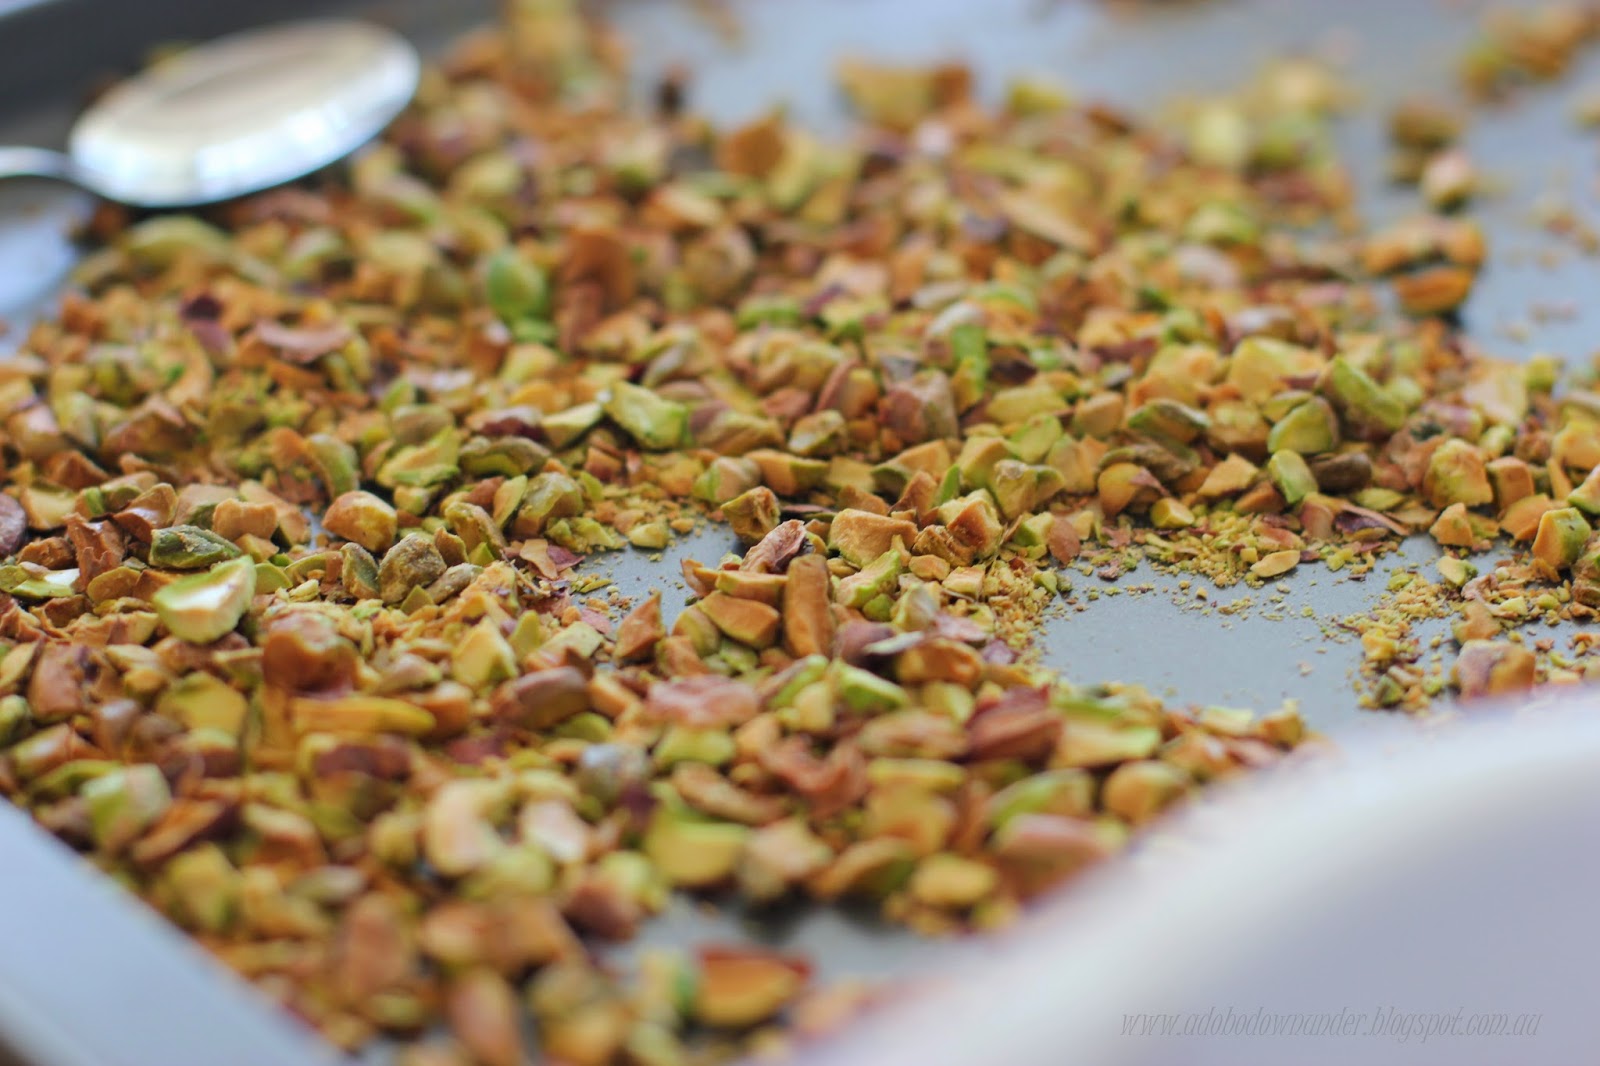
While rice is resting/cooling/decompressing, toast the sesame seeds - using a non stick pan.  
 On medium heat, fry the sesame seeds until golden.  No oil needed.  
Transfer into a small bowl and let cool.

Using a sauce pan, dissolve the grated palm sugar in the 1/2 cup water.
  
Remove pressure cooker lid and remove pandan leaves.  Stir in dissolved palm sugar. 

Serve warm in bowls drizzled with coconut cream and toasted sesame seeds.


Tips and tricks
* Use Kara brand for the coconut cream.  I find that this brand is creamier than those that come in tins/cans.
* Be extra careful when using pressure cookers, as they can cause burns if opened while still hissing.
* Remember that pressure cookers once lid has been locked, should not be opened at any time, unless the hissing has completely stopped and the safety red button (differs in various brands and models) has completely sunk.


The real prize for running the 10K Bridge Run for me, was not really the medal. It's winning against all the self doubts inside and pushing through to the finish line regardless of the time.  And this year, I actually beat my last year's record by 17 minutes.  So that's a bonus.  The half marathon next year doesn't seem too far after all.


Friday, August 28, 2015

Lemon and sour cream cake with raspberries


I found a new hobby.  Colouring books!  If you haven’t already noticed, adult colouring books is the trend at the moment and publishing companies are selling them by the millions.  Marketed as therapeutic and anti-stress, colouring books for adults have become hip thanks to social media.  People who are into colouring books posts their creations on social media and it just creates the pull which is making the publishers very happy.


A standard page would take me from an hour to 3 hours, glued to the page instead of watching some TV series on Netflix or browsing on Facebook and Instagram.  While it may be my own form of digital detox, it does deliver its own spell of mindfulness and calmness claims.  Indulging in a new hobby, engrossed with colour pencils sliding across the page, sticking to the lines, mix matching colours onto patterns somehow gives me a sense of fulfillment as I create something visual and beautiful.  I started borrowing colour pencils from the girls, but now that I have my own set, I can colour to my heart’s content.


Although this does not replace my love for cooking, baking and writing, it does give me something to do while waiting for dinner to cook, or the cake to be warm and the cookies to cool.


How about you?  Have you started a new hobby lately?


Now to this cake that is a revisit from the archives.  A lemon yoghurt cake dressed with raspberries.  This is my go to cake recipe when I'm asked to bring a cake.  Why?  Because it's easy as A-B-C, 1-2-3.  No need for a mixer.  Just good ol' fork and little bit of elbow grease.


Ingredients

1 and 3/4 cups sugar

2 eggs

1/2 teaspoon salt

2-3 teaspoon lemon juice

grated rind of 2 lemons

3/4 cup light olive oil

1 cup sour cream

2 cups self-raising flour

1 cup (or more) fresh or frozen raspberries

Icing sugar for dusting (optional)


Method

Preheat oven to 180*C.  Line a round 20cm cake tin with baking paper.

In a mixing bowl, mix rind, oil, eggs and sugar with a fork.

Add remaining ingredients and combine well.

Add the raspberries and stir to distribute around the pan and some to sprinkle on top of the batter.
Pour into cake pans and bake at 180 degrees C for 30 minutes.

Leave to cool on a cooling rack, then turn out onto a plate.  

Dust with icing sugar (if using).


* You can use natural yoghurt or buttermilk as substitute for sour cream and the result will be the same.


Tuesday, October 21, 2014

Coconut tapioca with mangoes


So.  I made this for an office birthday lunch Thai cuisine theme.  And everyone fell in love.

I have made this at one of our street BBQ parties and it was a hit.

Hubby loves this and eats portions of it every day when its in the fridge, slowly partaking of the sweet dessert controlling himself.  Otherwise he could eat it in one sitting.

I posted this on FB and was asked the recipe.

Sometimes, what seems easy can be complicated when specific details are amissed.  For example. A friend of mine in Manila asked me for the recipe and so I told her what I did - boil and cook the tapioca, warm the coconut milk and add sugar, mix the tapioca with the coconut milk, pour into pyrex or tray, chill then top with mangoes.

Seems easy, right?

Of course, I didn't realise that she buys the tapioca from the markets cooked already.   
Was she suppoesd to boil and cook them again?  
Of course, this will make things a little less starchy as cooked tapioca bought from the markets has been washed.

Nor did it occur to me that of course absolutely, fresh grated coconut is available and that she will squeeze the milk out of them to come up with, say... 400ml.   
How many cups per squeeze can you get from one whole grated coconut?  Does she use the first extraction or the second extraction?


If she had followed what I said, she would have missed a few points.  Lost in translation. Or in this case, lost in ingredient translation.


And in other news - we are on our way to a new parenting challenge in the guise of the HSC.  As migrant parents, we obviously did not go through the High School Certificate (HSC) in Australia and now that our oldest daughter is going to take it next year, there's a lot of learning and understanding that is going on in my head and hubby's.  With all the media attention during HSC and the unnecessary stress that is highlighted in the news, kids can get easily swayed into the axiety parade.  HSC is somewhat similar to the NCEE that hubby and me took in high school going to college.  This is now known as NSAT (National Secondary Achievement Test) which is a goverment initiated as well.  The difference is that the NSAT is a test based on all general subjects taken during high school which becomes a factor when applying for a place in university.  Whereas the HSC is a test for subjects which the students have chosen from a list by the Board of Studies including general subjects, and which they are preparing for from Year 11 to Year 12.  The HSC exams result per se, is not the be all and end all of the assessment.  The results is a 50/50 mark of 1) school based assessments tasks, and 2) examination marks.  It seems pretty straightforward, until they introduced another acronym called the ATAR - Australian Tertiary Admision Rank which is a basis for acceptance into some universities.  Or so I think....  as you may already noticed, we are still learning.  And HSC is part of it... learning to be Australian.


If you're a migrant like us, or a Filipino family with young kids, I'll keep you updated on what have we learned from the HSC as a family.   And if you're a parent who went through HSC, please send me some encouraging thoughts. 


For now, here's a fool proof recipe for this sweet and easy dessert.


Ingredients

1 cup mini tapioca pearls

10 cups water

 2 cans 400ml coconut milk

1 1/2 cups raw sugar

1 mango, sliced into thin strips


Method

Boil 10 cups of water.  When rapidly boiling, add the tapioca pearls and continue to boil.

Once the tapioca pearls are half way through cooking - the outside part of the pearls are transparent but the middle part is still white, turn the heat to low and simmer the pearls until cooked through, stirring occasionally to prevent from sticking to the bottom.  This can take from 30-45 minutes on simmer.

Drain the cooked tapioca pearls through a sieve under cold running water.  Set aside.

In a medium sized pot, boil the coconut milk then add the sugar, stirring to make sure the sugar has dissolved.  Simmer until the sauce thickens slightly.

Add the tapioca pearls and stir distribute the pearls throughout.  

If the sauce looks too much, scoop some of the sauce into a bowl and set aside.  The pudding should have enough sauce to tapioca pearl.  Reserve the extra coconut milk mixture.

Transfer to a pyrex or dish and chill in the refrigerator overnight, or 8 hours.

Top the pudding with the mango strips and served.


Tips and tricks:

*If you are using already cooked tapioca, simply drain the store bought pearls before adding to the thickened coconut milk.

* If using freshly extracted coconut milk, use the first extraction and about half a cup of water added per whole coconut.

* If after chilling, you find that the pudding is too thick, add a half cup of the reserved coconut milk mixture at a time until you get the desired consistency and thickness.

* These can be served in individual cups or serving glasses like my previous post with papaya, topped with any fruit you prefer.

* Fruit topping should be tropical like mangoes, papaya, purple yam or pineapple to suit the dish.  As coconut works well with tropical fruits.

* I have prepared this before in individual cups for my mom's 75th birthday party and topped them with purple yam / ube jam.


Wednesday, October 01, 2014

Browned butter M&M and chocolate chip cookies (gluten free version)


A few years ago, early on in my blogging (through a different blogging platform) adventure, I wrote about my experience raising daughters and triplets for that matter.  They were still toddlers when we arrived in Australia and my eldest was 8yo.  It was a struggle adjusting to life without a nanny (called yaya back home in the Philippines) and suddenly facing the task of parenthood upfront.    Back in the PI, with a full time job and the luxury of having help around the house and with the kids, it was so easy to escape the responsibilty of being a parent, except when really necessary - taking them to their monthly pediatrician visits, attending school meetings and functions, organising birthdays, etc.    It was the standard of living for any working parent/s.   Those little milestones during the day are missed and forgotten, because we were not home.  We were both working.  


When we moved to Australia, it was not easy.  All of a sudden, I had to deal with my tween's dramas and the toddlers' tantrums, when all I had in my head was the idea of playing at home, dabbling with playdough and paint, quitely helping with homework, preparing home cooked meals, a spic and span home and all around having a grand fun time.  I must have had the idea of a 50s housewife wearing my hair in a bun and donning an apron with homebaked cookies wafting in the air from the kitchen oven.  Of course, there were a lot of dramas and crying and not wanting to go to school, not wanting to drink milk, potty training, dealing with getting sick, cleaning up after getting sick, dealing with the ups and downs of girl hormones - pre-teen and then teenhood, and more. 


Now that the girls are maturing, there is less yelling in our home and more conversations. Their beautiful personalities are coming through and they are they own person.  My eldest now 17 year old has slowly adjusted to her monthly hormonal roller coaster and there is less angst and moans and grunts and more words exchanged.  Although I missed having to lecture her about having her period and period pains and all other growing up topcis (no thanks to Healthy Harold).  And the girls while still adjusting to tweenhood, their interests is making me and hubby jump from one fad to the next - from One Direction to Rainbow Looms, to camps and sleepovers.  


Parenting, as it is - multiples or not, is a responsibility that is beyond anything.  There's a lot of hit and miss, trial and error, and even books and so-called experts tell us we're doing something wrong or right or we're this, and we're that and that our kids will grow up needing regular psychiatric meetings.  There is a lot of parenting books out there, parenting articles saying all these and before, I used to read them all, and then compare my kids developments to others.  Bad idea.  The truth is, we (parents) each have our styles and there is no cookie-cutter approach to a single child.  Each child is unique and usually, the parent style suits the family dynamics.    


These days, I wear my hair short.  There is the aroma of cookies (and cakes, and brownies) wafting from the kitchen oven.  We play Monopoly and Boggle more and watch reruns of Friends on TV.  We watch movies together (from Frozen to 100 Foot Journey).  There is the occasional groans and I-didn't-hear-you episodes, little dramas that add spice to our family, but over all, I think we're approaching a higher order of parenting in our own little way. 


 This recipe is adapted from Ree Drummond - The Pioneer Woman

Ingredients

225g salted butter

1 cup brown sugar, packed

1/2 cup caster sugar

2 large eggs

1 tablespoon vanilla extract

2 cups + 2 tablespoons gluten free flour*

2 (heaping) teaspoons espress powder (or coffee granules)

1 teaspoon baking soda

1 teaspoon salt

1 cup mini M&Ms

1 cup bittersweet chocolate chips


Method

Preheat oven to 180*C

In a bowl, combine the flour, espresso powder, salt and baking soda.  Set aside.

Melt the half of the butter in a pan until golden (with brown bits in the bottom).  Transfer to a small bowl including all the brown bits. Do not burn.  Set aside to cool.

In the bowl of an electric mixer, cream the softened butter with the brown and caster sugar until combined.

Add eggs one at a time, then the vanilla and beat until mixed through.

Add the cooled melted butter and continue to beat, scraping down the sides of the bowl every now and then, until incorporated.

In three batches, add the flour mixture while continuing to beat the dough.  

Using a small ice cream scoop, or teaspoon, scoop dough onto a parchment lined (or if using silicone mat) baking tray. 

Chill in the refrigerator for 15-20 minutes.

 Bake in the preheated oven for 8-10 minutes or until golden.


Tips and tricks:
* I used a local (Woolworths) brand free from gluten flour which is a combination of tapioca starch, maize starch corn flour and ice flour which made for thinner and crispy cookies

* Use regular plain flour like PW if you're not avoiding gluten

* Bake in 160*C oven for longer if you prefer more golden cookies


Tuesday, September 30, 2014

Baked maple pears with toasted pistachios


No more whingeing around here of being too cold.  We have been blessed with warm air and clear blue skies.  And so I am catching up on some needed writing and blogging as it is the end of September, and we are halfway through to spring.  Spring cleaning at home and the backlog of recipes and photos to post.  

We have revamped our veggie garden as the seedlings planted in winter did not survive and to take the easier route, we bought some ready-to-plant veggies from the local nursery.  Hopefully, there will be some harvest of French beans, eggplants, strawberries, Habanero and birds eye chillies soon.  Our calamansi plant is finally showing some fruits after last year's drought.  This makes me very happy as any Filo would be.


And now catching up on some blog posts, this recipe is the easiest dessert there is that you can bring to any potluck party.  The idea to make this was initially to make it for a vegan at work who was retiring.  And I also brought this to a work birthday lunch and ever since, people have asked for the recipe and they have made it at home with spectacular results.   It's really easy.  I love easy dishes.  Those that you prep and then you just wait for the magic to happen.  Be it a slow braised on the stove, or a baked maple pear in the oven.  You prep it and you wait for an hour.


The recipe is adapted from an old cookbook from my shelves - Marie Clare Fresh + Fast Simply Delicious Healthy Food


To make these baked maple pears

Ingredients:

7 Corella pears, halved and cored*

3 tablespoons real maple syrup

2 tablespoons extra virgin olive oil*

1 cup toasted pistachios, roughly chopped

1 cup creme fraiche or whipped cream


Method

Preheat oven to 180*C

Cut a thin slice from the skin side of the pears to give them a flat surface.

Place the pears onto a shallow baking dish, skin side down.

Drizzle olive oil and the maple syrup onto the pears.

Cover with aluminum foil and bake in the oven for 1 hour.

The pears should be tender when a butter knife inserted comes out smoothly.

Serve with the creme fraiche or thickened cream on the side, and the toasted pistachios.


Tips and tricks:

* The original recipe called for unsalted butter to rub on the pears.  I used olive oil as I brought it for someone who is vegan.

* You can use other pear varieties. Corella pears tend to be tougher than most so it cooks for an hour.  Other pear varieties are tender and may be baked for less than an hour.

* You can make as many or as little as you like, just adjust the maple syrup to your requirements.


LinkWithin

Related Posts Plugin for WordPress, Blogger...