Welcome to adobo-down-under!

Musings. Family. Food. Stories. Cooking. Recipes. Eating. A recipe journal. From simple Filipino dishes to challenging recipes and exciting gastronomical failures. This is for my girls to look back on for comfort, memories, laughs, love and lots of food!

Saturday, July 30, 2011

Herb crusted lamb brains with lemon pepper mayonnaise

“Tell me what you eat, and I'll tell you who you are.” -  Anthelme Brillat-Savarin


Lamb brains in crumbed herbs with lemon pepper mayonnaise - Lesson 2 @ Kitchen 10


When was the last time you did something for the first time?  This was an excellent TV ad by Emirates. First time to see and feel snow, a grandmother’s first time to ride a helicopter, a scuba diver’s first encounter with sharks.  All exhilarating experiences for the involved people.  It’s a great ad.  It ended with the tag line, “Keep discovering.”  Great message.


And of course it goes without saying the obvious.  That it was a first time for mum to be introduced lamb brains.  We've seen this many times, especially at our favourite reality cooking show Masterchef.  I wouldn't have anticipated it sooner, but there it was facing mum right in the face.  In Kitchen 10.  Menu for the day!  Herb crusted lamb brains with lemon pepper mayonnaise. I know.  It sounds and looks icky.  Offals after all, in culinary terms are off cuts or entrails and internal organs of butchered animals.  But it shouldn’t be.   Coming from a country that has isaw or chicken and pork intestines barbequed and sold in skewers at street corners and sometimes deep fried called “chicharon” or crispy pork skin, and has found food use for pig's blood, lamb brains must be something easier to consume, in concept and in the palate.  But… eating brains sounds like something you’d be doing if you’re were in an Indiana Jones movie.  And as part of the intro,  I need to add in a word of caution.  The following image may not be for the faint at heart.  But look at the photo above!  Definitely suits the saying, looks can be deceiving!


4 lamb brains
 1 egg
 50g flour
50g bread crumbs (use fresh bread passed through a processor)
2g fresh herbs (1 bunch each of parsley and thyme)
salt and pepper to season
olive oil for pan frying


Break the brains into halves along the middle (you will have 2 pairs and halved into 4).  Wash the brains and cut out fat and sinew (white parts).  Place the brains in a small bowl and soak in milk to lighten their colour.  Leave for about 20 minutes.

Finely chop the herbs and mix with the bread crumbs.  While brains are soaking, prepare your crumb a l'anglaise which is simply your seasoned flour-egg wash-breadcrumbs in separate bowls.

Take the brains out from the milk and place on a tray with kitchen/paper towel to drain the milk and dry the brains out a bit.  

Fresh lamb brains (L) and the crusted lamb (R). Definitely hides the ugly facade.


To crumb a l'anglaise, dip one brain at a time first in flour, then egg wash then coat with the breadcrumbs.  Do this until all brains are coated.  Set aside.

Prepare a medium sized skillet in medium heat.  Add olive oil and shallow pan fry the brains until golden brown.   (The instructions for the recipe in the textbook says to deep fry, but Chef A insists, that deep frying is easy and can be done by anyone.  But pan frying shows a Chef's technique and skill.)


Lemon Pepper Mayonnaise
200ml mayonnaise (either use store-bought or make your own which mum posted here)
1/4 lemon, zest and juice
10g lemon pepper (again, store-bought or make your own)

Mix the mayonnaise with the ingredients. Chill then serve as accompaniment (to any dish).


Surprisingly, it didn't taste like anything different or disgusting.  It was soft with a texture almost like squid.  Smooth.  But can I say, the closest similar taste would be chicken?!  Yes!  Tastes like chicken!  Don't they all?   Come to think of it, I'd choose lamb brains over Cambodia's fried tarantulas and South Korea's dog meat and offal!

Friday, July 29, 2011

Roasted Peanuts (Adobong Mani)


This is the spicy-garlicky-savoury sibling of an earlier post of  Panutsa (Candied Peanut Brittle).  Another Filipino street food, commonly known as Adobong Mani or Peanut Adobo, it is sold by most street vendors in every corner of the country.  It also served at some local bars (called pubs in Oz) as appetizer.  This is not like the supermarket beer nuts variety.  You may or may not add chillies, if you prefer just a simple roasted nuts taste, but the chillies gives this that extra X factor which makes you want to eat more, and more and more once you start!


To make this simple appetizer-cum-snack, you'll need:

500g of raw peanuts (same one we used for the Candied Peanut Brittle)
5 cloves of garlic, pounded (use the pound from a mortar and pestle set or the flat end of a chef's knife)
1 cup vegetable oil
5 long red chillies (or bird's eye chillies)


Heat oil in a large skillet or pan.  Add the nuts and cook/boil for 10 minutes.

Add the garlic and chillies, and cook until browned for another 5 minutes.  If the garlic is burning, take the garlic off and continue cooking the peanuts.  

Turn off heat and bring the garlic back in the pan and stir to coat the peanuts.  

Strain the cooked peanuts using a spider scoop (or a brass skimmer, or any kitchen utensil that has small holes and  handle which you can use to strain the oil) and place on a baking pan lined with baking paper and let cool.  (I'm sure while its cooling you'd be eating bits and bits....)

Keep in air tight containers.  


Speaking from experience, this can last for 2 weeks without affecting the taste.  But I do doubt that it will last that long.  They are seriously addictive, you'll find you ran out even before the week ends!  Seriously! 


Thursday, July 28, 2011

Warm salad of prawns with exotic mushrooms


“To make a good salad is to be a brilliant diplomatist - the problem is entirely the same in both cases. To know how much oil one must mix with one's vinegar.” - Oscar Wilde (1854-1900)


Warm salad of prawns with exotic mushrooms - Lesson 1, Term 3 @ Kitchen 10


This recipe is adapted from Futura Training's Appetisers, Salads and Sandwiches & Stocks, Sauces and Soups, but was tweaked to adapt to available ingredients in the pantry at the time of preparation.


Warm salad of prawns and exotic mushrooms


5 cooked prawns, medium (peeled, de-veined)
1 clove garlic, minced
2-3 cos lettuce leaves
20 ml extra virgin olive oil
5 grape or cherry tomatoes
10g baby rocket
10g Mesclun (or an assortment of salad leaves)
1 stalk coriander, chopped
10ml Balsamic vinegar
Salt and pepper to season


Heat a pan and saute the garlic in olive oil.  Add the prawns and cook for 2-3 minutes.  Set aside.


In the same pan, add the mushrooms and stir to cook until soft.  Add the coriander and cherry tomatoes and stir.  Add the cooked prawns and glaze the pan with balsamic vinegar and turn off heat.


On a plate, place the cos lettuce as base for the salad.  Using thongs, place the mushroom and prawns on the lettuce and spoon some of the balsamic sauce from the pan onto the salad. 


Garnish with some julienned carrots.


Warm salad of prawns with exotic mushrooms - Lesson 1, Term 3 @ Kitchen 10

Wednesday, July 27, 2011

Beef Pares

“Food, like a loving touch or a glimpse of divine power, has that ability to comfort.” - Norman Kolpas


Beef Pares is an absolute comfort food.  It is one of the few dishes which mum and dad both love.  You all know that dad and me are white-chocolate and dark-chocolate in contrast.  Which is why I am the one in the kitchen, and he is the one at the dining table.  But with this dish, we are united.  Beef pares is one of the many Filipino dishes we have fond memories of and the top dish we miss from Manila.  It was our first food trip stop when we visited family in December 2010.  Along the streets of Dapitan in La Loma Quezon City, before you get to the throngs of spit roast pig vendors lining up the sidewalks as if  fences, there is that small corner eatery where people sit on round mismatched stools and order over the counter and devour this unique street food.  The "original" beef pares is their claim.  And having tried others, this place is indeed the pioneer of it all. 


"Pares" is Filipino word for pair, as the Beef is paired with garlic rice and a beef stock soup.  The dish resembles the Chinese Beef Brisket dish where the distinct flavour is the addition of the star anise.  Like  many other cultural influences in Philippine cuisine, this has become uniquely Filipino by the pairing with rice and soup, and the manner of which it is sold, served and eaten.  Right there in the streets of Dapitan, with tricycles and jeepneys driving past behind you as sip your soup, take in some beef with garlic rice and savouring the moment.  Comfort food at its best.  


A friend of ours here in Sydney makes this special dish and brings us some ration every time.  We've never tried to make this at home because I thought it would be too complicated.  And I've found out just recently that its not that hard.  So this was a weekday dinner surprise.  Thanks to Panlasang Pinoy for the recipe and to Tita C for the inspiration, this will now become a staple lunch/dinner dish in our home.


To make Beef Pares:

1-1.5k beef brisket (usually sold by butchers, cling wrapped)
 4-5 cup water (for broth)
1/4 c dark soy sauce
1/4 c sugar
2 cloves garlic, minced
2 tbsp ginger, minced
1 medium-sized onion, minced
2 pcs star anise
cooking oil
salt and pepper, to taste
1 cup of onion leaves/green onions for garnish/topping


Prepare pot with cold water and add the whole brisket.  Bring to a boil then simmer until meat is tender, around 1-1.5 hours in a regular pot (shorter if using a pressure cooker).  Make sure to skim the stock from fat and impurities.


Once cooked, set pot aside.  Take the meat off the stock and cut into chunks/cubes. Set aside.

In a separate sauce pan, heat cooking oil and cook the garlic, ginger and onion until soft.  Add the meat and sear for 2-3 minutes.

Add soy sauce, pepper, sugar and 1-2 cups of the beef stock, then bring to a boil.

Add star anise and simmer for 10-15 minutes, or until sauce thickens.  Add some more stock if preferred.

Serve in a bowl with green onions for garnish.


Garlic Rice
2-3 cups cooked (cold preferred) rice
2 cloves garlic, minced

Heat a shallow pan, add cooking oil and saute the garlic until slightly brown.  Add the rice and stir through.  Season with salt and pepper.


Beef Soup
Using the beef stock from the beef brisket, pass the stock through a sieve into another pot. Bring to a simmer and season with salt and pepper.  Serve in a bowl and garnish with some chopped onion leaves for added flavour.


Tuesday, July 26, 2011

Linguini alla puttanesca

"One of the very nicest things about life is the way we must regularly stop whatever it is we are doing and devote our attention to eating." - Luciano Pavarotti and William Wright, My Own Story


I’ve realised only recently that we have a limited repertoire of pasta dishes.  We mostly cook the basics at home - Lasagne, carbonara, baked ziti, spaghetti Bolognese, chicken pasta, beef stroganoff, pesto, prawn-fetta pasta and marinara.  Although I have tasted several other fancier varieties in restaurants, I have never tried to replicate any at home.  Ages ago, a neighbour of ours in Manila shared a Puttanesca recipe over the fence.  Literally.  Well, almost literally as she lived 2 townhouses away.  First, she shared a bowl of the pasta dish and then mum requested for the recipe.  And shared she did.  But I’m bad at keeping hand-written notes especially those which are written by myself.  And so I’ve lost it, and have never tried looking for one again.  We’ve moved overseas and life went on.  Until recently, when I came across this from taste.com.au.  Another dish with an impressive resume.


This Linguini Alla Puttanesca is adapted from the celebrity food critic Matt Preston, via taste.com.au


Olive oil, for frying
1 large brown onion, diced
25g anchovy fillets 
3 cloves garlic, crushed
1/2 cup red wine
400gcan tomatoes
150g black olives, drained (we got bottled black olives and simply sliced off the pits)
1/3 cup capers, washed and drained
1 bunch flat leaf parsley, washed and chopped
1/2 lemon, zest and juice
2 long red chillies, de-seeded and finely chopped
400g spaghetti or tagliatelle
Vegetable oil, for frying


    Heat the olive oil in a non stick frying pan over medium low heat and cook the onion for 6-8 minutes until translucent.

    Add the anchovies, pressing down with a fork to lightly mash then add the crushed garlic cloves and saute for 3-4 minutes until cooked through.

    Pour in the wine and cook down, scraping any caught bits on the pan back into the sauce. Add the can of tomatoes, olives and 1/4 cup capers. Stir and cook on a low heat for 5 minutes. Add half the parsley and squeeze in the juice of the lemon. Adjust the seasoning with salt and a little sugar so it is in balance (but only if needed, those capers and olives will add lots of salt). Stir in half the chilli. Cook for 2-3 minutes or until flavours are combined.

    Meanwhile, cook the pasta in well salted boiling water until al dente – or still a little firm to the bite. Drain and toss with a little oil. Keep warm.

    Dry the remaining tablespoon of capers on kitchen towel and then fry in vegetable oil until crispy. Drain on paper towel.

    Serve the dish at the table garnished with the crispy capers, the lemon zest, remaining chopped parsley and chilli (if using).

    Serve with crusty bread.


      Mum used linguini pasta as this was the only one we had in our pantry.  Great grown up dish!  I loved the authentic Mediterranean taste which comes from the capers and olives!  The gremolata (parsley and lemon rind mixture) and chilli garnish gives the dish that oomph and that X factor.  


      Since we now have a pasta maker (manual) bought at a bargain from Aldi a few weeks ago, its time to venture into other pasta dishes to add to our pasta night!

      Monday, July 25, 2011

      Champorado (Chocolate sticky rice pudding)


      Champorado is one of many Filipino dishes which stems from the Spanish influence in the country. This dish closely resembles a sticky rice pudding, except the method and the addition of cocoa.  Over the years, this dish has made its mark as a uniquely Filipino dish as it has been commonly served  partnered with a truly unique Filipino delicacy - dried herring or tuyo.


      "Tuyo" or dried herring (tuyo meaning dried, and the process of preserving the fish is by salting and air drying) - a favourite in Filipino households.  Mum never grew to like this kind of fish.  Too salty for my taste buds, although it is usually eaten dipped in garlic infused vinegar, but Dad is just the opposite. So he can eat all of the tuyo and bring that balance in our tuyo-eating pursuits.   


      Traditionally, champorado is cooked using chocolate tablets or tabliya.  These are locally produced cacao tablets made from Philippine cacao.  The locally available cacao tablets sold in farmer's markets are purely organic and produced by small-scale entrepreneurs.  With the advent of technology and new investors, there are now many brands of this cacao tablet which are exported around the globe.  And as far as being organic, I wouldn't know for sure.  Cacao from the Philippines are said to be one of the best in the world, especially those farmed in the mountainous terrains of Mindanao. US chocolate company Askinosie imports cacao from Davao into the US to make their chocolates and spreads. 


      But you don't have to bend backwards to find those cacao tablets!  You can reach for a can of any brand of cocoa from the supermarket shelves and you'll have this for breakfast in no time. Champorado is usually served for breakfast, but of course, it doesn't stop there.  It can be eaten for morning tea or afternoon tea. There are instant Champorado mixes around in Filipino shops, but it's so easy to make, why would you want to buy?


      2 cups glutinous rice
      8-10 cups water
      4 tbsp cocoa powder (we use Nestle cocoa)
      1/2 cup raw sugar
      milk for topping


      In a large sauce pan or pot, bring the water to a boil and add the rice.  Boil for 10 minutes.  Add the cocoa, stirring to dissolve the cocoa powder.  Bring back to a boil then slow simmer for 30-40 minutes or until the rice is tender.  Stirring occasionally to make sure the rice is not sticking in the bottom of the pot.  


      You know the rice is cooked when it looks plump. Add some water if you feel that the mixture is getting too dry.   Add the sugar and stir through.  Taste and add sugar and water to suit the consistency you prefer. 
      The champorado should have a thick consistency but still soft, like a congee.


      For days now, I promised you this for breakfast, but have been lazy.  Winter, cold, wet, grey.  But a promise is a promise so mum made this one school holiday morning.  And everyone woke up with that subtle hint of cocoa-chocolate wafting from the kitchen into the bedrooms.  Warm and chocolate-y., drizzle with just a bit of milk.  Just what we need on a chilly winter morning.


      Post updated: 30/7/11

      Sunday, July 24, 2011

      Spanakopita! Because I love Greek food too!


      Greek food is something new to us when we moved to Australia as its not very common cuisine in the Philippines restaurant scene. And having been introduced to it, I fell in love.  I love Greek food!  The texture, the colours, the taste and ooh lala, the heritage!  So rich! And that goes as far as dreaming of visiting the islands too!  I don’t mind trekking  Santorini’s foot paths, admiring the uniformed white infrastructures and centuries old architecture, eating along the boardwalk café’s and just soaking in the Greek air and sun!  And hedonistic Mykonos of course!  All lovely picturesque patterns of white houses, streamlined café’s, chairs and decks and bronze bodies soaking on the golden beach of Platos Yalos!  It must be that inner knowledge of the Greeks as gods from long ago.  Hence, I must find it titillating if amongst the gods and eating their food!  That’s one of those dreams mum has tucked away in a bucket list somewhere.  Among them, hiking in South America and trek the Machu Pichu!


      This recipe is adapted from Nannette of Gourmet Worrier.  I chanced upon her site and found her easy spinach spanakopita.  And as described, it is easy as!


      1 packet 375 g  filo pastry
      2500g fresh spinach leaves
      3 cloves garlic, finely chopped
      bunch fresh fill, finely chopped
      600g fetta, crumbled
      1/2 c grated Parmesan
      12 strokes freshly grated nutmeg
      3 eggs beaten
      300ml thickened cream
      olive oil

      Preheat the oven to 200C/390F.  Grease a 25-30cm round baking pan with olive oil and set aside.  (Usually just drizzle the pan with olive oil and wipe with kitchen/paper towel)

      Heat some olive oil in a pan then add the garlic, spinach and dill.  Cook in low heat until the greens have wilted.  Turn off heat and allow the spinach mixture to cool then add the fetta and parmesan stir until well combined.  Add the nutmeg and season with salt and pepper to taste. (Make sure to taste as the fetta and parmesan are already salty by itself)


      Lay 2-3 sheets of filo pastry on top of each other then scatter the spinach and fetta mixture over the filo.  Scrunch the pastry up and place it into the prepare baking dish (See photo on scrunching.  Note to scrunch the shorter side of the pastry.  It doesn't matter how you place the pastry into the dish.  It will all snuggle up together when you're finished all the mixture and the pastry). Repeat the process until there is no more spinach mixture left and the baking dish is well packed.  


      Whisk the cream and eggs together and gently pour over the pastry making sure it is evenly covered.  (I used a butter knife to move the pastry in between to let the cream seep through).  Bake for 40-45 minutes or until golden brown.  Allow the spanakopita to rest for 5-10 minutes before serving.


      The spanakopita looked a bit puffed after baking but it mellowed and flattened out a bit after a few minutes.  We kept this in the fridge for 3 days, taking out slices and re-heated in the oven for a quick snack or afternoon tea.  


      Saturday, July 23, 2011

      Economical chocolate icing


      By now, you all ready know that we like simple cakes at home.   No elaborate frostings or icings, just simple cakes and quality ingredients.  This is a recipe for chocolate icing.  Brilliant. Easy. Simple. For just about any kind of cake.  We made this for your cousin's birthday.  We made chocolate cake using the recipe from your birthday, topped with this simple chocolate icing.


      This Economical Chocolate Icing is adapted from Margaret Fulton's Encyclopedia of Food and Cookery, and actually named as such. Simple ingredients + simple method = Economical.


      1 and 1/2 cups icing sugar, sifted
      1/2 tsp cinnamon powder
      1 tbsp cocoa powder
      30g (1oz) unsalted butter, softened, room temperature
      1 tbsp hot water


      Mix icing sugar, cinnamon and cocoa powder in a bowl, then stir in softened butter and water.  Mix to a smooth paste, adding a little more hot water if necessary.  Sufficient to cover top of a 20cm (8in) cake.


      It was sufficient to cover the tops and sides of our cake!  Besides being economical, this icing is great as it was packed with that subtle cinnamon scent but not overpowering the chocolate flavour of the cocoa.  We used store-bought tubes of Queen's Writing Icing and some caramel flavoured sprinkles. 

      Moist apple cake, revisited

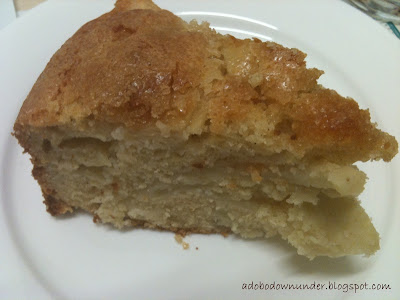
      What's left of the apple cake after tea


       Just recently, a colleague at work was leaving for another department within  and all were called to morning tea.  A nice tradition which happens when one is leaving the branch.  Of course there are the occasional morning tea or lunch just because.  Anyways, as mum thought to bring something to share, I made this in the morning before shuffling everybody off to school.  Quick and easy.  Moist and just right for that cup of tea or coffee.

      This is actually a re-visit of an earlier post mum did using the same recipe.  Actually, the first ever cake that mum made from scratch!  A milestone.  So this cake recipe is kind of memorable.  And since we now have the book, we might as well get on with the other sweet comfort treats in it.


      I've flagged the pages for Chocolate Elcairs, Chelsea Buns and can't wait for summer for raspberries to be in season for the Raspberry Mousse Gateau. Among a few.  It's still winter though.  Wet and cold and grey, but all good.  We're good. 


      PS - I actually thought the contributing author is the Bridget Jones whom I know. Embarrassing.

      Friday, July 22, 2011

      No Knead Bread

      All sorrows are less with bread. - Miguel de Cervantes, Don Quixote


      Yes!  It is true!  Which I think must now be about 4-5 years old. The recipe which originated from the NY Times, and sent home cooks and food bloggers across the galaxy into their kitchens and testing the authenticity of the claim - No-Knead!  And true to its claim, it is indeed a no-fuss, no-knead bread.  Manna from heaven.  Bread heaven that is.  


      This in fact, is a bread that you can really, honestly, seriously, make at home.  With your own hands, a bowl, and a wooden spoon.  Some flour, yeast, water and salt.  And we did.  We finally made brilliant use of our cast iron pot, and made this glorious dough creation!  The long over due, no knead bread.  Who doesn’t love the smell of bread wafting from the oven?!   


      While our version of this no-knead-bread did not make it to a golden colour and only had that slight crisp top (too much anticipation enveloped around everyone that we just had to get it off the oven when we knew it looked and resembled an actual bread!), it was bread brunch heaven for us!  School holiday, mum off work, everyone just idling away the time, moving in slow motion and voila!  Bread!  In a flash, we managed to gobble almost the whole thing, with a slice left for dad to taste when he comes home from work.  Wow!  We did it!  We made bread!  And more bread making to come!  Say goodbye to that white loaf from the supermarket and say hello to freshly baked bread, everyday!


      This No-Knead Bread is adapted from the NY Times but mum first found from Steamy Kitchen.  Her post was definitely more enticing. Enough to encourage anyone, to actually get up and make your own bread!  


      3 cups all purpose flour or bread flour
      1/4 teaspoon instant yeast
      1 tsp salt (the NY Times version has 1/4 tsp more)
      1 and 1/2 cups warm water


      Combine all ingredients in a big bowl with a wooden spoon until the dough just comes together. It will be a shaggy, doughy mess. Cover with plastic wrap and rest for 12-20 hours in a warm room 
      (Since it's winter while we are trying this on, a warm room at our current home is as elusive as trying to find a parking spot at the mall during Christmas shopping season.  But we managed to keep the dough warm inside the kitchen cupboards wrapped over with a thick tea towel).


      Dough is ready when its surface is dotted with bubbles. Lightly flour a work surface and place dough on it; sprinkle it with a little more flour and fold it over on itself once or twice. Cover loosely with plastic wrap and let rest about 15 minutes.


      Using just enough flour to keep dough from sticking to work surface or to your fingers, gently and quickly shape dough into a ball. Generously coat a cotton tea towel with flour, wheat bran or cornmeal; put dough seam side down on towel and dust with more flour, bran or cornmeal. Cover with another cotton towel and let rise for about 2 hours. When it is ready, dough will be more than double in size and will not readily spring back when poked with a finger.


      At least a half-hour before dough is ready, heat oven to 450 degrees F (232 degrees C).  Put a 6- to 8-quart heavy covered pot (cast iron, enamel, Pyrex or ceramic) in oven as it heats (Yes, the empty pot!). When dough is ready, carefully remove pot from oven.  Turn the dough over into the pot, seam side up. Shake pan once or twice if dough is unevenly distributed; it will straighten out as it bakes. Cover with lid and bake 30 minutes, then remove lid and bake another 15 to 30 minutes, until loaf is beautifully browned. Cool on a rack.


      There's definitely some rocket science in there. No knead?  And a preheated pot?  But we're not interested.!  Right? All I know is we made BREAD! So all those who have been afraid.  Fear no more!  Give this a try! You have to!  You need to!   Although it is no-knead!

      Thursday, July 21, 2011

      Term 3 and a caesar salad

       Lesson 1, Term 3 - Caesar Salad  and dressing @ Kitchen 10


      Appetisers, salads and sandwiches and food service!  A new and exciting semester.  Or new and not so exciting, depending on viewpoint.

      This term will be all about salads and appetisers.  This includes sandwiches and canapés (or hors d’oeuvre pronounced awr durvz), quiches and wraps.  And tiny things that can be served before the main meal. And then the last term will be double the excitement as we move to Kitchen 11 for the unit on Food Service – preparing and serving food to real customers!

      Salads, sandwiches and appetisers.  Sounds a bit boring, but the first day was far from dull.  First of all, our new teacher is the epitome of the true French chef.  He is in fact French, has a million years of experience in a commercial kitchen, some local and  international stints and exudes that posh and almost conceited and distinctively French aura, and accent.   Don’t get me wrong.  I love the French (and at 40  I’m still dreaming of a trip to Paris and immersing into a true French adventure)!  Especially their attitude towards food and eating!  The first time I saw Mireille Guilano (author of the book French Women Don’t Get Fat.  She has since wrote a cookbook which is a take-off from this) on Oprah way back in 2006, I thought, “this lady’s got sense and definitely knows what she’s talking about!”  A lot of which are old truths we already know, but don’t really have habits of like, truly savouring every meal (not rushing that you gorge down every morsel down your throat), eating in portions (not stuffing your face because you love the food),  taking walks for pleasure and just plain to enjoy eating, enjoy food!  She quotes this French saying - joie de vivre – which translated means looking at your life as something that is to be taken with great pleasure and enjoy it.  Enough said. 


      I know that its going to be an exciting term because I admire French chefs no matter what their status is. - celebrity, small café owner, retired, whatever.  And Chef A is the vision of a true Chef to me.  Not those in the cooking shows with celebrity chefs.   He reminds me of that French chef in the animated movie Ratatouille.  Not in a disrespectful sort of way, but more of awe and admiration of the passion showed in the kitchen.  He walks about tall and proud and peeks at our benches and what were whisking away in a bowl and sneers or snorts or imparts a quizzical look which leaves you wondering whether your mayonnaise actually looks right, or you’re doing your work flow as instructed.   I like him straight away.  Besides the fact, that amongst all the Caesar salads prepared in class, he chose mine and actually ate it, in the pretense of a real customer.  I’m stoked!


      We made all 6 salads on the board including dressings and vinaigrette!  Why is it again exciting?  Besides having a French chef for a teacher, we make the salads and sandwiches, including the dressings!  And so it will come to happen that when we make those canapés in the next few days, we will also be making pastry.  Which is something that I’ve always been keen to take on.  Just think!  Cocktail party! 
      Caesar salad with Caesar dressing
      Serves 2

      1 cos lettuce
      50 ml olive oil
      30g bacon, chopped
      1 garlic clove
       1 slice bread
      8 anchovy fillets (can be omitted for those who prefer a less fishy taste)
      15 parmesan, shaved
      1 batch Caesar dressing


      Clean the lettuce and refresh in a colander.


      In a small pan, fry the bacon and add the crushed garlic and set aside. (Place them on a plate with kitchen paper towel to drain some of that oil)

      Add the diced bread and fry for croutons (or the alternative is to toast the French baguette slices in a tray in the oven.  Rub some garlic on them and drizzle some olive oil.  Alternatively, you can cut them into cubes and fry them as instructed here)

      Place the heart leaves on two plates; tear the remaining leaves into bite size pieces and draw through the dressing.

      Add some croutons and bacon.  Place on top.

      Finish with the remaining bacon, Parmesan and anchovy fillets and croutons.
      (For the anchovy fillets, I simply crushed 2 pieces, pan fried them in the bacon/garlic oil till they were crispy and topped them on the saladJust get ready to break the room apart.  It is fish after all.)


      Caesar Dressing

      2 egg yolks
      1 garlic clove, chopped
      1 anchovy fillet
      15g Parmesan
      5g mustard (use real honest to goodness English Mustard)
      20ml wine vinegar
      60ml olive oil
      5ml Worcestershire
      5ml lemon juice
      1/2 parsley, chopped
      salt and pepper to taste


      Whisk the yolks with the garlic, squashed anchovy fillet, Parmesan, mustard and the vinegar until all combined.

      Add the oil gradually, just like making mayonnaise.
      (To be able to do this by hand, you need to place a medium sized sauce pan on the kitchen bench, cover this with a kitchen tea towel and place your bowl on it.  One hand with the whisk, other hand pouring the oil gradually.  Or, you can always asked for a helping hand.)


      Season with the remaining ingredients.

      The semi hard boiled egg (runny yolks) is an optional extra.  To make this:  Boil some cold water in a sauce pan.  Once boiling, put eggs in and boil for 5 minutes.  Take the eggs from the water and place in a bowl with cold water - to stop the cooking process.  This results in a semi hard boiled egg with runny yolks. The perfect accompaniment to a Caesar salad.


      An important tip from Chef A when plating salads for presentation.  Follow the sequence of: 1. Base, 2.  Body, 3. Dressing and 4. Garnish


      The rest of the other salad recipes will be shared in the succeeding posts.


      Wednesday, July 20, 2011

      Vintage kitchen finds


      I love vintage classic kitchen stuff.  They have that character that no new item has.  They have a history. A story.  And I'm sure they serve their previous owners well, to have those marks and scratches, from years and years of use, from cooking and baking and making dishes for family and friends.  I try and visit op shops like Vinnies and Salvos, local markets and garage sales every now and then to find that treasure.  As they say, someone's trash could be another one's treasure!  Besides, its a good bit for the environment!  Remember, reduce, re-use, recycle!


      Found these vintage kitchen utensils last weekend.  From a local op shop and at the annual massive garage sale at St. Michael's in Lane Cove.  I love vintage classic looking kitchen utensils.  They have the look and feel of years of use and I know that whoever owned it before, used it with a lot of love and care.  Preparing food, baking in their kitchen for their family and friends. 


      Although we already have our own newer apple corer, this one definitely has a different kind of character to it. And Mum needs a melon baller in her tool kit (at school) and this just looks perfect!


      I've always wanted sturdy mini pie tins and was ecstatic when I saw these Willow brand set of 6  versatile tins, I grabbed them straight away!  They were tucked away under a table inside a box, unexposed to the rest of the bargain hunters and called to me!  And something, somehow told me to scrounge down there and rummage through these piles of other cooking paraphernalia. And voila!  They're just gorgeous!


      They also look lovely in photos. They look like props from those big-named magazines and some other lovely websites such as Katie Davies' website:  What Katie Ate!

      Besides, these we also found a big nice wooden salad bowl!  Great for those Caesar Salads and Greek Salads that we'll be serving soon (now that mum's onto salads at school), a wire basket (great for eggs but now holding all those lemons from the market), and three wooden spice racks for $0.50 each. While browsing the hall for bargains, I grabbed 3 of these spice racks and an old lady just had to ask me what would I have them used for?  Why they are spice racks, right?  After all SAXA is really a household name in Australia for salt!


      The good thing about grabbing vintage kitchen finds is this.  If they collapse after several uses, its easy to just throw them away. Because you know, you got them for a bargain and they served their purpose with you!  Much less stressful than buying a pricey brand new one and breaks down sooner than expected.

      PS - I need to stress that vintage finds doesn't always mean its the old second hand types. These stuff stand out from the rest of them.  Yes, they are old.  But they have character.  So look out for them.  

      LinkWithin

      Related Posts Plugin for WordPress, Blogger...