Welcome to adobo-down-under!

Musings. Family. Food. Stories. Cooking. Recipes. Eating. A recipe journal. From simple Filipino dishes to challenging recipes and exciting gastronomical failures. This is for my girls to look back on for comfort, memories, laughs, love and lots of food!
Showing posts with label entree. Show all posts

Monday, March 24, 2014

Aussie-Asian smoked salmon rice paper rolls


We love fish and seafood,  and salmon is one of our family's favourites.  Raw or smoked, it's always a welcome treat in the lunch box, in salads and in our mains.  And I was just too happy to oblige to receive an invitation to the #huonsalmon blogger's competition sponsored by Huon Aquaculture. 
 
 
With salmon and my cooking style, I prefer simple and fresh.  As much as possible, I want the star of the dish to shine.  So it was a little bit difficult to think of a dish to make that's not already out there.  And this came to mind - Australian salmon meets Asian spring rolls.  This may be one too many of similar dishes out there, but I don't mind.  This was a welcome change to our usual fare.  I also added some Australian macadamias for that extra texture and to make it even more Aussie.


Ingredients

8 pieces rice paper rolls

1 Lebanese cucumber, deseeded and julienned

1 carrot, julienned

60 grams salted macadamias, roughly chopped

60 grams rice vermicelli noodles


Method

In a bowl, soak the rice noodles in warm water for 10 minutes.  Once soft and noodles have turned white, drain.
 
In a large bowl, combine the rice noodles, julienned cucumber, carrots and the macadamias.  
 
  Prepare a wide bowl with some water, and a dry tea towel on the counter.

Soak one rice paper roll in the water for 10 seconds or more until soft. 

Place the rice paper and pat on the tea towel, then on a cutting board.

Place a strip (or more) of smoked salmon on the rice paper roll.

Spoon some of the rice noodle-macadamias-cucumber-carrts onto the smoked salmon.

Fold the front end of the rice paper roll and slightly tuck to hug the filling, fold the right and left sides then continue to roll.

Continue with the rest of the rice paper rolls and the filling until you've used up all ingredients.


These can be dipped in simple soy-sauce or sweet chilli sauce, or you can also make your own Nuoc Cham sauce which is the traditional dipping sauce for the inspiration for this dish - the Vietnamese spring rolls. This sauce is adapted from SBS Food with some slight changes.
 
To make the nuoc cham sauce:
 
1 garlic
 
3 pieces red chillies
 
juice of 1 lemon
 
60 ml fish sauce
 
60 ml warm water
 
3 teaspoon raw sugar
 
1/2 teaspoon Worcestire sauce 
 
 
Grind the garlic and chillies in your mortar until you get a paste consistency.

Combine the fish sauce, water, sugar  in a bowl stirring until the sugar is dissolved.  

Add the Worcestire sauce and stir.

Add the garlic-chilli paste, stir and serve with your spring rolls.


Disclaimer: The writer (adobo down under) was invited to take part in the #huonsalmon blogging challenge and Huon Aquaculture has provided the products mentioned in this recipe. 


Tuesday, January 14, 2014

Empanadas (empanaditas)


Heirloom recipes.  Do you have those?  Handed and taught down from generation to generation through family members?  


I don’t have an image of me growing up with my grandmother on one side and mother on another, dabbling with ingredients in the kitchen or making  a mess with flour and sprinkles.


Inay, my grandmother (mother side), was not so much a kitchen person.  She’ll concoct some traditional Tagalog / Filipino dishes every now and then, effortlessly.  The few times she’s in the kitchen, she can work magic with simple ingredients – from scratch.  And I mean from a live chicken to a dish on the table.  That type of cooking.  Other than those few magic moments, she’s really a Martha-Stewart-recycling-DIY-kinda-gal.  She’ll make a “walis ting-ting” – broom made of sticks from dried coconut palm leaves.  She’ll idle away the time making floor rags from old fabrics and old t-shirts.  She’ll clean the hell out of old coffee, jam, peanut butter jars and reuse them as drinking glasses and tumblers at home, she’ll be happily tinkering away the afternoon in her sewing machine. At the best of times, she’d be making mean "pinais na tulingan" (slow braised tuna in tamarind or kamias), tinolang manok with malunggay (native chicken tinola with moringa leaves).  Her cooking was always simple with fresh ingredients and as organic as would be called now. 


Now my grandmother on my father's side is the all the time cook.  Although I have never spent time with her side by side in the kitchen (she's lived in the US since we were born with a few visits in the Philippines while growing up),  I have gotten to know her through her cooking.  The few times she's visited us was always a lesson in the kitchen.  And this is her recipe. One of the dishes she can throw all together in a bowl without batting an eyelash, without measurements, and it always comes out perfect.    And whenever they make this at my aunt's home in NJ, everyone pitches in and make these.


Now like all recipes, as long as you have the ingredients on hand it's really up to you to adjust the quantities as it suits your taste.  The flavour, feel and texture is entirely up to you.  I have tweaked my grandmother's recipe for the filling to suit our preferene at home.


There are two elements to this recipe - the filling and the dough/pastry.   


Ingredients and method for the filling:

 500 grams minced pork (or beef or chicken)

 1 large onion, diced

3 cloves garlic, finely diced

1 large potato, diced

2 medium sized carrots, diced

1 red capsicum, diced

1 stick celery, diced

1 cup frozen green peas

2-3 tablespoons soy sauce

salt and pepper, to taste

vegetable oil

2 teaspoon of chilli flakes (optional) 


In a large skillet or wok, pour about two tablespoons of vegetable oil and heat the pan.

Saute the onions and garlic until soft and fragrant.

Add the minced meat and cook stirring until almost brown, 5-10 minutes

Add the potatoes, carrots, capsicum, celery and cook stirring to coat all the ingredients.

Add soy sauce and season with salt and pepper.

Turn the heat to medium and simmer until meat and vegetables are cooked through, 10-15 minutes.

Add the frozen green peas and sprinkel the chilli flakes if using.

Simmer for another5 minutes then turn off heat.

Spoon onto a large bowl and let it cool.  
Make sure the filling is completely cool before making the empanada/empanaditas.


Ingredientes and method for the  dough:

170 grams butter, cold cut into cubes

3 and 1/2 cups plain flour

1/4 cup sugar

1 cup cold water

1 beaten egg + 1 tablespoon of water for the egg wash

2 tablespoon milk or water for sealing

Combine all the  dry ingredients in a bowl and rub the ingredients with your hands until it resembles fine crumbs.  Slowly add the water (a little at a time) and continue to mix with your hands until it forms into a ball.

* Alternatively, you can process the butter, flour and sugar in a processor, then slowly pour the cold water until the mixture forms into a ball.

Flatten the dough slightly and chill in the refrigerator for 10-15 minutes.

Place the dough on a flat surface, and using a rolling pin flatten the dough to abou 1-2 cm thick.  

Cut the dough with a cookie cutter (your desired size - can be bigger or smaller).


Filling the dough:   (see photo below).   

Press on the sides of the dough to slightly thin them out.  Seal one side with milk.

Fill the dough with a tablespoon of the filling.

Slowly pinch the sides to seal the empanada.

Place on the flat surface and using your thumb/finger, press the sides of the empanada.

Further seal the edges with a fork.  Place all finished empanadas on a lined baking tray.

Continue with the other dough/filling.  


Baking the empanadas/empanaditas
Before baking, preheat oven to 180*C.

Brush the empanadas/empanaditas with egg wash.

Bake in the oven until golden, 30-40 minutes. 


Tips and tricks

* The butter needs to be cold when making the dough, not softened or melting;

* When making the filling, you can add other ingredients to suit your preference.  You can make it entirely vegetarian too.

* Alternatively, you can also deep fry the empanadas until golden, then drain on paper towels.

* Create small air pockets on the empanadas prior to baking so they don't inflat too much leaving a space between the dough and the filling.  I usually use a small knife or a fork to do this.

* This dough which my grandmother uses does not have the flaky texture when baked.  If you prefer a flaky dough, you will need to roll until thin, fold, then roll, and fold and roll.  The layers from rolling and folding several times creates the layers which results in a flaky dough.

* Some empanada recipes calls for lard and butter combined, which also helps in creating a flaky texture when baked.  Trissalicious shares in her blog a secret for a flaky empanada. 

* Store-bought puff pastry can also be used to make these empanadas.

* They are called empanadas when they are bigger, like the palm of one's hands.  This recipe for empanaditas are bite-sized and a little fiddly to make (photos show scale).  You can always adjust the size to suit your preference.


From Inay Mercedes and lola/grandmother Antonia, this is my heirloom - memories of good old fashion, no-nonsence cooking.  No fancy antique jewelries here, or grand estates. 


And this family recipe, I'll recreate a tradition at home when making this - as these are bite-sized pieces, I'll gather the girls around the table, pinch away dough and seams and filling and sharing stories and creating new memories.
 

Monday, October 21, 2013

Chicken rollatini with ricotta and spinach


It's 65 days more till Christmas!  A little bit more than two months to the silly season!  Shopping malls are already filled with trimmings and marketing ploy to make us stay at the malls longer and shop till we drop. 


Well that ain't working with me.  You see, I hate shopping.  I hate shopping malls. I hate shopping malls during the Christmas rush especially. 


Usually, if there's really a need to go in there, I'd dash in and out in less than hour.  


Not that I don't shop for clothes and shoes.  I do.  It's just that when I'm out shopping, I pretty much know what I want and get it.  Straight up.  


But with food.  Food shopping?  I'm more patient and take time.  Savouring the smells of seasonal fruits and fresh veggies, browsing at the seafood on offer and cuts of meat for the day.  I usually shop at the markets and my favourite Asian butcher and fish monger locally.  And that's my happy place.   


So usually Christmas gifts to family and friends are always food related - cookbooks, kitchen and dining gadgets and home made goods.  


Now talking about Christmas always brings me dinner table thoughts.  You know, menu for the Christmas eve dinner, Christmas breakfast, Christmas lunch, Christmas dinner and every single meal all the way to New Year's day.  It's always exciting to try new dishes in preparation for that special day.  Often times, anticipating the traditional dish becomes the highlight of the meal.


Now this chicken dish can be made any day of the week, a weekend lunch or dinner or try it this holiday season.  The colours do match the holidays too.  This recipe is adapted from  Skinny Taste with the ingredients slightly changed.


Chicken rollatini coated in bread crumbs


Baking in the oven for 25 minutes


Ingredients

500g chicken breast fillets, thinly sliced

125g ricotta cheese

250g baby spinach, washed and roughly chopped


2 cups breadcrumbs

2-3 whole eggs, slightly beaten

125g cream cheese, sliced thinly

125 grated Tasty cheese

700g jar of passata sauce

salt and pepper to taste


Method

Preheat over to 180*C.

Prepare an oven proof rectangular dish.  Spray with canola oil and set aside.

Prepare 3 separate bowl, one with breadcrumbs and one with the beaten eggs.

In a medium sized bowl, combine ricotta cheese and spinach and mix with a fork.

Set aside.

On a large chopping board, work the chicken pieces one by one.  Spread the chicken fillet flat, spread some ricotta-spinach mixture and loosely roll with the seam side down.  Repeat with the remaining chicken pieces.

Coat the chicken rollatini in the beaten egg, then roll into the bread crumbs.  Place in the prepared baking dish.  Repeat with the rest of the chicken pieces.

Lightly spray with olive or canola oil.

Bake in the preheated oven for 25 minutes.

Remove from the oven then pour the passata sauce over the chicken pieces.

Place cream cheese slices on top of the chicken, then the grated cheese.

Bake in the oven for a further 5 minutes or until the cheese has melted.

Serve in individual portions with some salad or roasted vegetables.


After 25 minutes....


Topped with cream cheese and grated Tasty cheese....


Cheese has melted.... seasoned with some more ground pepper
 

And served with some extra explosives on the side! Ha!


Now this has delicious written all over it.  We've made this many times using bocconcini as topping and some mozarella.

Don't you think it looks like Christmas?

Now... time to get some list going.   Thank goodness for online shopping!  Hahaha!


Wednesday, May 08, 2013

Pork and chorizo sliders with jalapeno mayo


"Life is full of surprises and serendipity. Being open to unexpected turns in the road is an important part of success. If you try to plan every step, you may miss those wonderful twists and turns. Just find your next adventure - do it well, enjoy it and then, not now, think about what comes next." - Condoleezza Rice


Do you believe in fate?  Serendipity?  I do in most instances.  I mean there are small miracles that happen every day, I believe that.  I've experienced that. But serendipity are those little sometimes big, pleasant surprises that just happen.  Because of fate?  Maybe.  Luck?  Who knows.  But I do believe this.  That if you think something or visualise something so bad and pray for it, the forces of the universe will make it happen.  

Now maybe I'm a little naive about these things and believe too much in this crap, but truly I am amazed at how things turned out for someone I've connected with in IG.  We don't know each other personally, but she's contacted me a few weeks ago.  We had two things in common.  We're both Filipinos and into Instagram.  That's about it.  In the course of our email exchange, she mentions about looking for a job which I thought maybe, somehow I could help however way I can.  Working a few days at at government office and with limited connections myself I casually forwarded a job posting email which circulates around the office when positions fall vacant.  And from there,  a few weeks after that email exchange, it all turned quite magical.  Serendipty. A happy pleasant surprise!  She got the job which involves a project working closely with our branch!  I am amazed at how this all turned out.  Social networking does work!  And soon, I will get to meet her!


Not to mention through social networking, my eating and cooking adventures (and my family included) have evolved.    


Just looking at my Instagram feed, Pinterest, FB and reading other food bloggers' posts is always inspiring.  Recently though, I had some nostalgic kick craving and remembering a particular burger we loved to eat while hubby and me were still dating.  This was served at a small kiosk at the Greenbelt Plaza just outside the cinema.  This was during the early 90s but they disappeared later on during that decade. From what I've learned, they are now back with the same famous recipe for choriburger but with an entirely new look and logo.  


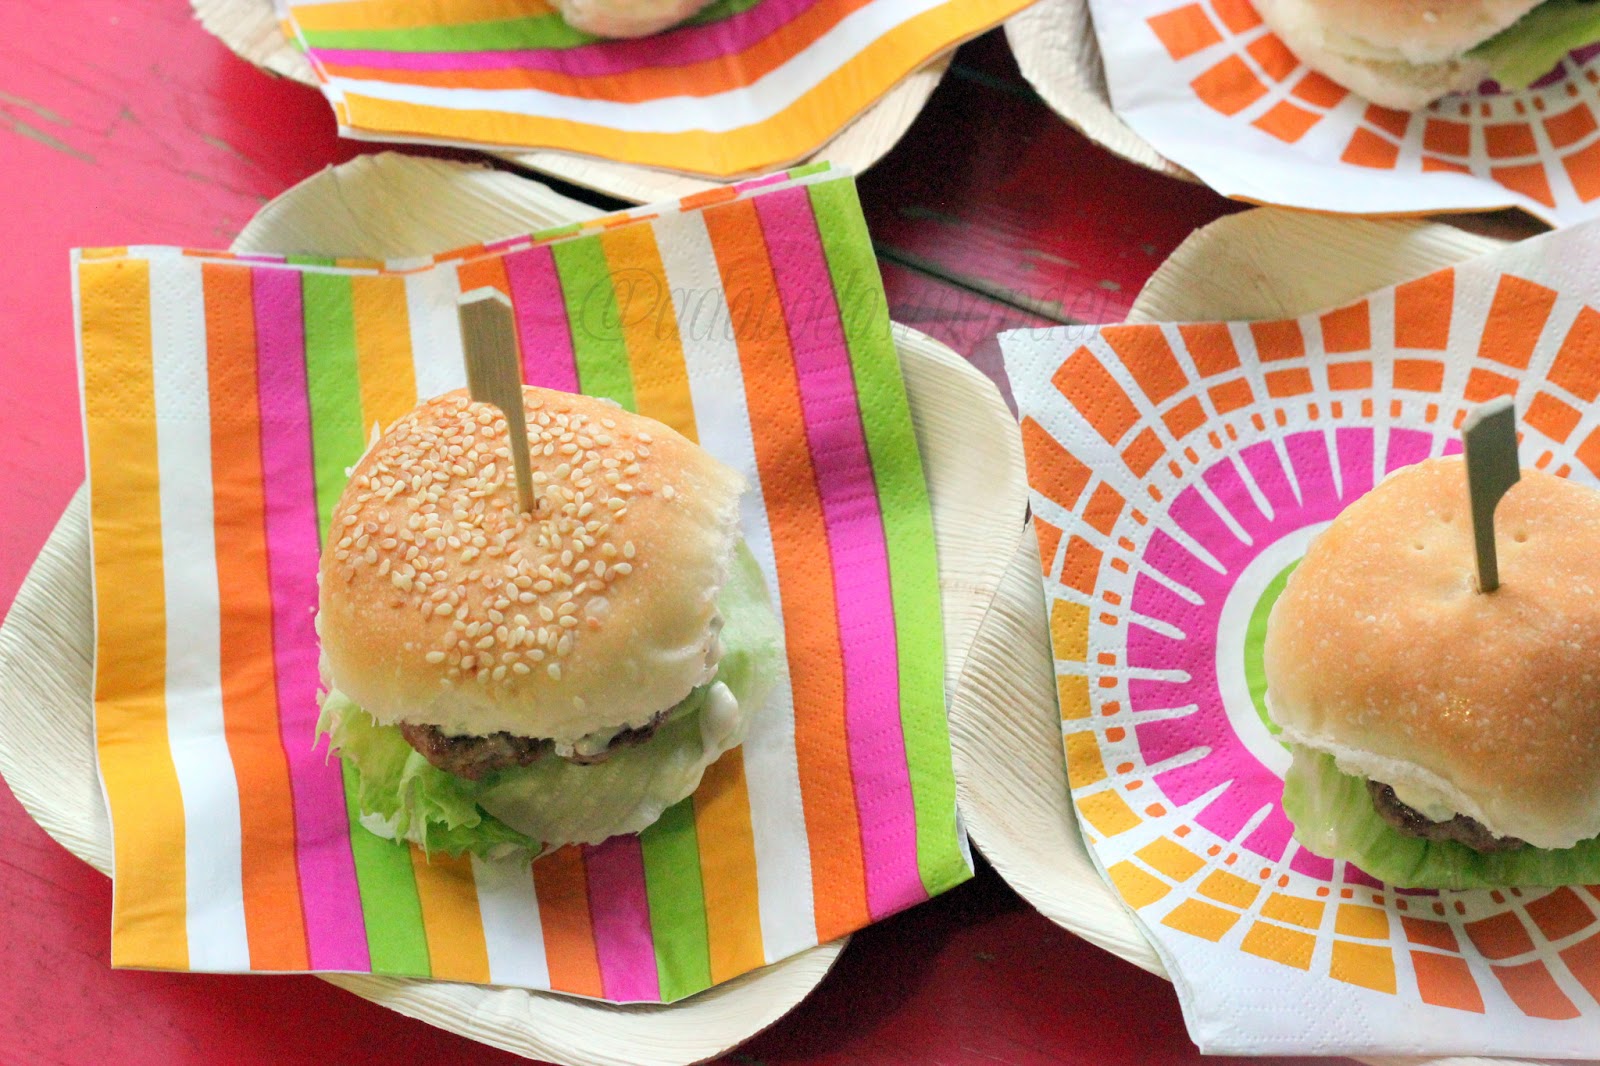
So here's a recipe inspired by an old favourite from back in Manila (Burger on the Run's Choriburger).  I was looking for Bun on the Run online and found a Pork and Chorizo burger by Emeril Lagasse's from the Food Network's Backyard Eats - which I found too complicated with so many spices so I made my own version.  We served this "for adults only" at that weekend birthday party.   The smell of the patties while cooking was so inviting, some of the kids kept coming into the kitchen and asking what's cooking.  "Sorry kids, this is for adults only."


Ingredients:

500g pork mince

3 fresh chorizo sausages, removed from casings

2 cloves garlic, finely chopped

1 onion, finely chopped

1/4 teaspoon paprika

1/4 teaspoon cajun pepper/seasoning

1 tablespoon corn flour (for binding)

salt and pepper for seasoning


Mix all the above ingredients by hand in a large bowl.  Shape into patties.  Set aside.

Using a pan griddle, or a simple pan, fry the patties in a little oil and cook until done.

To serve: thinly spread some jalapeno mayonnaise* on the rolls/buns, top with a pork-chorizo burger, some lettuce (add tomato slices and cucumbers if you prefer), and top with a good dollop of the jalapeno mayo*.  


*I wanted to make Emeril's green chilli mayonnaise but can't get poblano peppers at the time, so I made a simple Jalapeno mayonnaise.  Which was a mixture of 2 jalapeno peppers finely diced, mixed with a cup of mayonnaise. 


Tips:
  •  Buy your chorizo fresh from the butcher or deli.  The supermarket variety will work but will not be the same because they are slightly cooked.  You will need to remove the chorizo from the casings which will be difficult to do with the commercial variety;
  • You can make this as big as burgers or small as in for sliders (like this version);


Sometimes I think the fear of being vulnerable and taking a risk stops us from connecting with people.  Opening doors, in more ways than none, actually helps.  We create friendships and build little communities!   I love how blogging and social networks has helped me do this.  And taken my thirst for cooking and eating into new heights.


Thursday, March 21, 2013

Gambas al Ajillo


Ok.  So today I decided to brag about this dish.  Er. I mean blog about this recipe.  This was only after I realised this dish is not yet in my blog archives.  How can that be?  It's one of my all-time favourite dishes way back when - as an appetizer usually when out drinking with mates.  Back in the day.  And yes, at home too as a main dish.  Its a simple dish without the need for a recipe, really.  Just the basics of olive oil, garlic, chillies, parsley and good ol' salt and pepper.  Its actually one of those dishes which you can re-create on your own just by tasting the dish.  You know those times when you eat something at a restaurant that looks easy enough and you try to replicate it at home.  Well, this is like one of those.  Actually just look at the picture and you will already know what to do.


Gambas al Ajillo is a Spanish dish which originates from the South of Spain and it is really a tapas dish - an entree or appetizer.  A long time ago, when I took a short Spanish cooking class at the Sydney Seafood School, this was one of the tapas dishes we prepared.  Intentionally, I enrolled to learn the basics of paella.  And it was a bonus to learn two other tapas dishes  - this one included.  An easy Spanish tapas dish which is already a hit every single time.   When I organised the Taste of Harmony lunch at work and asked everyone to bring a dish from a country they want to visit, I initially thought of making Tres Leches Cake because one of my dream is to visit South America and trek the Machu Picchu. But I also would love visit Spain and making this was easy enough on a weekday morning. 


To make Gambas al Ajillo

500g prawns - washed, peeled and deveined

3 cloves garlic, crushed and chopped finely

2 birds eye chillies, chopped finely

1/2 cup flat leaf parsley, roughly chopped

3 tablespoons light olive oil

salt and pepper to taste


Method:

Heat olive oil in a skillet or pan.

Add the garlic and cook until soft but not brown.  
(Do not burn as your dish will taste bitter)

Add the prawns and stir until cooked through.

Add the chopped chillies and stir.

Season with salt and pepper.

Top with the chopped parsley.

Serve with toasted crusty bread.


Taste of Harmony lunch feast at the Office


I'm grateful that I work in small organisation and coercing everyone to bring a dish with a theme was too easy.  Everyone had a good lunch celebrating with lots of food and stories to share.

 * Taste of Harmony is an initiative by the Scanlon Foundation whose vision is to enhance social cohesion in Australia.  TOH is an annual event which encourages workplace colleagues to share food and stories from different cultural backgrounds.


Sunday, February 10, 2013

Shakshouka


I have a confession to make.  I am a noob at other culture's cuisines.  Sans the traditional Italian, Spanish, Japanese, Chinese, Vietnamese, Korean, Thai, Indian, Mexican, Malaysian and Greek dishes, when it comes to other cuisines, I am as clueless as a child.  You know the one who refuses to eat her vegetables and only eats naked pasta when allowed.  Growing up with a limited repertoire of available cuisines, it was either Filipino traditional dishes, American (steak and mash or hamburgers is the usual) or some pasta dish and the occasional tacos.  Eating out almost always took the Chinese or Japanese route or a fave pizza parlour complete with folk singers with guitar singing Puff the Magic Dragon and Horse With No Name.  


Malaysian, Vietnamese and Thai only came in early adulthood when restaurants started opening in Manila and showcasing neighbouring Asian cuisines.  So that was about a decade or so ago.  A far cry from the state of the restaurant industry in the Philippines these days.  Fusion of Mexican-Japanese  now exist, traditional Sri Lankan and a host of other gourmet fusions. There are cakes,  patisseries and chocolate shops that are at par with overseas counterparts. Filipino restaurateurs back home are showcasing Filipino food in a way that Heston  Blumenthal would plate a salmon dish at the Fat Duck.   Why there's even a franchise of Masterchef on local  Philippine television, and a live MC competition going on as I write this post.


Now being a noob in this day and age of technology is not acceptable.  Cooking shows attract a good following and reality cooking shows become the new Big Brother. Food documentaries, magazines, events, blogs!  Food has become as exciting as when TV broadcast its very first show.  Now back to me as the noob in this instance and learning how to cook (other dishes besides and a few other Filipino dishes).  This was a dish that I first saw from a TV show - yeah I know pathetic right.  And from there on, made it, made it, made it.  Hubby loves this.  I love it.  (The kids are not fans yet).  We make a cheats version with chorizo and tinned baked beans.  I love how versatile this can be and how its such an easy casual dish that can be served any time of the day.  


Just a week ago, I saw a good number of this dish in my IG feed and so a timely revisit to Shakshouka.   And so here is a recipe inspired by that TV show and a fave weekday meal at home.

 
To make this Shakshouka dish:
Print the recipe here

1 onion, sliced

1 red capsicum, chopped

1 green capsicum, chopped

4 Roma tomatoes, quartered

1/2 teaspoon sweet paprika (I used a Spanish brand)

2 eggs

olive oil

salt and pepper to taste


Method:

Using a cast iron pan (or any 20 cm pan), heat about a tablespoon of olive oil.

Add the onions and capsicum to the pan and cook till soft.

Add the tomatoes, stir and cook for two minutes.


Season with salt and pepper and half of the paprika and stir to coat the vegetables with the seasoning.

Turn the heat to low/simmer.

Using a wooden spoon, push aside some of the vegetables to make space for th eggs.
 
Crack the eggs into this space and let it poach until the whites are cooked through but the yolks are still runny.

Remove from heat and serve on the pan, with some toasted flat bread or any bread of choice.


Saturday, January 12, 2013

Fresh brocolli salad


There's an email going around the office. Its been shared by a family for many years and so apparently its also been passed on to office colleagues who came and went.   And it's not a chain letter.  It is actually a really good brocolli salad.  And this is it.   Mr G who shared this salad recipe is a lovely man who's been all over the world and back.  He's like a jolly Santa always happy to share a ho-ho-ho or a recipe or two.  Even when it's way pass Christmas.


Broccoli salad
Print the recipe

Ingredients

3 heads brocolli, washed and cut into florets/small segments

250g diced bacon

1 medium red onion, sliced

1/2 cup sultanas/raisins

1 tablespoon pine nuts

1 tablespoon sunflower seeds

2-3 tablespoons mayonnaise

1-2 tablespoons apple cider vinegar

sugar to taste (optional)


Method

Cook the bacon until crisp, drain on paper/kitchen paper and set aside to cool.

Place the brocolli florets in a large bowl. 

Add the mayonnaise then all the other ingredients.   Mix until the brocolli florets are coated with the dressing. 

*Add a bit more cider vinegar or sugar to balance the taste.  Should be a bit tangy and sweet.

Once bacon is cooled, add to the salad mixture and stir.  

Leave in the fridge to cool for at least an hour before serving.

* You can omit the bacon and make this entirely vegetarian.  Alternate mayonnaise with sour cream.  You can also use other types of nuts - toasted almond slices work a treat.*


I work in an office where there's a culture of sharing food/dishes made at home, especially when there's an occasion that calls for it - a birthday, someone going away, anniversary, etc. etc.  And I've tasted this in one of those occasions.  And it just changed the way I look at fresh brocolli!   As I'm a newbie at work (about 6 months and counting), I heard so much rave reviews about this salad that I had to get a copy of that circulating email and try it at home!  

Its a great summer salad!  To bring to that party or that picnic at the park!  Why as brocolli's a year round vegetable, its great at just about any season!
Try it!  But don't tell Mr G it came from me.  Ssshhhh!

PS - I do have the permission from the owner to share this so you can all relax.  xx

Tuesday, January 08, 2013

Steamed milk cupcakes (Filipino puto)


There's an unwritten Filipino tradition that every family observes on the eve of new year. It doesn't matter which part of the world we are, generally all Filipino families practice this.  And that is to plate or serve round types of food.  Whether its a basket full of round fruits or dishes with round ingredients, it is a custom that's hard to ignore.  Why?  Well supposedly round-shaped foods and fruits bring good luck for the new year. Everybody wants good luck for the new year, right?  Who wouldn't?

This practice is obviously brought and influenced by the Chinese. Whether its fad or tradition, we follow what we grew up with. So round fruits always adorn our table every new year.  Here's an old article mined from 2010 about this practice.


And while we are in the subject of round foods, why not a classic Filipino round sweet treat for a first post of the year!  So  here it is, a recipe shared to me by an ex office colleague for steamed milk cupcakes, or "puto" as what is locally called back home.


Puto/s are traditionally made using rice flour, hence called steamed rice cupcakes or cakes.  They're also made using banana leaves trimmed to fit the round mini cakes.  They also come in lots of colours (no flavours) and sometimes with pandan and coconut flavours.

But this particular recipe is easy.  It uses plain flour and pantry staples.  And its no bake.  I've prepared this using a make-shift steamer: a large wok, a round grill or cooling rack placed on top of the water and mini cupcake pans. Of course if you own a steamer, this will be an easier feat.  Otherwise, you can always use the oven and make this using a bain-marie: a roasting rack with a little water, your cupcake pan then covered with aluminum foil. 


To make this recipe
(Print the recipe here)

Ingredients

3 cups all purpose/plain flour

1 1/2 cups milk or 1 can 375ml evaporated milk

3 tablespoons baking powder

2 cups caster sugar

1 1/2 cups water

3 eggs

cheese slices/squares or grated for topping


Method
In a large bowl using a whisk, mix all ingredients together.

Pour into muffin/cupcake pans.

Top with cheese.

Place in the steamer (or bain marie in the oven) and cook for 20 minutes.

Test with a toothpick or skewer.  Stick should come out clean.


The classic combo for this sweet treat is puto and dinuguan (blood pudding).  If you haven't tried this, just leave it to your imagination.  It may seem a odd.  Wierd even. But the combination is divine. Savoury and sweet at the same time.  Black and white.  Ebony and ivory.  But that's Filipino food for you.    It's like no other I must say.  Now I'm not going to push anyone to try dinuguan (blood pudding, why I'm the only one at home who likes this stuff!  And I'm yet to learn how to make it!), but this sweet round treat should be an easy must-try for those who are keen for something different.


So how about you?  Do you have family traditions that you follow from where you grew up?  Or are you making your own traditions?  And while we're at it, do you have any foodie resolutions and goal this year?


Saturday, November 12, 2011

Tartlet of caramelised onions with clotted cheese and roasted tomato


It has been an exciting week!  After the fabulous day, my tweeting ability has multiplied a thousand fold.  Well, maybe exaggerating a little bit. But still learning.  This was in my twitter timeline on Friday" #ff.  And embarrassing as it may be to admit it, but I had to consult good ol' friend Google.   I'm hopeless, but will keep up.  Technology is amazing!

Now going back to the kitchen, these entrees were from last week's Lesson 4 in Kitchen 10.  Was on the roster for entrees/appetizers.  And this kept me going from 3-7pm.  It did take that long, including resting the dough, blind baking the pastry, making the clotted cheese, roasting the tomatoes and cooking the caramelised onion.    What made it exciting was cheese making and making the short crust pastry - a first time for this Pinoy chef wannabe.   And while its seems overwhelming to look at the long list of ingredients and to do's, this can be done in a home kitchen on a weekend.  Who say's multi-tasking is only for the corporate environment?


ready for service

Enough of the chit chat!  Let's get to work!  First things first!  Savoury short pastry!

125ml water
250g unsalted butter
500g flour
1/4 tsp salt

The basics of short savoury pastry: 1-2-4: meaning one part water, two parts fat, four parts flour.

Cut the butter into small cubes, and rub the flour with the butter in a large bowl until it resembles fine crumbs.  (This is something that doesn't happen in a rush.  You need to rub rub rub the flour and butter for a good 15-20 minutes to get good results.  You know you're done rubbing when there are no more big lumps of butter, instead of you have a bowl of grainy flour).

Add the salt and the water and mix together using your hands.  You will create a soft dough.  
Do not overwork.  

Wrap in cling plastic and rest for 30 minutes in the refrigerator.

After resting, grease the tart pans with butter or oil spray. Line the pastry onto the pan, cutting edges with a kitchen scissor then press firmly.

the dough pressed onto 8cm disposable tins

 Cut out round or square baking paper and lay these onto the pastry.  Use baking beads or beans and pour these onto the pans.  Bake blind for 15-20 minutes in a 200*C preheated oven.


the pastry ready to be baked blind using mixed beans

The pastry is ready when they are golden and are easily lifted off the pan/molds.

Set aside to cool.


Its time to make the fillings!  Roasted tomatoes first!
 
5 large Roma tomatoes
1/4 bunch thyme
salt and pepper

Cut the tomatoes into quarter.  Season with salt and pepper and chopped thyme.  

Place on a baking sheet or roasting tray and slow roast at 140*C for approximately 40 minutes.


And while the tomatoes are roasting in the oven, prepare the caramelized onions.

200g (about 2 medium sized) Spanish onion, sliced
1 garlic clove, minced
20g brown sugar
1/4 bunch basil
50ml olive oil
20ml balsamic vinegar


In a medium sized pan, sweat the onions with garlic and olive oil.

When cooked (onions have softened), add the sugar and caramelise, add vinegar and seasoning.   

Set aside in a plate or bowl and cool.


To serve: arrange the caramelised onions and roasted tomato in the pastry.  Serve topped with clotted cheese and some basil leaves. Or if you're not making the cheese, fresh ricotta or some crumbled feta would be just as great.


Have a great weekend everyone!  And while we're still coasting through the middle of November, best to get on with some Christmas shopping! 

LinkWithin

Related Posts Plugin for WordPress, Blogger...