Welcome to adobo-down-under!

Musings. Family. Food. Stories. Cooking. Recipes. Eating. A recipe journal. From simple Filipino dishes to challenging recipes and exciting gastronomical failures. This is for my girls to look back on for comfort, memories, laughs, love and lots of food!
Showing posts with label healthy. Show all posts

Tuesday, September 30, 2014

Baked maple pears with toasted pistachios


No more whingeing around here of being too cold.  We have been blessed with warm air and clear blue skies.  And so I am catching up on some needed writing and blogging as it is the end of September, and we are halfway through to spring.  Spring cleaning at home and the backlog of recipes and photos to post.  

We have revamped our veggie garden as the seedlings planted in winter did not survive and to take the easier route, we bought some ready-to-plant veggies from the local nursery.  Hopefully, there will be some harvest of French beans, eggplants, strawberries, Habanero and birds eye chillies soon.  Our calamansi plant is finally showing some fruits after last year's drought.  This makes me very happy as any Filo would be.


And now catching up on some blog posts, this recipe is the easiest dessert there is that you can bring to any potluck party.  The idea to make this was initially to make it for a vegan at work who was retiring.  And I also brought this to a work birthday lunch and ever since, people have asked for the recipe and they have made it at home with spectacular results.   It's really easy.  I love easy dishes.  Those that you prep and then you just wait for the magic to happen.  Be it a slow braised on the stove, or a baked maple pear in the oven.  You prep it and you wait for an hour.


The recipe is adapted from an old cookbook from my shelves - Marie Clare Fresh + Fast Simply Delicious Healthy Food


To make these baked maple pears

Ingredients:

7 Corella pears, halved and cored*

3 tablespoons real maple syrup

2 tablespoons extra virgin olive oil*

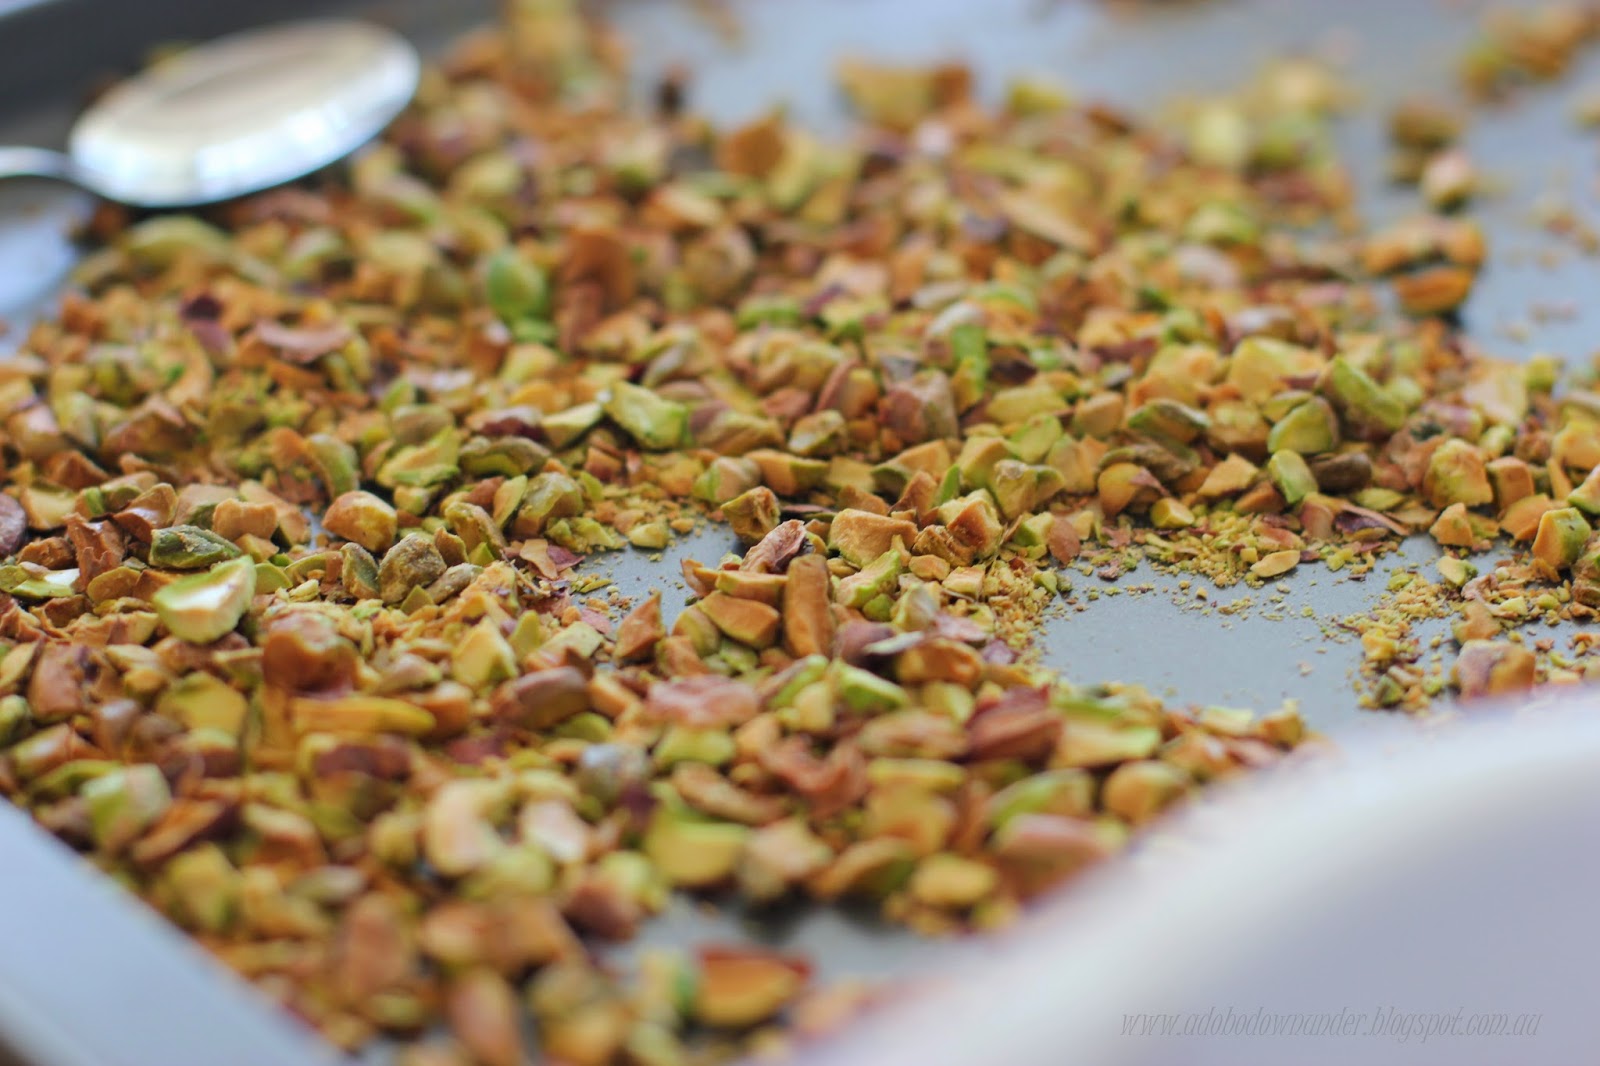
1 cup toasted pistachios, roughly chopped

1 cup creme fraiche or whipped cream


Method

Preheat oven to 180*C

Cut a thin slice from the skin side of the pears to give them a flat surface.

Place the pears onto a shallow baking dish, skin side down.

Drizzle olive oil and the maple syrup onto the pears.

Cover with aluminum foil and bake in the oven for 1 hour.

The pears should be tender when a butter knife inserted comes out smoothly.

Serve with the creme fraiche or thickened cream on the side, and the toasted pistachios.


Tips and tricks:

* The original recipe called for unsalted butter to rub on the pears.  I used olive oil as I brought it for someone who is vegan.

* You can use other pear varieties. Corella pears tend to be tougher than most so it cooks for an hour.  Other pear varieties are tender and may be baked for less than an hour.

* You can make as many or as little as you like, just adjust the maple syrup to your requirements.


Tuesday, July 15, 2014

Seafood marinara stew


Winter is creeping up on us like an unwanted guest. It's the middle of July and of course it is cold.   I have always written many many times in the past that we dread winter. Well I do. Sans the layering of clothing and comfortable matching scarves and beanies, and beautiful leather boots, I could do well without winter.  Really.  But I’m embracing our life here in AU and part of assimilating into the Australian way of life is well, embracing winter and all the other seasons that come and go.  But you have to know that winter... is my least favourite. 


When it comes to winter cooking and food, I love simple recipes.  My favourites are dishes that shout fresh, easy to reach ingredients, simple cooking methods with delicious results.  While I do admire chefs who are into fusion and gastronomy, I’m not the type who would attempt pesto jelly, or strawberry foams.  I like simple cooking.  Time spent in the kitchen is precious, and any effort made to prepare, whether it took 10 minutes or 6 hours always spells love. 


This one, no matter what angle shouts L-O-V-E.  Ingredients are simple, easy to make and wow! It's my easy version of the French seafood boullabaisse, minus all the other ingredients.  The seafood mix is anything you get from the fish markets. 

You dive into this with some toasted sour dough or any fresh bread, and you’ll come back up feeling the love.  You’ll get lots of warm hugs from this for sure. 


 Ingredients:


1kg mixed seafood (marinara mix in shells)


1 jar 350 ml passata sauce (tomato sauce)


3-4 fresh tomatoes, quartered


1 onion, sliced


2-3 cloves garlic, chopped finely


½ cup fresh parsley, roughly chopped


½ teaspoon course/ground oregano

Salt and pepper to taste


Olive oil


Tablespoon of butter (optional)


 Method:


In a heavy based pan or skillet, heat about 2 tablespoons of olive oil.


Add the garlic and onions and cook until soft.


Add the tomatoes and cook until soft.


Add the passata sauce, bring to boil then turn down heat to simmer.


Season with salt and pepper, and sprinkle the oregano.


Add the seafood, place lid/cover and simmer for 10-15 minutes or until all seafood pieces are cooked through.


Add the butter and let it melt into the sauce.  


Top with the chopped parsley.


Tips and tricks:

* I add the butter in the latter part of the cooking just to add that gloss in the sauce.  You don't have to add butter if you don't want to, but that its a secret ingredient in most restaurants - the chefs add that for the shine and gloss.

* You can also add fresh or dried thyme for extra flavour.  They add a rich depth to the stew.


Monday, January 20, 2014

Peaches, strawberry and orange popsicles


It’s been scorching in Sydney and all across Australia as the heat surges to its 40s.  Adelaide was just declared the hottest city in the planet last week as temperatures soared to 46.5* and the tennis players at the Australian Open can’t escape from what is summer in Australia.   I’m not complaining though.  I love summer and everything that goes with it – Australian flies and all. 


It's summer and stone fruits are a plenty!  Sometimes I get overly excited at my local fruit and veg shop and just buy buckets load.  Sadly, with the heat most fruits soften quickly than normal at room temperature.  So some of these were put to great use - home made fruit pops or popsicles.  They're healthy, all natural and great to combat sweet cravings in the summer heat.


And a big thanks to Swah for hosting this month's Sweet Adventures Blog Hop!  Check out her elegant white tea, pomegranate and mint popsicles!  


To make these popsicles, we used plastic cups and wooden disposable forks.

4 peaches, pits removed
250g strawberries, hulled
juice of 4 valencia oranges
1-2 cups water

Using a blender, mix/process the fruits then add the orange juice slowly.  Add the water as much or as little as you want.   We used all 2 cups.

Pour into small plastic cups.  Then place in the freezer for 30 minutes.  When the popsicles are slightly firm, place wooden disposable popsicle sticks or wooden disposable forks.

Freezer overnight or for at least 6 hours.

Enjoy!


These popsicles definitely brought out the party mood in our home. 


Tuesday, November 26, 2013

Mixed vegetable soba noodles salad with peanut sauce


Traditional Filipino cuisine does not have a lot of fresh vegetable salad dishes in its repertoire.  Most vegetables are cooked in soups or stews, some are steamed and served with a side of dip or some form of chutney or relish.  It's quite surprising because even with the warm tropical climate, cooked vegetables are almost always the only option in most homes across the island.  The reason is that while there are available salad vegetable varieties, they are pricey as they come from the upper north or the south where the climates are cooler.   

Growing up, I can't remember salads serve on the dinner table except for the usual tomato-onion-green mango that comes with a good barbeque, classic salads are only to be had when dining out in restaurants.  

Living in Australia has opened a lot of fresh green doors for me.  My kids are now accustomed to fresh salad and veggies on the table, lettuce in their sandwiches, cucumber slices in their lunch box... the works.  Especially as the season becomes warmer, fresh and cold salads are the best way to serve the day's healthy portions. 


Now the real hero here is the dressing, aka peanut sauce.  The soba noodles add the healthy protein touch.  This recipe is adapted from Pallavi Gupta through Honest Cooking.

To  make this salad just add vegetables which you are keen to eat fresh and raw - cucumbers, lettuce leaves, cherry tomators, grated carrots, slices of capsicum. You can just play around with the quantities.   But for this salad of 4 serves, I used:


Ingredients:

60 grams organic soba Hakubakku brand, cooked according to packet instructions then drained through cold running water.
(I used 2 bundles from the 90g pack)

half capsicum, julienned

6 pieces cherry tomatoes, sliced in two

1 cucumber, sliced

1 carrot, julienned

1 brocolli, stems removed

2 stalks of spring onions, sliced


For the sauce:

1/3 cup smooth peanut butter

1 red chilli, finely diced

1 clove garlic, finely diced

2 tablespoons sweet chilli sauce

2 tablespoons soy sauce

60 ml warm water (or less)

Combine the peanut butter, chilli, garlic, sweet chilli sauce and soy sauce in a bowl and whisk together.  Add the warm water a tablespoon at a time and continue whisking until you get the desired consistency of the sauce.

 Place the cold soba noodles in a large bowl, add the vegetables and toss together.  Drizzle the peanut sauce when serving.

Tips and tips

* You can add as many or as few raw/fresh vegetables in this salad.  Just make sure you slice them thinly (julienned).

* You can make the sauce as thick or as thin as you like, just add (or don't add) warm water as you prefer.  

* I made this a day ahead and it became think in the fridge.  I diluted it with a little bit of warm water and added a few more teaspoons of sweet chilli sauce to suit my taste.  


Perfect for the warm spring weather for a weekday lunch, entree or to accompany hot BBQ on a weekend.

Enjoy!


Monday, October 14, 2013

Coq au Verdelho (chicken with mushrooms in white wine sauce)


There will be a trend here for the next couple of weeks.  As I have 2 other chicken dishes to post including this one so it shall be declared that chicken shall be the theme!  

Chicken is the easiest poultry and game meat to cook and prepare.  When we were doing the the Poultry and Game module at TAFE,  working with chicken was my least favourite.  Because no matter how many times we have prepped a whole chicken in class, I still can't get my chicken portoins right when at home.  When in class, I amaze myself.  When at home, it seems like a struggle.  I guess the pressure that there is a chef/teacher breathin down my neck helps in the process of making it right the first time. While at home, who cares how the portions look?!  Hahaha!

Ah memories of Kitchen 10, 8 and Kitchen 1.  And since that's all history now, time to move and get planning.     I've learned so much all those times in the TAFE kitchen but somehow in the process, lost my creativity.  When prior to cooking school I would experiment in the kitchen, during the course I was inclined to be more technical.  You know, following recipes to the very detail and focused more on the technical processes and result rather than having a fun time and just letting ingredients flow.  Thankfully, I've regained it all back - being creative in the kitchen when cooking and baking afterall, is the fun part of it all. 

So what to do after a 2.5 years in a culinary school?  Initially, the goal was just to supplement my knowledge of food and cooking at home, and in blogging.  But then, it has pointed me to a different path and so hopefully a food-related business to materialise soon.


In the meantime and in order to get the ball rolling, I have started lunch box delivery to co-workers and hubby's office.  Not a regular market, but a few tubs of lunch a week gets me busy researching and experimenting on what's best to serve my clientele.  I'm focusing more on Asian cuisine, but once in while serve them familiar dishes and classic favourites.  And this one was raved about most. Served with slices of sour dough bread, it was such a hit they have been asking for the recipe.     

And what luck that I found this on Pinterest!  A Nigel Slater recipe posted on Alida Ryder's blog which will make your family and friends happy to lick their plates clean.  Seriously.


Ingredients

2 tablespoons olive oil

1 large brown onion, finely diced

4-5 pieces rasher bacon, diced

4 garlic cloves, chopped finely

8-9 pieces chicken thighs, on the bone

250 grams button mushrooms, sliced

300 ml Verdelho (or any white wine)

300 ml thickened cream

salt and pepper, to taste

1 bunch flat leaf parsley, coursely chopped


 Method

Season the chicken pieces with salt and pepper and set aside.

Using a large skillet or pan (I used a 30cm large cast iron pan with handles), heat the olive oil.

When oil is hot, brown the chicken pieces in batches.  This will create some caramelisation in the pan.

Once all chicken pieces are browned, set aside on a plate.

Add the onions and bacon to the pan and cook to render fat from the bacon and until the onions are soft.  

Add the garlic and cook for about a minute or until the garlic is fragrant.  Remove the onion-garlic-bacon mixture from the pan and set aside.

 Pour the wine and using a wooden spoon, release some of the caramelisation on the pan.  Let this come to a boil.

Add the chicken pieces into the pan making sure they are spaced out evenly.

Add the onion-garlic-bacon mixture and the mushrooms.

Let this come to a boil, then turn down heat, cover and let it simmer for 15 minutes.

After 15 minutes, add the cream and mix it around the pan using your wooden spoon to evenly distribute the cream into the sauce.  Cook for another 5-10 minutes, or until the sauce has thickened and reduced a little.

Add a handful of chopped parsley and stir to combine the greens into the sauce.

Serve portions topped with more chopped parsley, with rice or slices of sour dough bread.


Tips and tricks:

* I omitted the butter from the original recipe as a personal choice.  Also because I was going to keep the tubs in the fridge for the next day's lunch box, I wanted to avoid the buttery residue on the plastic tubs while the dish is cold.

* I used Lucy's Run Verdelho from my sister's trip to the Hunter Valley a week before and was the white wine I had at home at the time.  Nigel recommends any kind of dry white wine.

* You can use any kind of mushroom.  I actually added more as we love mushrooms at home.

 
Now when I said people will lick their plates clean with this one, I'm not kidding.  So if you make this, make sure you have enough sour dough bread or rice (or even mash) to help them clean their plates.   It's really that good!


Tuesday, May 14, 2013

Pink milk aka strawberry smoothies


Strawberries are still aplenty on the shelves here in Sydney. Sometimes, they're even on special at the local fruit and veg shop in our suburb. Some spill over harvest from summer means extra red yumminess to eat and in this case, drink at home!


This serves 4.

We used 2 250g punnets of strawberries

1 cup of ice cubes

2 tablespoons raw sugar

1 cup milk


Place everything in a blender and whiz away!


Tips:

  • These can be made using frozen strawberries, which in case you won't be needing the ice.  Just add milk to get the consistency you want. 
  • Vanilla ice cream or natural yoghurt can be a substitute for milk
  • To make this into a non-dairy drink, just add orange juice in leiu of milk.


When I make these, I make sure there's extra punnets at home.  That's only because my kids can't stop at one serve each.  They can be demanding when it comes to food!


Sunday, February 10, 2013

Shakshouka


I have a confession to make.  I am a noob at other culture's cuisines.  Sans the traditional Italian, Spanish, Japanese, Chinese, Vietnamese, Korean, Thai, Indian, Mexican, Malaysian and Greek dishes, when it comes to other cuisines, I am as clueless as a child.  You know the one who refuses to eat her vegetables and only eats naked pasta when allowed.  Growing up with a limited repertoire of available cuisines, it was either Filipino traditional dishes, American (steak and mash or hamburgers is the usual) or some pasta dish and the occasional tacos.  Eating out almost always took the Chinese or Japanese route or a fave pizza parlour complete with folk singers with guitar singing Puff the Magic Dragon and Horse With No Name.  


Malaysian, Vietnamese and Thai only came in early adulthood when restaurants started opening in Manila and showcasing neighbouring Asian cuisines.  So that was about a decade or so ago.  A far cry from the state of the restaurant industry in the Philippines these days.  Fusion of Mexican-Japanese  now exist, traditional Sri Lankan and a host of other gourmet fusions. There are cakes,  patisseries and chocolate shops that are at par with overseas counterparts. Filipino restaurateurs back home are showcasing Filipino food in a way that Heston  Blumenthal would plate a salmon dish at the Fat Duck.   Why there's even a franchise of Masterchef on local  Philippine television, and a live MC competition going on as I write this post.


Now being a noob in this day and age of technology is not acceptable.  Cooking shows attract a good following and reality cooking shows become the new Big Brother. Food documentaries, magazines, events, blogs!  Food has become as exciting as when TV broadcast its very first show.  Now back to me as the noob in this instance and learning how to cook (other dishes besides and a few other Filipino dishes).  This was a dish that I first saw from a TV show - yeah I know pathetic right.  And from there on, made it, made it, made it.  Hubby loves this.  I love it.  (The kids are not fans yet).  We make a cheats version with chorizo and tinned baked beans.  I love how versatile this can be and how its such an easy casual dish that can be served any time of the day.  


Just a week ago, I saw a good number of this dish in my IG feed and so a timely revisit to Shakshouka.   And so here is a recipe inspired by that TV show and a fave weekday meal at home.

 
To make this Shakshouka dish:
Print the recipe here

1 onion, sliced

1 red capsicum, chopped

1 green capsicum, chopped

4 Roma tomatoes, quartered

1/2 teaspoon sweet paprika (I used a Spanish brand)

2 eggs

olive oil

salt and pepper to taste


Method:

Using a cast iron pan (or any 20 cm pan), heat about a tablespoon of olive oil.

Add the onions and capsicum to the pan and cook till soft.

Add the tomatoes, stir and cook for two minutes.


Season with salt and pepper and half of the paprika and stir to coat the vegetables with the seasoning.

Turn the heat to low/simmer.

Using a wooden spoon, push aside some of the vegetables to make space for th eggs.
 
Crack the eggs into this space and let it poach until the whites are cooked through but the yolks are still runny.

Remove from heat and serve on the pan, with some toasted flat bread or any bread of choice.


Thursday, January 10, 2013

Spinach balls


After all the Christmas trimmings and tidying up happened there appears to be what now seems to be an empty space in the lounge room.  There was the tree and all the presents underneath.  A tub full of Christmas cards and trimmings.  A box of wrappers and sticky tapes.  Lots of toys scattered about and shoes and lollies if you may.  What used to be a corner full of excitement and chaos and cheer and colour is now empty.  Ah the holidays.  It brings so much excitement that its always bittersweet to part with the spirit and get on back to routine.  When's the next holiday again?


So.  Its the new year and tidying up the trimmings also meant tidying up some electronic backlog.  Photos untouched and recipes left unwritten.  And this post is one of those! I've been meaning to share after meeting the maestro of Italian cooking last October - the other half of the two greedy Italians Antonio Carluccio.

The Maestro is how he is in person as he is on television.  Jolly, unpredictable and full of laughs. He shares a joke or two through out the Sydney World Chef Showcase session I attended and was just as funny as he on stage and face to face, when I had my book signed.  This recipe which he shared and prepared on stage was something he created for a book 25 years ago, but has since used it for many other dishes, including as a vegetarian pasta dish or even layered in a vegetarian lasagna.


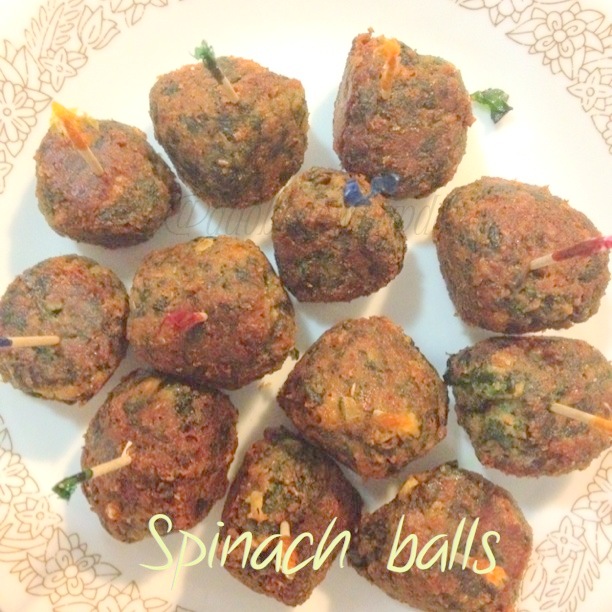
To make these spinach balls, I've halved the recipe to make 12 spinach balls. 
You can make 24 balls simply by doubling the ingredient quantities.

(Print the recipe)

250g spinach, washed

1 egg, beaten

pinch of freshly grated nutmeg

1 clove garlic, finely diced

50g breadcrumbs

25g grated parmesan

salt and pepper to taste

olive oil for shallow frying


Blanch the spinach in a pan of salted boiling water for 2 minutes.  Drain using a colander.

Using your hands, squeeze out the water from blanched spinach.  Then chop the spinach finely.

Place the chopped spinach in a bowl and stir in the rest of the ingredients: salt, pepper, eggs, breadcrumbs, parmesan, garlic.  

Mix well until you get a binding consistency - the ingredients are binding together. If the mixture is too wet, add a tablespoon of breadcrumbs.

Roll the mixture into little balls.

Prepare and heat a shallow pan and cover the base with enough olive oil for frying.

Shallow fry the spinach balls in the hot olive oil until golden, 3-4 minutes per side.

Drain on kitchen paper and serve warm (or cold).


These little spinach balls are so good and healthy too! Eaten by themselves or dipped into your favourite sauce (mayo, catsup, sweet chilli sauce, etc) I reckon they're great as appetizers especially during this summer for those backyard parties!  Also a great dish to bring to any party.  Hot or cold, they are divine!  After all, they were created by none other than one of the greatest cooks in this century.

So when's the next holiday again?  How about Australia Day!  These would be great in that picnic basket, don't you think?


Friday, September 28, 2012

Oatmeal and raisin cookies


"All I really need to know, I learned in kindergarten..." - Robert Fulghum


Do you know this guy?  Robert Fulghum is a story teller.  An American non fiction writer who's writings of common things and life in general are as funny and interesting, as they are inspiring.  He is one of my favourite book authors.  And this -   All I really need to know I learned in kindergarten... is one of my fave from his books.  It has, since first publication sold more than 7 million as of its 15th anniversary edition in 2003.  I had my first copy of this book in 1998.  And I never stop going back to it.  Again and again and again.  Why?  Well because of the simplicity of the message.  And here's an excerpt from the book via Amazon:


"All I really need to know about how to live and what to do and how to be I learned in kindergarten. Wisdom was not at the top of the graduate-school mountain, but there in the sandpile at Sunday School. These are the things I learned:

Share everything.

Play fair.

Don't hit people.

Put things back where you found them.

Clean up your own mess.

Don't take things that aren't yours.

Say you're sorry when you hurt somebody.

Wash your hands before you eat.

Flush.

Warm cookies and cold milk are good for you.

Live a balanced life - learn some and think some and draw and paint and sing and dance and play and work every day some.

Take a nap every afternoon.

When you go out into the world, watch out for traffic, hold hands, and stick together.

Wonder. Remember the little seed in the Styrofoam cup: The roots go down and the plant goes up and nobody really knows how or why, but we are all like that.

Goldfish and hamsters and white mice and even the little seed in the Styrofoam cup - they all die. So do we.

And then remember the Dick-and-Jane books and the first word you learned - the biggest word of all - LOOK.

Everything you need to know is in there somewhere. The Golden Rule and love and basic sanitation. Ecology and politics and equality and sane living.

Take any one of those items and extrapolate it into sophisticated adult terms and apply it to your family life or your work or your government or your world and it holds true and clear and firm. Think what a better world it would be if we all - the whole world - had cookies and milk about three o'clock every afternoon and then lay down with our blankies for a nap. Or if all governments had as a basic policy to always put things back where they found them and to clean up their own mess.

And it is still true, no matter how old you are - when you go out into the world, it is best to hold hands and stick together."

- Robert Fulghm  


Print this Recipe

To make these chewy and healthy cookies:

250g unsalted butter, softened at room temperature

1 cup firmly packed, brown sugar

55g caster sugar

1 tablespoon vanilla extract

60ml milk

2 large eggs, lightly beaten

300g plain flour

1/2 teaspoon ground cinnamon

1/2 teaspoon salt

1 teaspoon baking powder

1 teaspoon bi-carbonate of soda

3 cups rolled oats

1 cup raisins or sultanas


 Sift the flour, cinnamon, salt, baking powder and bicarb soda in a bowl and set aside.

Using an electric mixer, cream the butter and sugar together untli light and fluffy.

Add the vanilla, milk and eggs and beat until mixed through.

Add in the dry ingredients and continue to beat until just combined.

Take off bowl from your stand mixer, and using a wooden spoon, stir in the rolled oats and raisins.  You will have a lumpy slightly wet dough.

Place the bowl in the refrigerator to chill until firm - several hours or overnight.

Preheat your oven to 180*C.  Grease and line trays or cookie sheets with baking paper.

Using an ice cream scoop or tablespoon, scoop out dough and form into balls.

Arrange on baking tray/s and press down slightly with a fork.

Bake for 15-20 minutes or until golden.  Do not overbake.  At this point, the cookies should be slightly soft in the centre.

Remove from oven and transfer to a wire rack to cook


These cookies are great and healthy - they are chewy which is the kind that we like at home.  They kept for 2 weeks in an airtight container in the kitchen.  Two or three went into lunch boxes, some nibbled while waiting for dinner, some taken with milk (and coffee) and they're just all-around simple cookies.  No fancy schmancy pants here.


I think sometimes we need to be reminded that life can be simple.  That its okay to slow down.  That its okay to be late.  And that mess and dishes in the kitchen can wait.  That we should count our blessings (and be grateful for what we have). That prayers are answered.  And that cookies and milk, do make you feel good. 


And here's another quote from American politician Barbara Jordan - " Think what a better world it would be if we all, the whole world, had cookies and milk about three o'clock every afternoon and then lay down for a nap."


Enough said. 


Cookies and milk please.

LinkWithin

Related Posts Plugin for WordPress, Blogger...