Welcome to adobo-down-under!

Musings. Family. Food. Stories. Cooking. Recipes. Eating. A recipe journal. From simple Filipino dishes to challenging recipes and exciting gastronomical failures. This is for my girls to look back on for comfort, memories, laughs, love and lots of food!
Showing posts with label gifts. Show all posts

Saturday, May 17, 2014

Hazelnut spread - homemade Nutella


We have been contemplating on getting a pet for some time.  Actually years now.  But living in a rental has its limitations.  And a pet is one of them.  Even with the good relationship we have with our real estate agent, we have not attempted to get one - for many reasons: not getting approved, costs, space, sitting when we go on holiday, etc.


This Easter we stopped contemplating and we got ducklings for the girls (the 10yos) each, from the market.  The poor little things were crammed in a box filled with about 50 of them and they looked so adorable as ducklings are. If you have been following me on Instragram, you would have seen this Easter post. - 3 ducklings (named Anchor, Buttercup and Pato - a Tagalog word for duck) and 3 chicks (named Salt, Pepper and Ginger).  They were so cute!   Well the having-a-pet-to-care for did it. It was a good exercise of responsibility for the girls. They woke up early to bring them out of the cage, hose and clean the cage, prepare some newspaper and mulch for the cage flooring, refill food and water.  And everyone was happy.  It became a happy little routine during the school holidays and early on when term 2 started.


Fast forwad the third week after Easter - one just went out.  Died.  Right before my very eyes.  One of the girls was home sick that day and we were out the back, getting some sun just sitting and admiring the cuteness.  Then Anchor just sat down, closed its eyes and never stood up.  We lifted it up and it was lifeless.  You can imagine the reaction from my daughter.  It was a mix of sadness and fear, anxiety and grief.  She cried like there was no tomorrow.  It was heart breaking.  When the two other girls came home from school, it became it even worse.  There was more loud crying, more tears, more questions, screaming.  There was grief.  Gloom.  Mourning.  For a good half hour, it was continuous.  Big sister came home and helped consoling the grief stricken.  Hubby and I were speechless.  Overwhelmed.  I cried too.  We did a small memorial out the back.  Juliana who was at home sick that day was the only one brave enough to watch as we dug a hole in the backyard and buried the poor thing.   She put down a flower.  No more loud cries, but there were tears.  That night, lots of hard questions were asked.  We tried best to answer them without adding any more tears.  There were still tears come bedtime.


After a few days, the other duck appeared to look tired and was not as active as in previous days.  That night after dinner, Buttercup sat in the cage lifeless. Not again.  So for another half hour, there was another round of intense crying, tears, screms.  There were no more questions. But the tears kept flowing.  The house was quiet. We dug another hole. 


It's been a week since and Pato is thriving, enjoying being the lone duck amongst the chicks.  They're a happy bunch of fowls, grazing in the backyard during the day, and cuddling together at night.  The girls are happy now and that episode has been put behind but never forgotten, for sure.  We hope to give them a new home soon, as the real estate agent will not allow fowls because of the possibility of pests.  The girls don't mind.  They know that whatever time left their pets have with us are happy times and moments that they can keep. 


Moving on to happier episodes.

This hazelnut spread is the best thing we've ever done in the kitchen.  We made this twice already during the school holidays.  The girls used most of it for their sandwiches as you would with Nutella, and I've used them for my hazelnut buttercream icing for a birthday cake. 

How easy?

You get some hazelnuts.

Roast them in the oven.

Skin them using tea towels or soak them in water and peel them off by hand.

Process the nuts and ingredients in a processor.

And voila!  The best hazelnut spread you'll ever need.  100% hazelnut not 13% like that famous spread you get from the supermarket.

Word of caution though.  Roasted hazelnuts are kryptonite.  It's hard to stop when you start eating them!

And this hazelnut spread?  Well, the flavour truly shines.  You might even leave that other brand for good. 


This recipe is adapted from Michelle from the food blog Brown Eyed Baker

Ingredients:

300 grams (or 2 cups) hazelnuts

100 grams (or 1 cup) icing sugar

35 grams (or 1/3 cup) Dutch processed cocoa*

2 tablespoons vegetable oil*

1 teaspoon vanilla extract

1/4 teaspoon sea salt flakes


Method

Preheat oven to 180*C and line a cookie sheet or tray with baking paper.

Spread the hazelnuts in a single layer and roast in the oven until dark brown, 10-12 minutes.

Take off from the oven and leave to cool.

Take the skins off the hazelnuts. Cool the roasted hazelnuts.  Once cooled, rub between you palms and separate the skinless ones in a separate bowl.

Place the skinless roasted hazelnuts in the food processor and process until the natural oils of the nuts are released.  4-5 minutes, scraping down the sides with a spatula every few minutes.

Add the icing sugar, cocoa powder, vegetable oil and sea salt flakes.

Continue to process until you get a smooth and glossy consistency.

Transfer into a clean sterilised jar with a tight fitting lid.


Tips and tricks

* In Australia, you can get the Nestle brand Dutch process cocoa from any local supermarket;

*  The original recipe called for hazelnut oil.  We used vegetable oil as hazelnut oil is hard to find.  I have recently found them from a wholesale shop, and they cost $16.50 for a 500ml bottle.

* To take the skins off hazelnuts takes quite a bit of time.  You can opt for several methods, including what we did, or these:
  1. Using tea towels, rub the hazelnuts inside the two or one folded tea towel and rub until the skins come off;
  2. Transfer the warm hazelnuts into a bowl of cold water and slip the skins off with your fingers;
  3. Boil the roasted hazelnuts in a water with a mixture of baking soda, then run in cold water (we tried this option the first time, but I found it did not work for us)
  4. Follow Michelle's process and place them in a bowl, cover with a same size bowl and shake until you get all the skins off.
* More detailed instructions on how to skin hazelnuts from Fine Cooking.


This hazelnut spread is so good, you would even want to eat it by the spoonful!  And here's a a thought for those homemade Christmas gifts you've been planning to make. This, is going to make you famous with friends.


And by the way, here's a pic of our happy backyard campers.  If you're in Sydney and are interested to adopt these funny and lovable feathered friends, let me konw.  We'd love for them to go to a good home.


L-R: Salt, Ginger, Pepper and Pato (duck)

Thursday, January 02, 2014

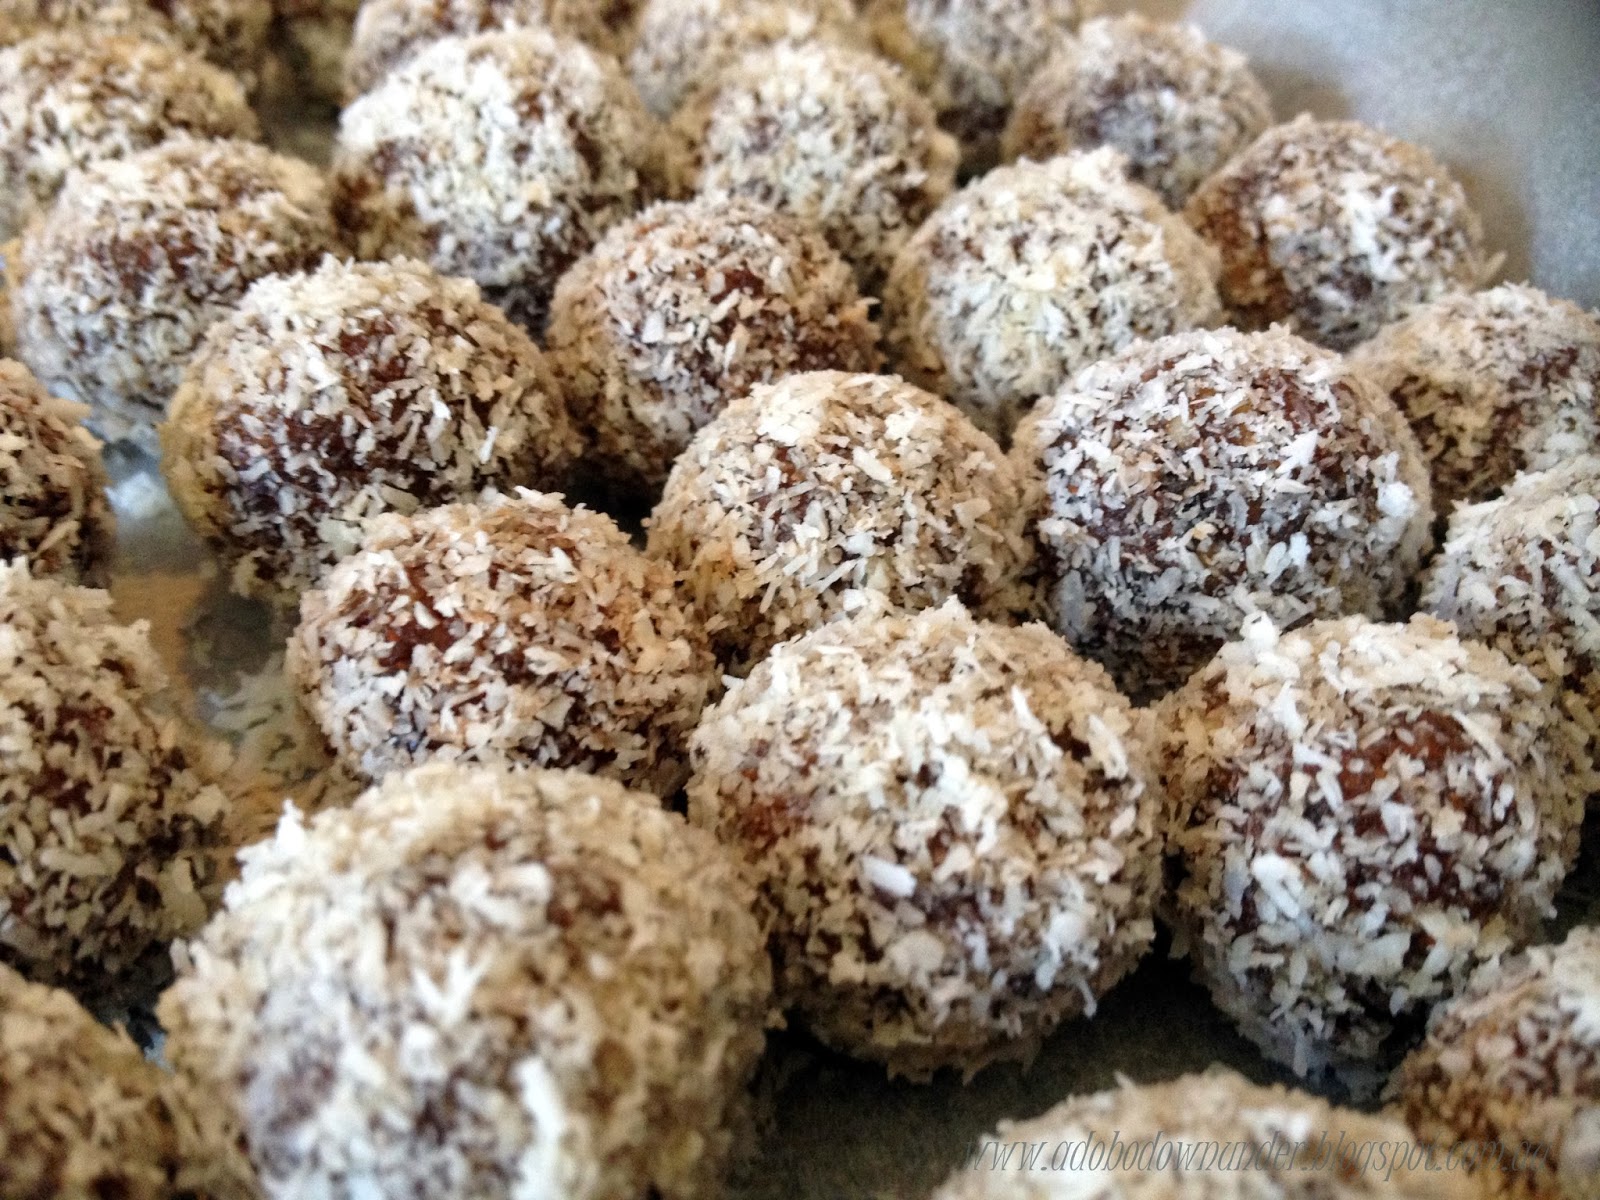
Protein truffles (protein balls)


coated in dessicated coconut


Wow!  How quick was that?!  2013 all done and dusted!  What a year it was!  Had a few bumps and bruises along the way but worth all the lessons learned.


Mid last year, I stopped eating sugar.  Not entirely quitting sugar, but not eating processed sugar. Nothing in my coffee, no cakes, cupcakes...  that kind of thing.  Hard to believe with all the baking I do, but indeed I did.  And I've been off it since.  Ocassionally, I'll nibble on some dark chocolate but that's about it.  It was a decision made entirely out of gut feel and a combination of all sorts of information gathered what I've read mostly.  No scientific or research study conducted.  Just a straight up decision to do so.  Late last year, I also got hooked into kale and making my nutriblasts, thanks to my trusty Nutribullet - a worthy purchase from home TV shopping (don't judge me!).


How can I bake so much sweets and not eat sugar?  Well, when I'm baking sweets, my kids and some very eager taste testers are more than happy to taste them for me - hubby, family, friends.


Anyways. Now this quitting sugar and drinking nutriblasts somehow sparked a good trend in the office.  And an office mate shared this recipe which he got from a local magazine/paper (he was not sure which one, so apologies to the source).  They're healthy balls of deliciousness, and if you're in to the "raw" bandwagon, you will love this one!


And to start the this awesomeness of a year rolling, here's a recipe for protein truffles which were supposed to be an SABH post but did not make it to deadline.  You know how busy December can be.  I made this to give away as Christmas homemade treats, and receivers loved them!  I'm sure you will too!  


coated in cocoa powder


Ingredients


100g walnuts, roughly chopped

100g natural almonds, roughly chopped

2 tablespoons pepitas

170g pitted dates

100g dried apricots

100g pitted prunes

1 tablespoon peanut butter

2 tablespoons cocoa powder

1 tablespoon cinnamon powder

2 tablespoons honey

Pinch of sea salt

100g dessicated coconut, for coating; or

100g cocoa powder, for coating; or

100g melted dark 70% chocolate for coating.


Method

Combine walnuts, almonds and seeds in a food processor and process until you get fine crumbs.

Add the dates, apricots and prunes and process until smooth.

Add the peanut butter, cocoa powder, cinnamon, honey and sea salt and process until the mixture starts to form into a ball.  

Place the protein ball of dough in a bowl and keep in the fridge to chill for half an hour to an hour, to keep it firm.

Prepare three separate bowls for your coating.

Using a teaspoon, scoop a spoon full and then roll in between lightly wet hands.

Roll into any of the chosen coatings (dessicated coconut, cocoa powder or melted dark chocolated).

Keep in an airtight container in the fridge for up to two weeks.

Yield: will depend on how big or small you want the protein balls/truffles to be.


coated in dark chocolate


Now that it's a new year, time to make some resolutions!  Make sure you add these to your regular plan.  It's healthy and delicious, for real!

 
A happy and awesome 2014 to all!  May this year bring you more blessings, peace, wellness and happiness within.


Tuesday, December 17, 2013

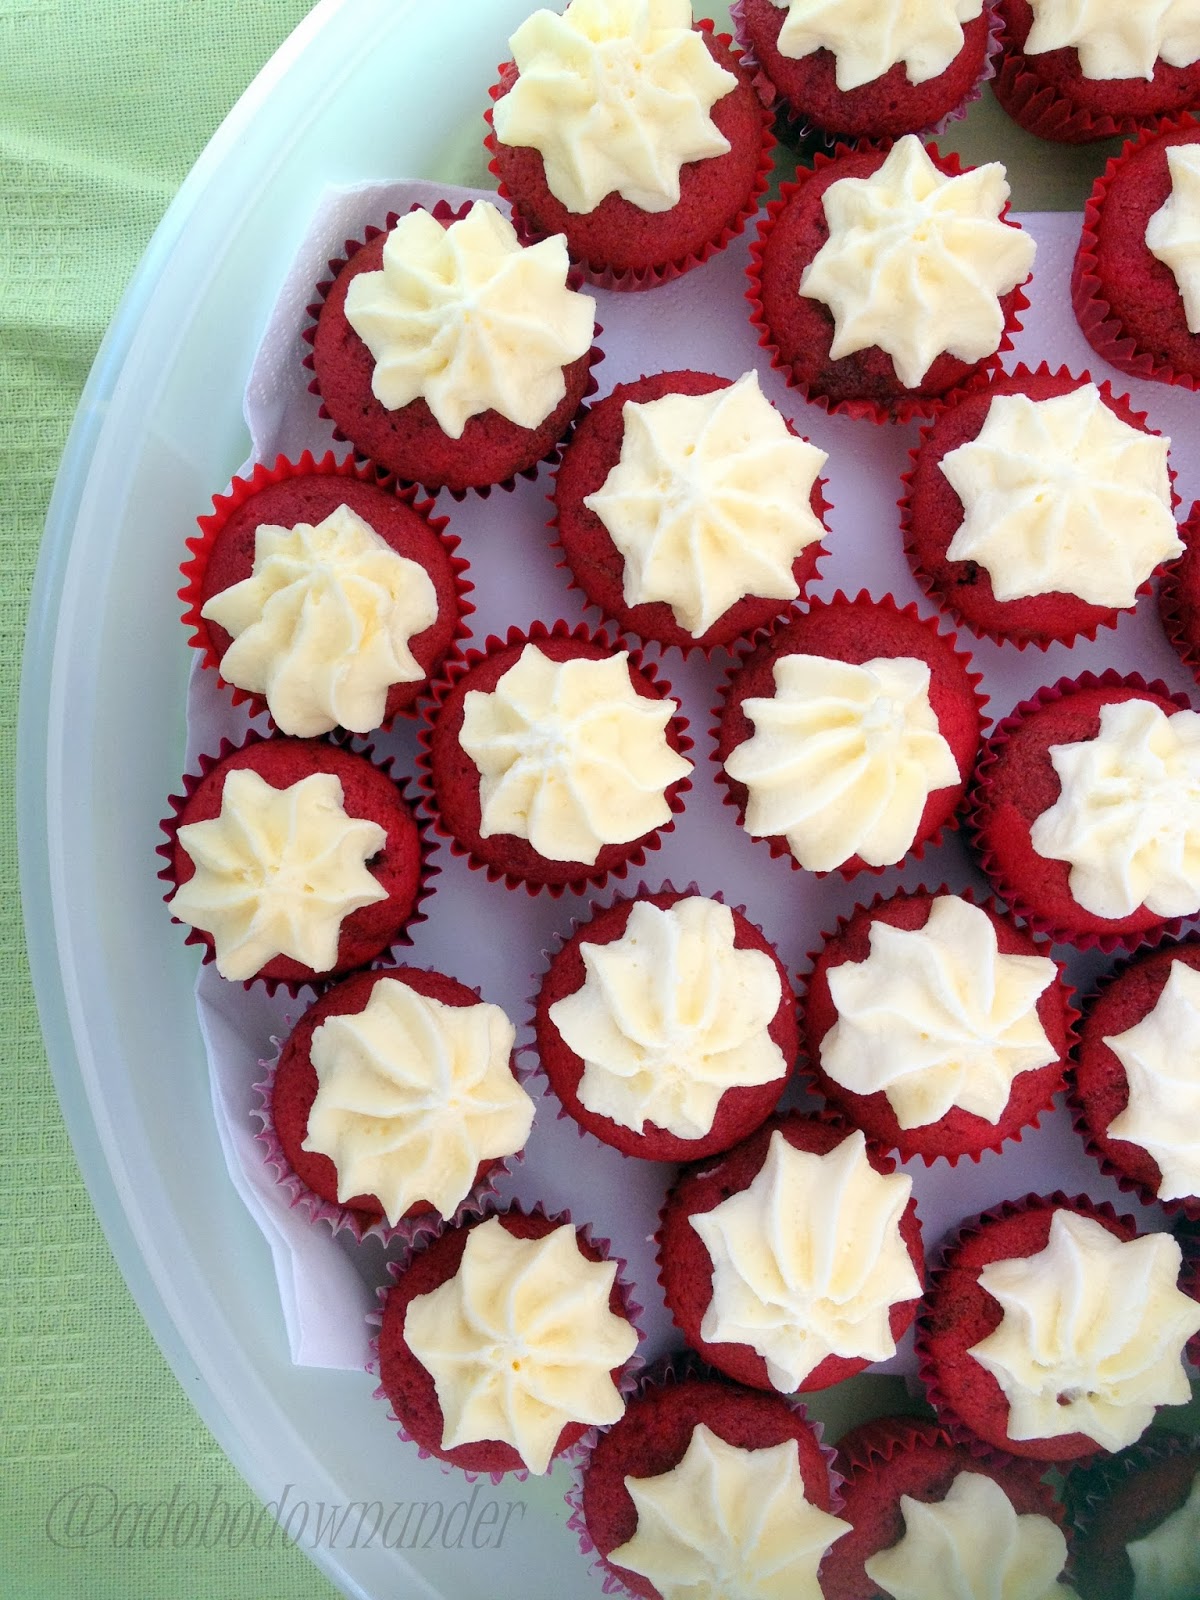
Red velvet cupcakes


December is a busy and expensive month for us.  We have a birthday, an anniversary and then Christmas.  The gift giving can get really overwhelming if we don't stop ourselves from the purchases.  In past posts, I always mention that Christmas shopping for me, has gone from overly organised (back in my single days), to last minute shopper.  Before, I would have gifts for everyone months before December and all I need to do in the last few days leading up to Christmas will be to wrap them. These days, hubby (as he is constantly online), he purchases most of the girls' presents ahead.  He's good like that.  He's reliable that way and I am so grateful.  Really. A few days ago, I just started wrapping them.  And I'm really impressed. Now all that's left now is to get Santa's presents.


Now that part, he leaves to me.  I try to be really sneaky and at the same time realistic every year.  But just last year, lists to Santa has extended into the technology realm - you know, the latest iPod or some other overly expansive gadget.  The girls were really cheeky.  "If mum or dad won't buy us, they maybe Santa can get this for us?"    Well, for the younger girls at least.


I don't know about you, but I'm the more conventional mom when it comes to toys.  I mostly get board games instead of apps, crossword and word search puzzles and books instead of the latest Wii game.  Last year, just to get into the apps world, I got them the Draw Something board game.  Yeah.  I'm not saying I don't play game apps or have the latest from iTunes, but I still do believe in the basic of playing - interaction (face-face) and having a good time.  

 
The younger girls at 10 years old are sort of in between that age when magic is becoming reality.  Their friends at school don't believe in Santa and of course, they get into that stage where what is said in the classroom or in the playground, just might have some truth vs what mum/dad said.   As much as possible, I'd still like to play that game while they're still young. I think believing in the idea of Santa creates a sense of wonder and awe each Christmas morning, and I love watching their reaction.  The open-mouth-surprise and smiles are priceless.  That's the part I love.  So don't judge me!


This year, Santa's elves at the North Pole still don't make Apple products so that's out of the list for now.  But some creative stencil stamps, new board games and a magic juggling ball might just under the tree next week.


Now Christmas is my favourite time of the year.  In Australia, when it's the middle of the summer makes me love it even more.  Summer fruits, beautiful colours all round, days at the beach, endless blue skies, warm breeze, Christmas decorations, Carols, and just the deep sense and feeling of delight in sharing and giving. 

Each year since two years ago, I started making homemade food gifts to friends, work colleagues, teachers and neighbours.  I love the idea of getting busy weeks ahead planning what it will be, shopping for ingredients and making them in layers (a day at at a time).  And these red velvet cupcakes are always a hit with anyone who receives them.  Why not?  They're red and so Christmassy!  Don't you think so?


This recipe is adapted from the Joy of Baking.  I have made them so many times and have varied the brands of ingredients with the same result.  I have doubled Stephanie's recipe to make 24+ half-cup sized cupcakes.

Ingredients for cupcakes

2 and 1/2 cup (250 grams) sifted plain flour

1/2 teaspoon baking powder

1/2 teaspoon salt

2 tablespoons cocoa powder

1/2 cup (120 grams) unsalted butter, softened

1 and 1/2 cups (300 grams) caster (white granulated) sugar

2 large eggs (about 60-65g each)

1 teaspoon vanilla extract

1 cup (250 ml) buttermilk*

2 tablespoons liquid red food colouring

1 teaspoon bi-carbonate of soda (baking soda)

1 teaspoon white vinegar


Method
 
Preheat the oven to 175*C.

Line two 12-half cup capacity cupcake tins with cupcake liners.

In a large bowl, sift together flour, baking powder, salt and cocoa powder.  Set aside.

In a measuring jug, mix buttermilk and food colouring until incorporated. Set aside.

In the bowl of your stand mixer, cream together the butter and sugar until light and fluffy.

Add the eggs one at a time, beating after each addition.

Continue beating and add the vanilla extract.

While the mixer is on low, add about 1/3 of the flour mixture, then the buttermilk mixture into the bowl. Add the flour and buttermilk alternating in three batches and mix until the batter is consistent and there are not more flour lumps.  Scrape down the sides of the bowl when necessary. Put the mixer on stop/pause.

In a small cup, combine the bi-carbonate soda and vinegar.  Allow the mixture to bubble.

Turn the mixer back on to low and quickly add the bi-carb soda-vinegar mixture and continue to mix for 10 seconds.

Scoop a tablespoon in each cupcake hole or at least a third full.

Bake in the preheated oven for 20-25 minutes, or until a skewere inserted into the cupcake comes out clean.

Place on cooling racks and leave to cool.


Make the Cream Cheese Frosting

1 box (250 gram) cream cheese, softened

125 grams salted butter

1 teaspoon vanilla extract

1/2 cup (50 grams) pure icing (confectioner's) sugar


In the bowl of a stand mixer, beat the cream cheese and butter until light, fluffy and soft.

Add the icing sugar a tablespoon at a time and continue mixing.

Add the vanilla extra and mix until incorporate.

Using a spatula, spoon and spread on top of cupcakes or spoon into a piping bag with a star tip and pipe onto cupcakes.


 Tips and tricks:

* To soften butter, take it out of the fridge to thaw for at least an hour or more (depending on the weather and season);

* Softened butter means its pliable.  When you pinch the butter, it creates a small dent.  Softened butter does not mean soft to the point of melting.  

* When preparing your butter and cream cheese, it helps in the mixing/creaming when you cut them into cubes. 

* As soon as you add the vinegar-baking soda, I always count 10 seconds to the dot then turn off the mixer and just fold the batter gently with a spatula.

* Don't overfill your cupcake tins.  If necessary, which is the case with me, I usually prepare another cupcake tin with liners for the excess.  

* When creaming the frosting, make sure all ingredients are at room temperature. When one ingredient is even slightly cooler, it can cost the frosting to look curdled - meaning the butter becomes solid again. 

* For buttermilk substitute, you can make your own sour milk which is 1 cup milk with 1 tablespoon lemon or white vinegar.  Let the mixture sit for 5 minutes until the milk has curdled or thickened.  I

* Plain natural yogurt can also be a substitute for buttermilk.  With the same amount in the ingredients, prepare  your yoghurt by mixing it with a teaspoon to take out the lumps. (Joy the Baker has some variations on the buttermilk substitution you might want to try.)


And so it's only 8 days till Christmas!  Are you ready yet? 

Is everyone's gift ticked on the list? 

Have you planned your Christmas menu?

And.... do you play the Santa role too?


Monday, November 18, 2013

Coconut macaroons - Filipino style


There are a few things that make the Filipino home.  Besides the rice cooker and on ready supply of soy sauce, rice and fish sauce, there are the usual things around the home that adds to the Filipino touch. 


There's the tabo in the bathroom, a framed art work of the Last Supper, wooden spoon and fork tandem on the wall and of course the magic mic - your ticket to endless hours of at home videoke. Filipinos do love to sing.  Well majority of us do.  Never mind if one can't hit the notes, karaoke at home is one of the Filipino's fave past time.


Now one of the traits that standout in the Filipino is resilience. We have had bouts with typhoons every year and corruption in the government, and all sorts of negativity that makes it a nation unattractive to some if  not a few.  With the recent calamity that wreaked devastation across the Southern part of the Leyte in the Philippines, properties and lives lost, Filipinos rise to the occasion.  I can't begin to write about how, seeing the horrific footages in the news both local and abroad has made me feel.  While our families and friends are safe away from the devastation, it is my home country and I felt so helpless that I'm so far away when I could be helping out there, on the ground.  I stopped using social media for awhile and have stopped watching the news.  I thought to give it a rest - posting food photos as a bit of respect for those who are going hungy in the typhoon savaged towns.  And while away, have organised a little fundraising donation drive in our little circle of family and friends.  Last weekend, we celebrated my mom's 75th birthday and asked guests to bring a can or two from their pantry to donate.  Sometimes we take it for granted that we have a full pantry with stuff we don't need and it put things in perspective.  Guests brought in more that just a can or two, they even shopped new items and the kids collectively donated lollies put in small ziplock bags with a message - "to the children affected by the typhoon, we hope this makes you smile."  I always say, no help is too small.  We delivered our donations this weekend through a Filipino-Australian community with their 48hr Response led and coordinated by Michelle Baltazar.  Thay have established a website Help after Haiyan and partnered with World Vision Australia to assist with the appeal.

While the devastation is horrific and rebuilding will be massive and will take years, the relief and help from all over the world is overwhelming!  It's heart warming!  It is touching!  So in behalf of the Filipino people, I'd like to say thanks!  Maraming salamat!  


Now back to blogging with this month's theme at the Sweet Adventures Blog Hop camp hosted this month by Nic Cooks with the theme "Say Cheese!" If you haven't read about Nic and her cooking adventures, you need to know that she loves cooking with cheese!  Why she makes her own cheese - check out her Cheesapalooza adventures!  And check out her Goats Curd Ice Cream for this month's SABH post!


So I thought I'd share the Filipinos love for cheddar cheese here.  I thought to make some Queso (cheese)  Ice Cream as its one of my fave store-bought from the Filipino shop, but time has failed me in between organising my mom's birthday party, family commitments, school, work, domesticity, yadda yadda yadda....   so instead, I am sharing a long forgotten post (in my drafts folder) for the a Filipino favourite cupcake - coconut macaroons.  Why it has cheese of course!  Which is supposed to be a secret ingredient, but I'm spilling it here anyway.


This recipe is adapted from Filipino Food Recipes. To make these coconut macaroons.

Ingredients:

2 cups dessicated coconut

1/2 cup (60g) plain flour

80g butter, softened

1 cup (200g) caster sugar

2 eggs

1 395g can condensed milk

1/2  cup grated tasty or cheddar cheese

1/2 teaspoon vanilla extract

 Method

Preheat oven to 180*C.

Line 2 cupcake trays (12 1/2-cup capacity) muffin tray or a 24 mini cupcake tray with liners.
In a bowl, mix together the flour and dessicated coconut with a spatula.  Set aside.

In a bowl on a standmixer, cream the butter and sugar together until light and creamy in texture.

Add the eggs one at a time and continue beating.

Add in the condensed milk and cheese and continue mixing. 

Add the dry ingredients (flour and dessicated coconut) and mix on slow speed until incorporated.

Spoon into prepared cupcake trays 2/3rds full,  and bake in the oven for 15-20 minutes or until golden.

Place in a cooling rack to cool for 10 minutes.


Tips and tricks:

*  You can add another 1/2 cup of grated cheese to the mixture like I do, as I like it really cheesy. This will not affect the texture of the macaroons.

* Do not overbake as they will be hard as a rock if you do.  When they're golden on the top, take them out of the oven and onto cooling racks.

 * These tastes even better the day after they're made.  They can keep at room temperature in an air tight container for a week.

* These are great as homemade gifts too!


Tuesday, September 17, 2013

Paciencia - Filipino meringue cookies


A meringue is really nothing but a foam. 
And what is a foam after all, but a big collection of bubbles? 
And what's a bubble? It's basically a very flimsy little latticework of proteins draped with water. 
We add sugar to this structure, which strengthens it. 
But things can, and do, go wrong. - Alton Brown


Well it is exactly that.  It's a foam created from whipping egg whites and the structure it creates whether soft peaks or stiff and glossy, is from the sugar that we add as we whip and whisk and whip and whisk away.  Meringue is one of the most versatile foundation for any dessert - as a base it is spectacular as in a pavlova. With nuts it becomes sensational as it macarons, and dacquoise and tortes. Topped with some 100s and 1000s (as in specks and sprinkles), they become like that classic treat you see at local bakeries.  On their own, piped in swirls they're pretty as a bow on a present.  They're even sensational in a mess (as in an Eton mess)!


According to Jennifer Field - a pastry chef I follow online, the basic ratio for a stable meringue is one part egg whites and two parts sugar.  As meringue is versatile, they are also the base for a lot of icing and frosting recipes.  I love Italian meringue buttercream in my cakes and use Swiss meringue for a lot of my cupcakes.  And because meringue is the star of this month's theme at the Sweet Adventures Blog Hop hosted by Claire K Creations, it wired up my head with so many possibilities.  But I'd like to let you in on another sweet treat from my home country of 7000 islands, so here comes Paciencia or meringue cookies as they are also called.


Paciencia which means patience in Spanish can only be one of the many food influences which evolved in the Philippines stemming from the Spaniards who set foot in the country.  According to The Winter Guest - Miriam, paciencas are small round cookies typical from various parts of Castilla.
So suffice it to say, it is originally Spanish.  But, as this is so common in the Philippines it has been adapted to suit the Filipino palate.  Pacencias or paciencias are sold commercially in small packets.  Home made, they are packed in jars or small boxes and given as food gifts during the Christmas season. Why its called paciencia eludes me. 


There have been a lot of blogs about this from the Filipino bloggers community worldwide, from Jun Belen, Adora's Box, Oggi - I Can Do That to cite a few, but this version is adapted from Jude of Apple Pie Patis Pate.

These cookies are made with a meringue base, some flour, icing sugar and vanilla.  Piped into small rounds they are baked on low heat till light brown and then cooled. 


To make these meringue cookies:

Ingredients:

30 grams (1/4 cup) plain flour

60 grams (1/2 cup) pure icing sugar

2 egg whites (I used large eggs)

1/4 teaspoon cream of tartar

30 grams (2 tablespoons) caster sugar

1/2 teaspoon vanilla extract


Method

Preheat oven to 125*C 

Line your cookie sheet or baking tray with baking paper or use a silpat.

In a medium sized bowl, sift the flour and icing sugar together.  Set aside.

Using the bowl of your electric mixer, whip the egg whites with the cream of tartar until frothy.

Add the caster sugar a tablespoon at a time and whip until the meringue is stiff and glossy.

Add the vanilla and continue to whisk until incorporated.

Fold in the flour and icing sugar mixture until combined.

Spoon the meringue into a piping bag with a 1/4 round tip.

Pipe the meringue into small rounds (almost the size of a AU$1), making sure there is space apart.

Bake in the preheated oven till light brown, about 15-20 minutes.

Take the tray out of the oven and cool on a wire rack.


Tips:

* To get stiff peaks when whipping egg whites, make sure your bowl is squeaky clean.  A tip from my chef teacher at TAFE is to swirl a little bit of white vinegar in the bowl to take off any visible grease or dirt.  Throw the vinegar out, but no need to dry the bowl.  Whip away.

* When piping the meringue cookies, you will get some tips or spikes.  If you want a flat cookie like I do, you can dab the tops of the cookies with you finger.  First pour some warm water in a small bowl, dip your fore finger in the water and dab on top of the cookies.  Don't wet them too much, but just to flat out the spikes.

* To keep the cookies nice and crisp, make sure they are cooled before putting them in jars or containers.


These meringue cookies were devoured straight away by my hungry girls after school.  No time for taste testing.  Just gulp gulp gulp.  These are also best served with good coffee, with any flavoured ice cream or simply on their own.

As the "ber" months arrived (in the Philippines, the "ber" months starting from September signals the season of Christmas and almost every commercial establishment starts decorating for the season), this has reminded me to include this in my Christmas gifts for friends, neighbours and office colleagues.

I reckon they will look pretty in a nice jar with a cute doily and a ribbon. And while we're at it, have you started your Christmas list yet?


Tuesday, May 21, 2013

Peanut butter choc-chip cookie dough bites


"Think what a better world it would be if we all, the whole world, had cookies and milk at about 3 o'clock in the afternoon and then lay down on our blankets for a nap." - Barbara Jordan


That would be a great idea, right?  I mean imagine, the whole world - politicians, world leaders, miners, teachers... everyone, would actually sit down at 3 o'clock in the afternoon, have some cookies and milk and take a nap!  Imagine what it would be like!  It would be WOW!  There's be some giggling, and laughing and for a few minutes each day, there'd be harmony and peace.  Really!  


I've read about that quote by American politician and leader of the Civics Rights Movement Barbara Charline Jordan in the book by one of my favourite authors Robert Fulghum in his book All I Really Need to Know I Learned in Kindergarten. It's one of those staright-forward-simple books that inspires and makes you laugh and think a little.  I've quoted this book many times in previous posts, including this here.   And writing this post, I am once again drawn back to it.  If you haven't had the chance to read it, go get yourself a copy and read on!  I promise you, you'll sit back and smile at every page.


Now back to the order of things.  This month's theme at the Sweet Adventures Blog Hop is hosted by the lovely Nic from Dining with a Stud.  She's come up with a real challenge of sweets without heat. Check out her raw chocolate ganache tart - with a surprise ingredient!   The pictures are so drool-worthy!


Initially I thought there's no way I can make anything sweet without heat - but then I remembered when cookie doughs became a hit a few years back.  Maybe an onset from Ben & Jerry's ice cream flavour combinations.  Who knows.   But I first saw them from Joy the Baker , bookmarked and never really got the chance to try.  Recently though, I've been back on the Pinterest arena and once again hooked on pinning and browsing, with lots of hours wasted (?) bookmarking and planning stuff to do.  And so this post is inspired by a Pinterest-find from the Disney Family.com site - cookie dough bites.  


To make these peanut-butter-chocolate-chip-cookie-dough bites:

125g unsalted butter, softened

3/4 cup packed light brown sugar

1 tsp vanilla extract

1/4 teaspoon salt

1 cup flour

1 tablespoon peanut butter

1 cup bittersweet/dark chocolate chips


Method

In a large mixing bowl, cream together sugar and butter until pale.

Add the flour, vanilla, salt and peanut butter and continue to beat until everything is incorporated.

Add the chocolate chips and mix with a wooden spoon.

Using a teaspoon, shape into round balls.  

Chill for a few minutes.


These are quite addictive.  They're sweet with some bursts of saltiness.  Something like a chocolate-covered pretzel or a salted caramel ganache.  I must say the peanut butter made it a little bit better.  Packed and wrapped with a ribbon - they can be great Christmas presents too!  Eaten as is, chilled or covered with melted dark chocolate, these are great anytime of the day. With milk, and possibly a nap afterwards. 


Monday, April 15, 2013

Flourless pear and chocolate cake


When was the last time you did something for the first time? I love this TV ad from Emirates a few years back.  The message is inspiring and it also ignites a certain sense of drive - to put some goals and dreams into action.  On another note, it can also push one to try something new - whether it be by choice or when one is pushed against a corner.  


At home we have our schedule and timing all synchronised.  The day doesn’t have to start in a flurry but usually on weekdays, it does.  The few minutes before we need to be out the door consists of dressing up, prepping lunch boxes, breakfast, packing up, brush teeth etc. Etc.  We have this under control until something, or someone slips a few seconds behind and this will rock our world entirely.  Well not to that extent, but can pump adrenalin into me like The Road Runner. 

So let me tell you about this day – when my teen misses the bus by a few seconds.  Usually, I take her to the nearest bus stop with the other girls, still in my pajamas  (usually PJs and a shirt with just a hoodie a wallet and a mobile phone).  And so this day when she missed the bus, I had to follow the bus route with the hope of reaching the next stop just in time, but was unlucky.  And so we had to take her to school – pajamas and all.  And the unlikely scenario happened of course – we were running out of petrol on our way back home.  And so the Emirates ad “when was the last time you did something for the first time” came to mind.  Pajamas and all – I was there pumping petrol surrounded by what then seemed to be overly-dressed-suit-and-tie-folks with the morning rush hour traffic passing me by, and I am whistling a happy tune.  La-di-da-di-da.... NOT!


Well, its not a big deal really, but when you still have to make/eat breakfast, shower and dress, remind the girls brush their teeth, brush and tie the girls' hair, take them other to school then drive yourself to work and you've just cut back your schedule for a good half an hour, then adrenalin does kick in.  Whoosh, whoosh, whoosh.  Don't forget the lunch boxes, the cello, the backpacks! Wait!  My bag! Quick! Quick! Quick!  


I tell you, my heart starts beating normally as soon as everyone is in the car. 


It's a weekly cycle really.  The routine pretty much works except that is, when something or someone slips.    So you can imagine how much the two-week school holiday means to us.  IT'S A BIG DEAL!  Two weeks of extra hours of sleep, no lunch box to prepare, no after school activities to go to. Just slow and calm mornings.  Because of work commitments, we don't usually go out of town during this 2-week break but the short break is enough to recharge everyone's energies to welcome the next term with great enthusiasm and joy.


Now back to autumn and the season for apples, pears, figs, and plums!  All great fruits we love eating at home fresh.  But for this month's theme at Sweet Adventures Blog Hop hosted by 84th and 3rd (check out her fresh apple cake - made with coconut oil!), I'm adding some pears to our go-to flourless chocolate cake!  I love blog hops because its a great way to tweak old recipes and try new ones!


This Flourless and Pear Chocolate Cake is inspired from BBC Australian Good Food magazine which has ceased publication last year.  The good thing is, I kept most of my old issues.  


To make this flourless pear and chocolate cake:

Ingredients

3 ripe Corella pears - peeled, cored, halved and quartered

85g dark chocolate (roughly chopped)

85g unsalted butter, melted plus 1 tbsp for brushing in the pan

75g caster sugar, plus 2 tbsp extra for coating the pan

3 eggs, separated

75g almond meal

icing sugar to dust


Meet Marco and Gordon.  They're my kitchen helpers.  Marco whips the egg whites on the left, Gordon beats the egg yolks and sugar until pale on the right


Method

Line the base of a 20cm loose-based pan with baking paper.  Brush the bottom and sides with the extra butter.  Sprinkle the extra sugar on the base and sides of the pan.  Tip out excess.

Preheat oven to 160*C.

Melt the butter and chocolate in a bowl over a pot of simmering water.  Set aside to cool.

Using electric mixer, beat egg yolks and sugar together until pale and thick.  

Fold into the melted chocolate and add the almond meal.

Using an electric mixer, whip the egg whites until you get soft peaks.

Fold into the chocolate mixture in two batches.

Pour into the prepare pan.  Top with the pears, cut side down.

Bake in the preheated oven for 30-40 until pears are soft and cake is cooked through.

Cool in the pan for 5 minutes.

Place in a cooling rack and dust with icing sugar.


Tips:

* I used Corella pears because they're small and it will fit the pan size that I used.  I cut two pears in half, and the third one was quartered. 

* The pears were not as soft as expected but they were soft enough to slice with the cake.  You can poach the pear separately before making the cake if you prefer a softer fruit.  Check out this Upside-Down Pear Cake I made before.

* I've made another batch of this cake but poached the pears with Maggie Beer Sangiovese Verjuice which is sweet juice of unfermented grapes, no sugar just the verjuice.  I chose this because I didn't want to do a white-wine-cinnamon-anise-sugar-poached pear, as I wanted the pear to retain their natural sweetness to complement the chocolate cake.

* You can spray the pan with canola oil instead of brushing it with butter.


This was gone in a flash!  Literally!  While the cake was cooling, my taste testers kept coming down to check in the kitchen.  They could not wait!  One of the few cakes with fruits which they actually loved!  The girls said they love how it tastes a lot like brownies!  Now that its the school holidays, we might be making more of these.

LinkWithin

Related Posts Plugin for WordPress, Blogger...